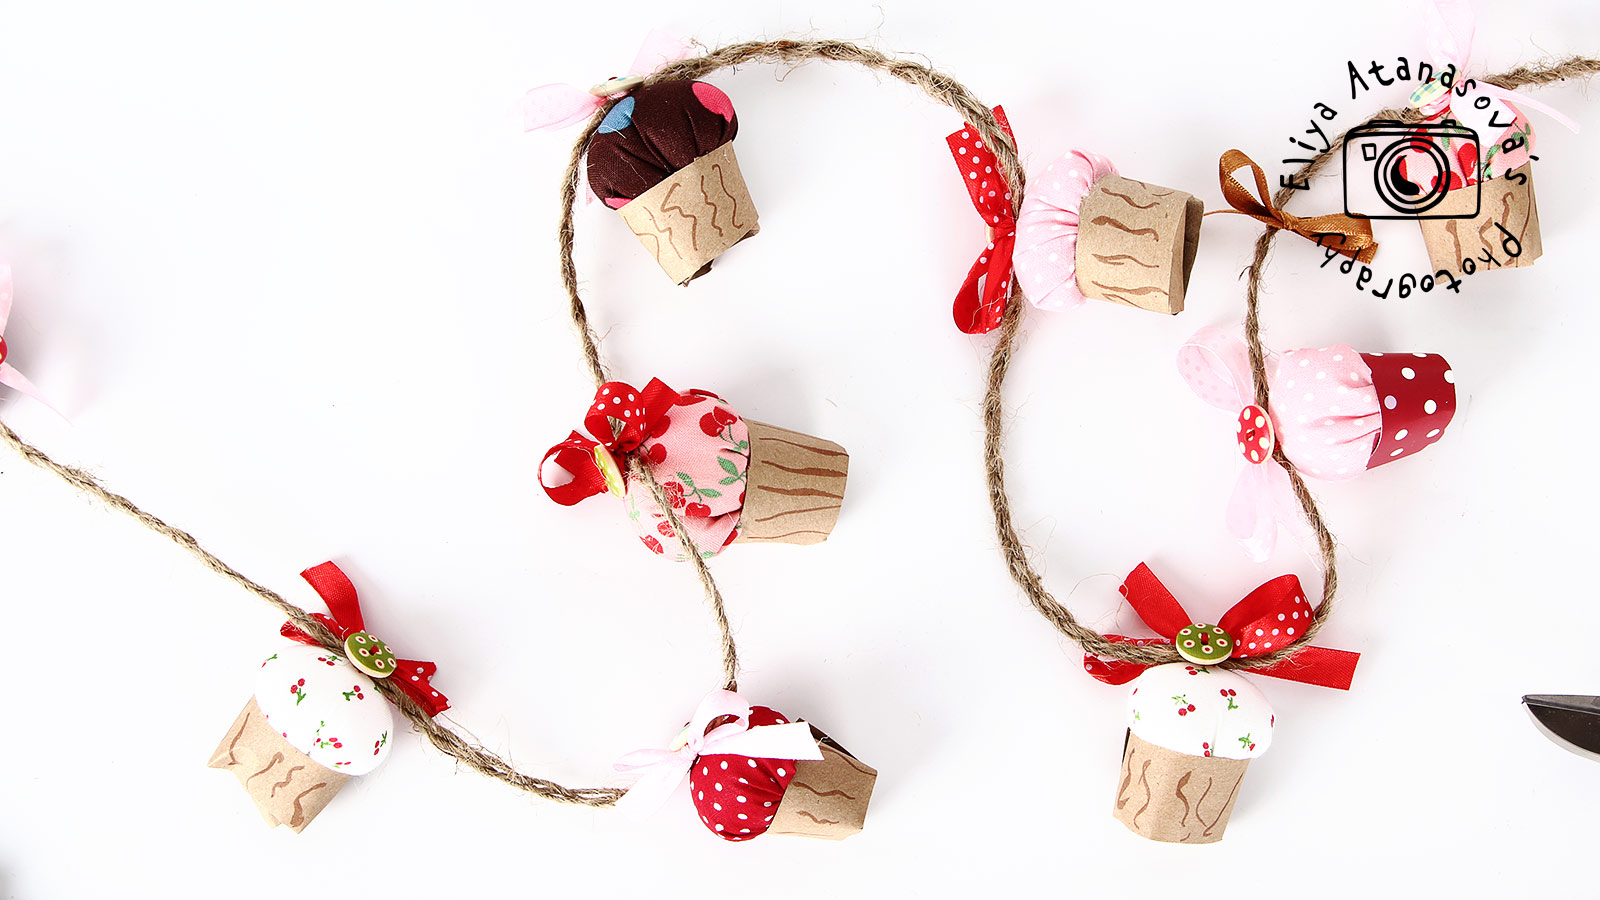
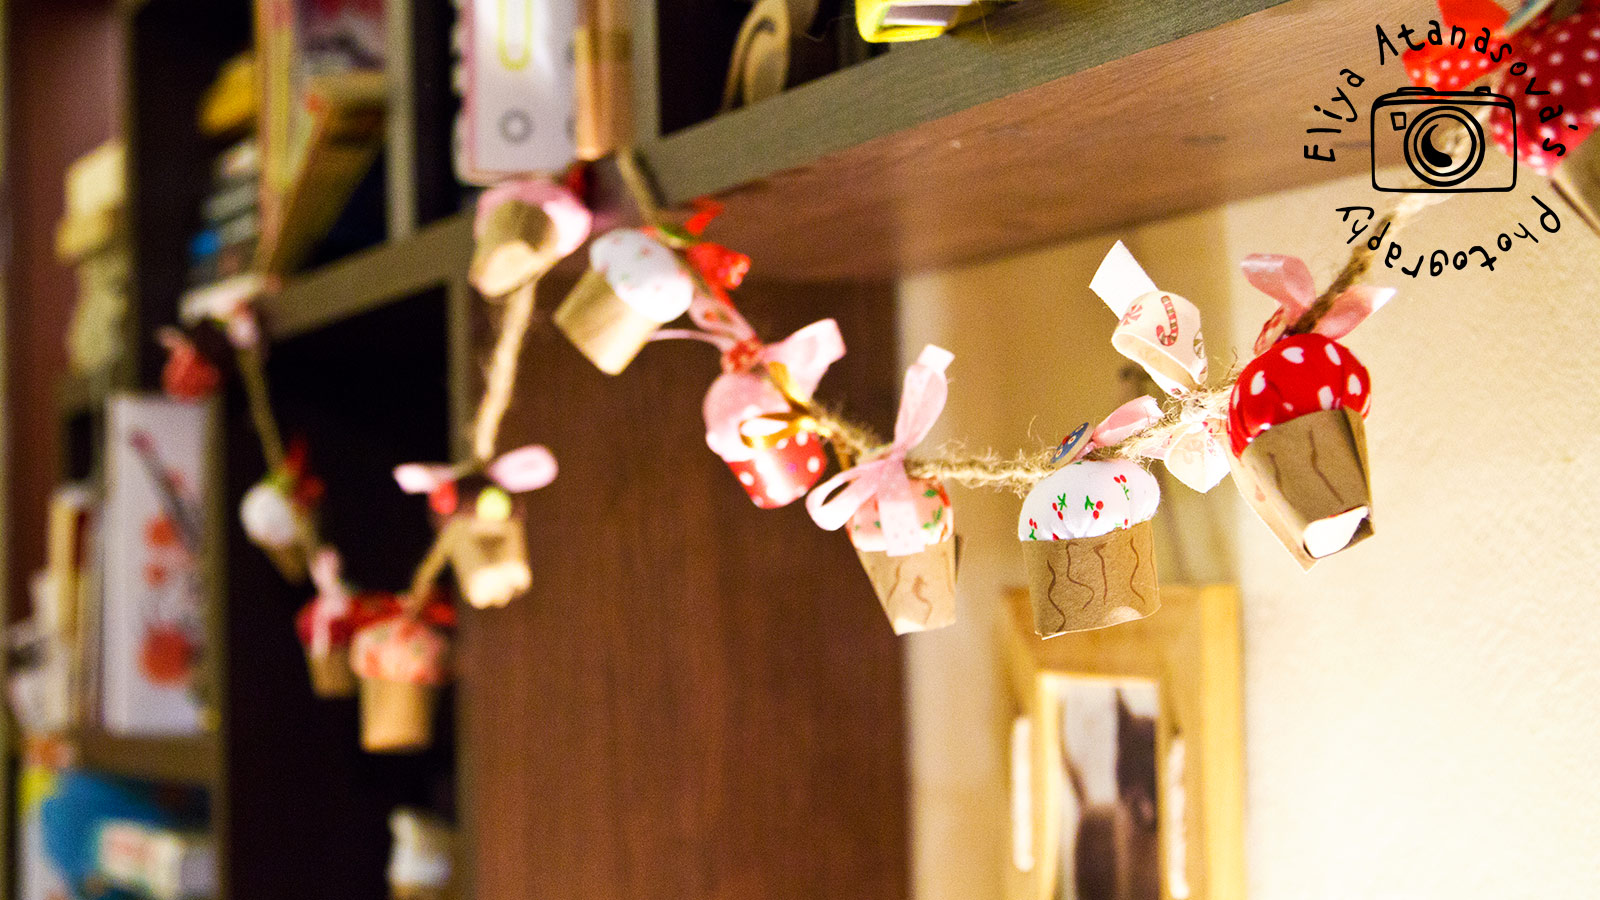
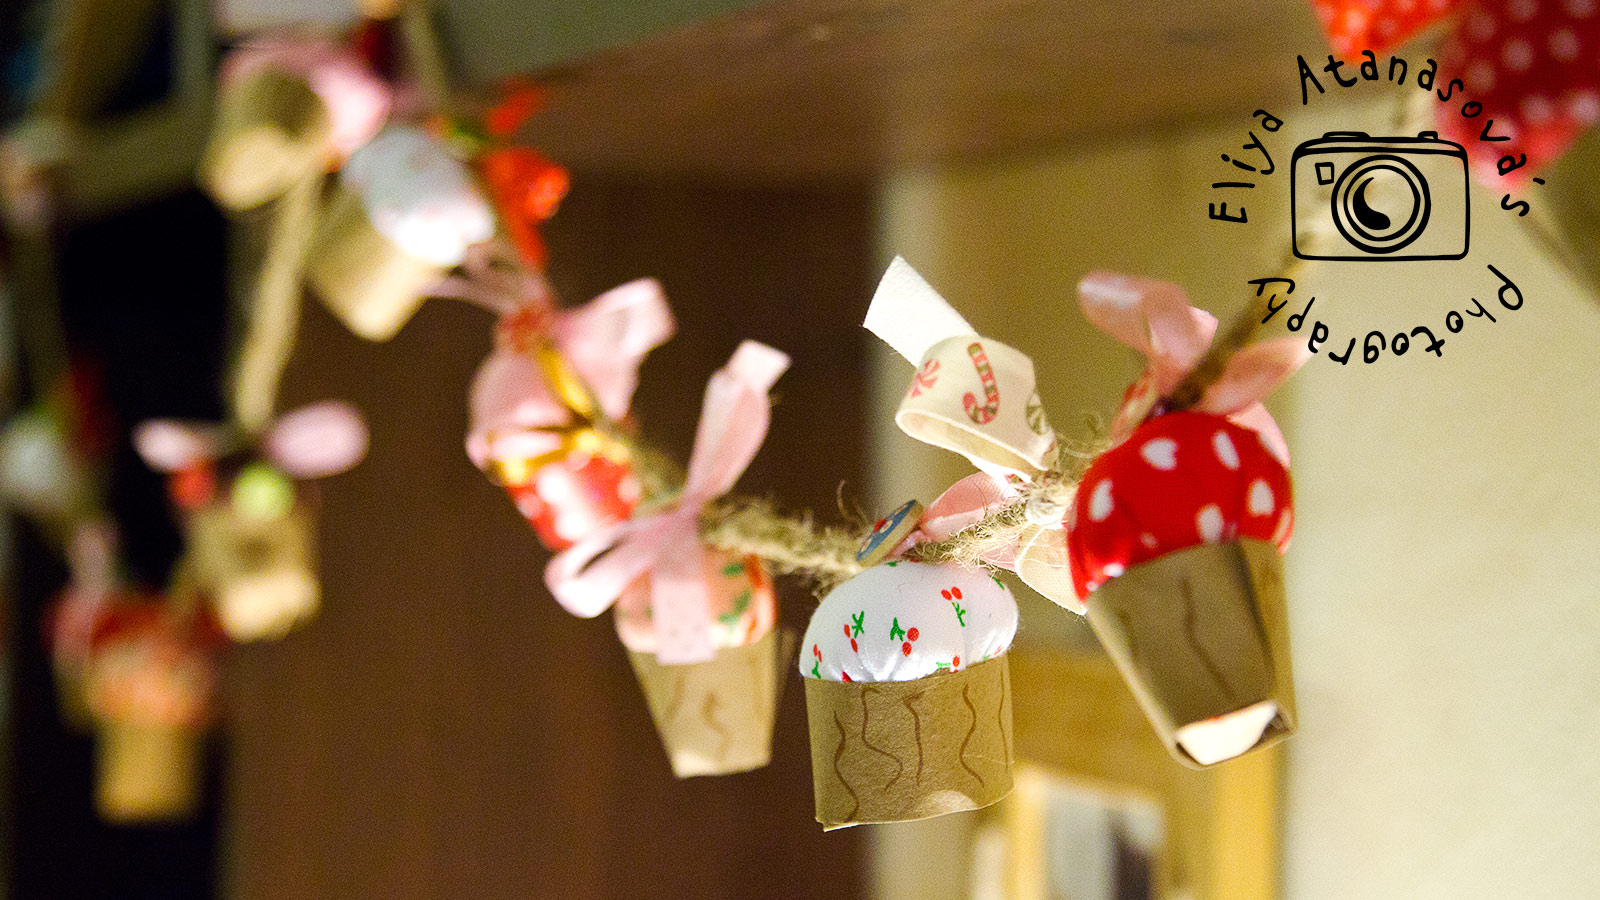
Do you like cupcakes? They are everywhere in all kinds of shape and decoration. These here are made of paper and fabric and some rope. And are great for Christmas decoration.
So, step by step, how did I make this Christmas cupcake garland? Here’s a short tutorial:
1. Necessary materials:
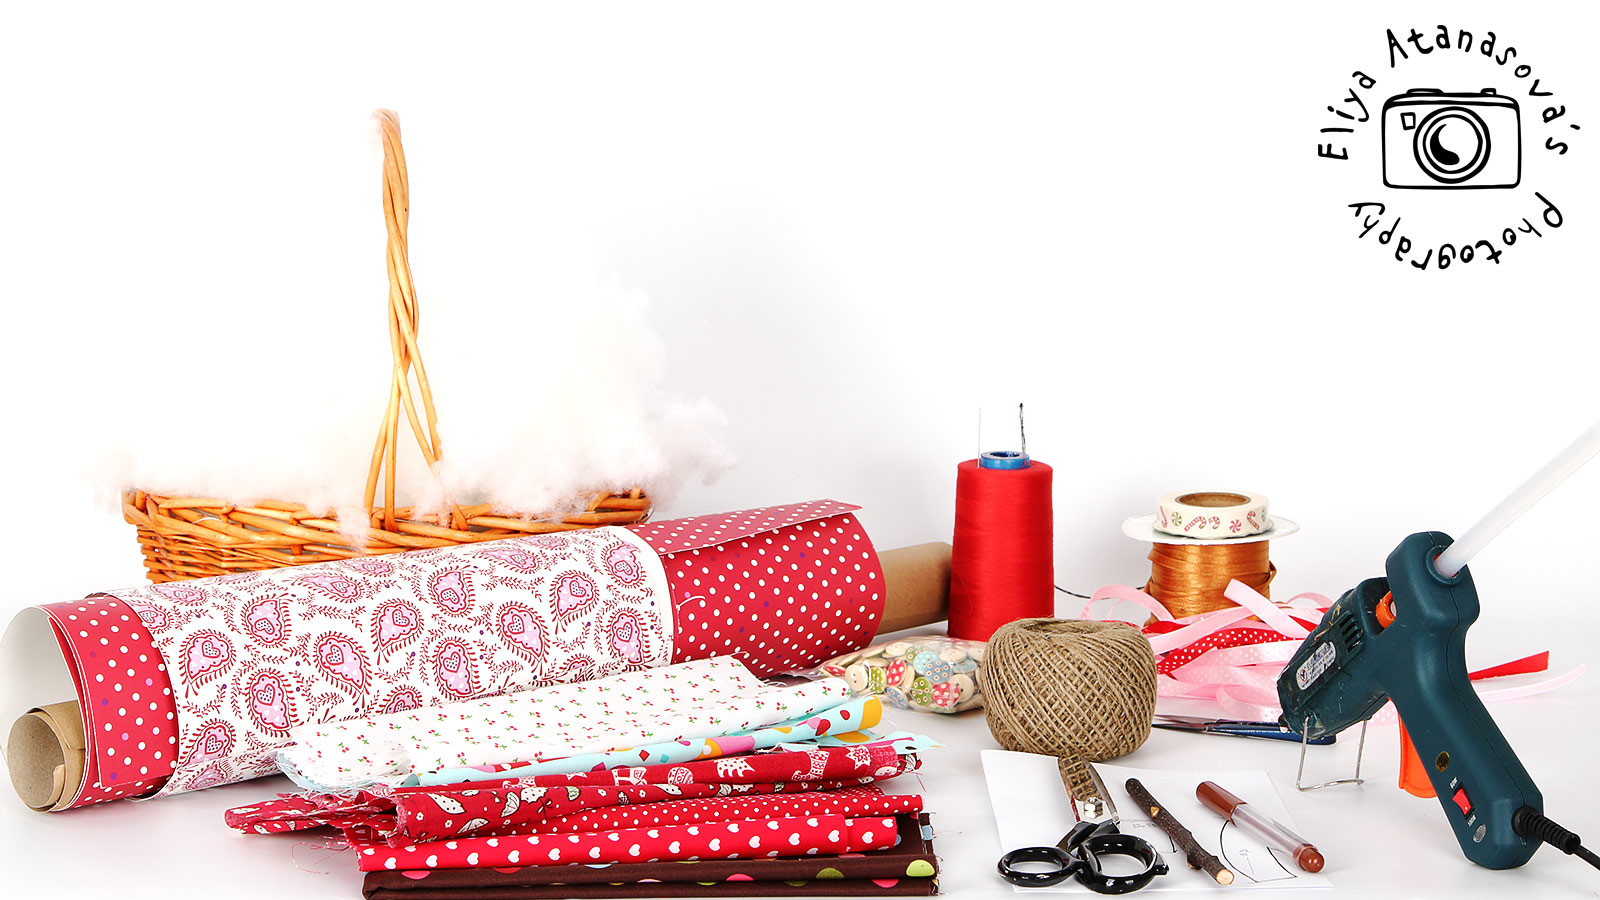
– Heavy colorful paper (160+ grams). You will actually need very small quantities. :-). It will be best if you use paper in red or beige.
– Fabrics in colors and patterns that will be suitable for cupcake, about 15 х 15 сm (approx.. 6 “ x 6” ) for each cupcake top 🙂
– Rope
– Scissors
– Pencil, needle and thread
– Pen in brown if you would like to decorate the base of the cupcakes even further
– Buttons or beads to decorate the cupcakes
– Вата, silicone granules or some filling to fill in the top of the cupcakes
– Ribbons
– Hot glue gun (you can use other glue options to attach the textile top in the paper cup, but this is most suitable for me)
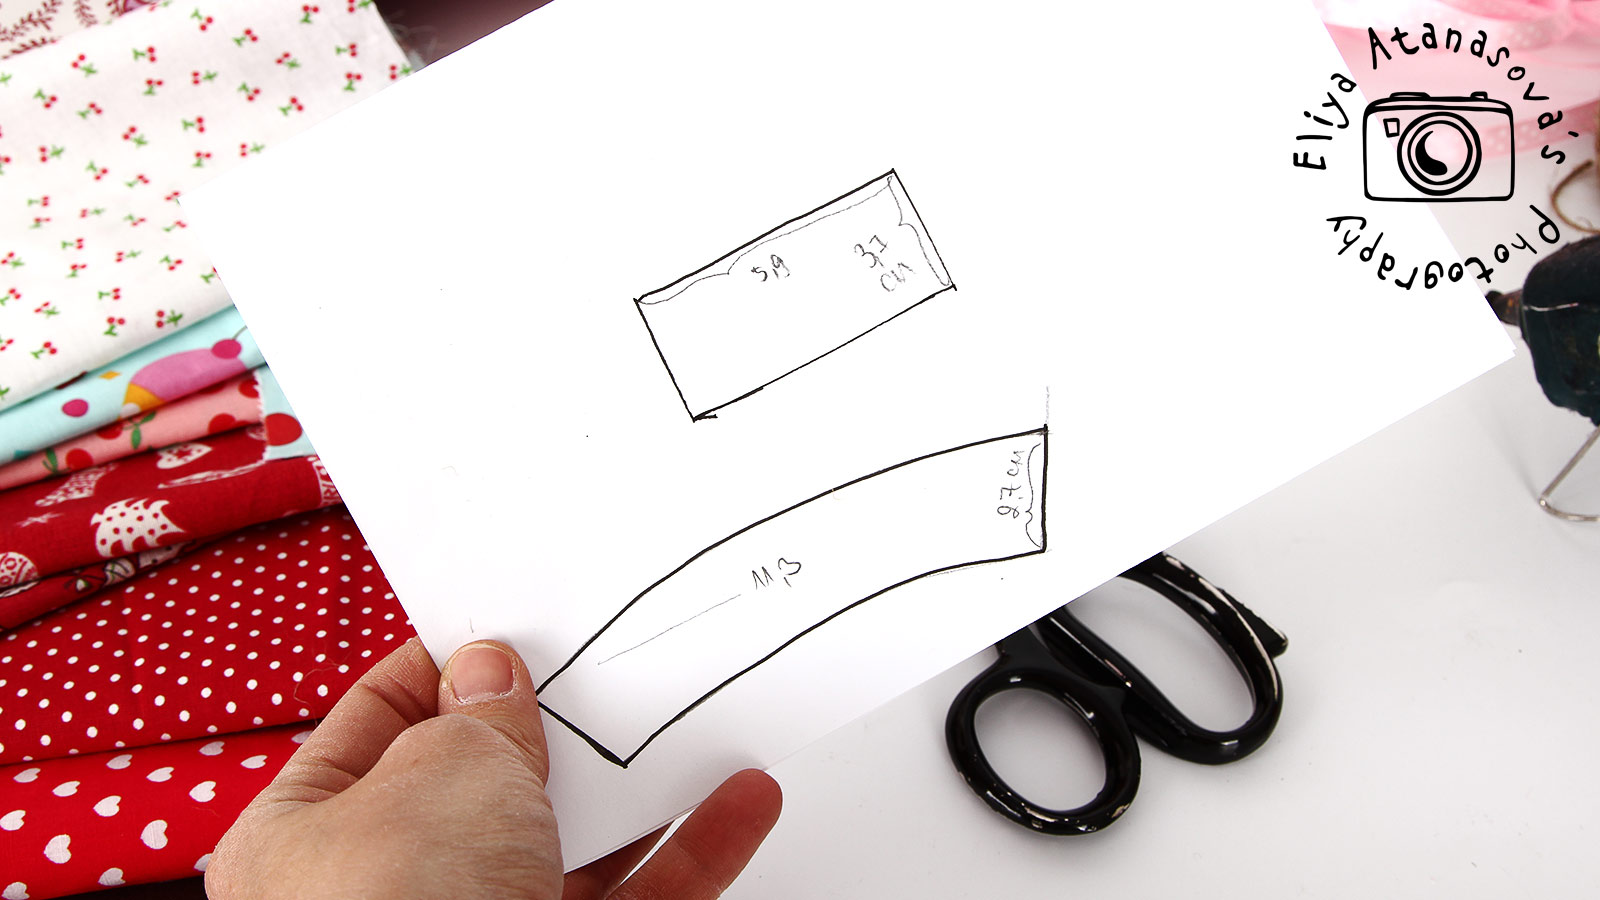
– The printed pattern from HERE (The pattern is in actual size. Make sure that you are also printing in actual size the .pdf file. You should choose „actual size” option from the printer settings of your printer. To make it easier, I placed two squares with size 1 cm x 1 cm and 1”x 1” in the .pdf fila, so that you can measure them after printing the pattern and make sure that you are working with the right size.
DOWNLOAD THE PATTERN
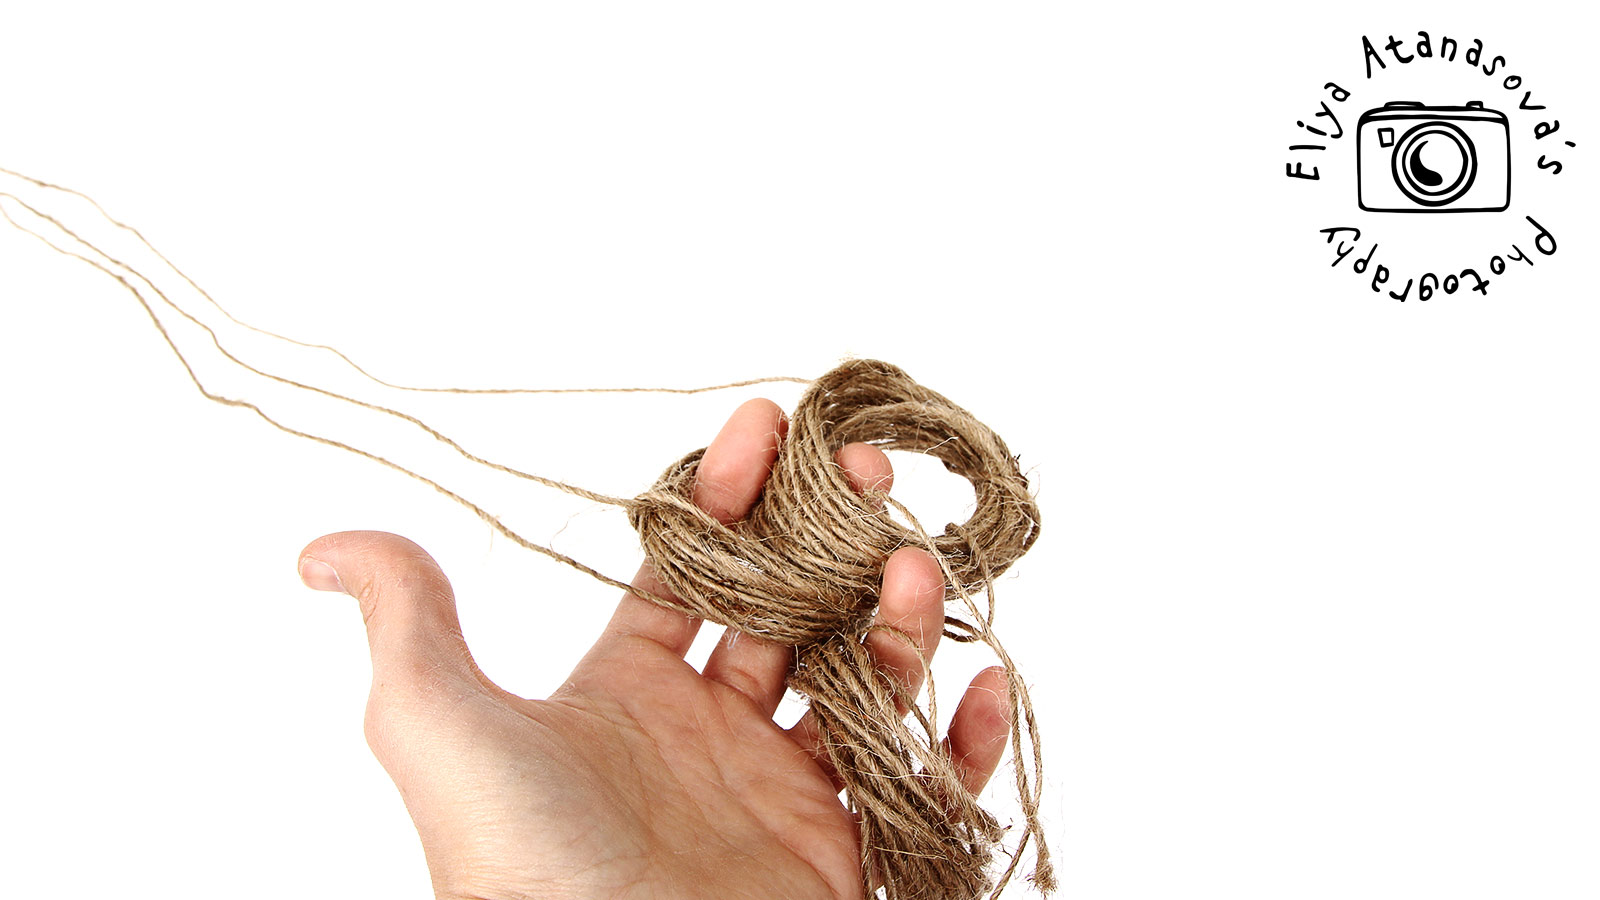
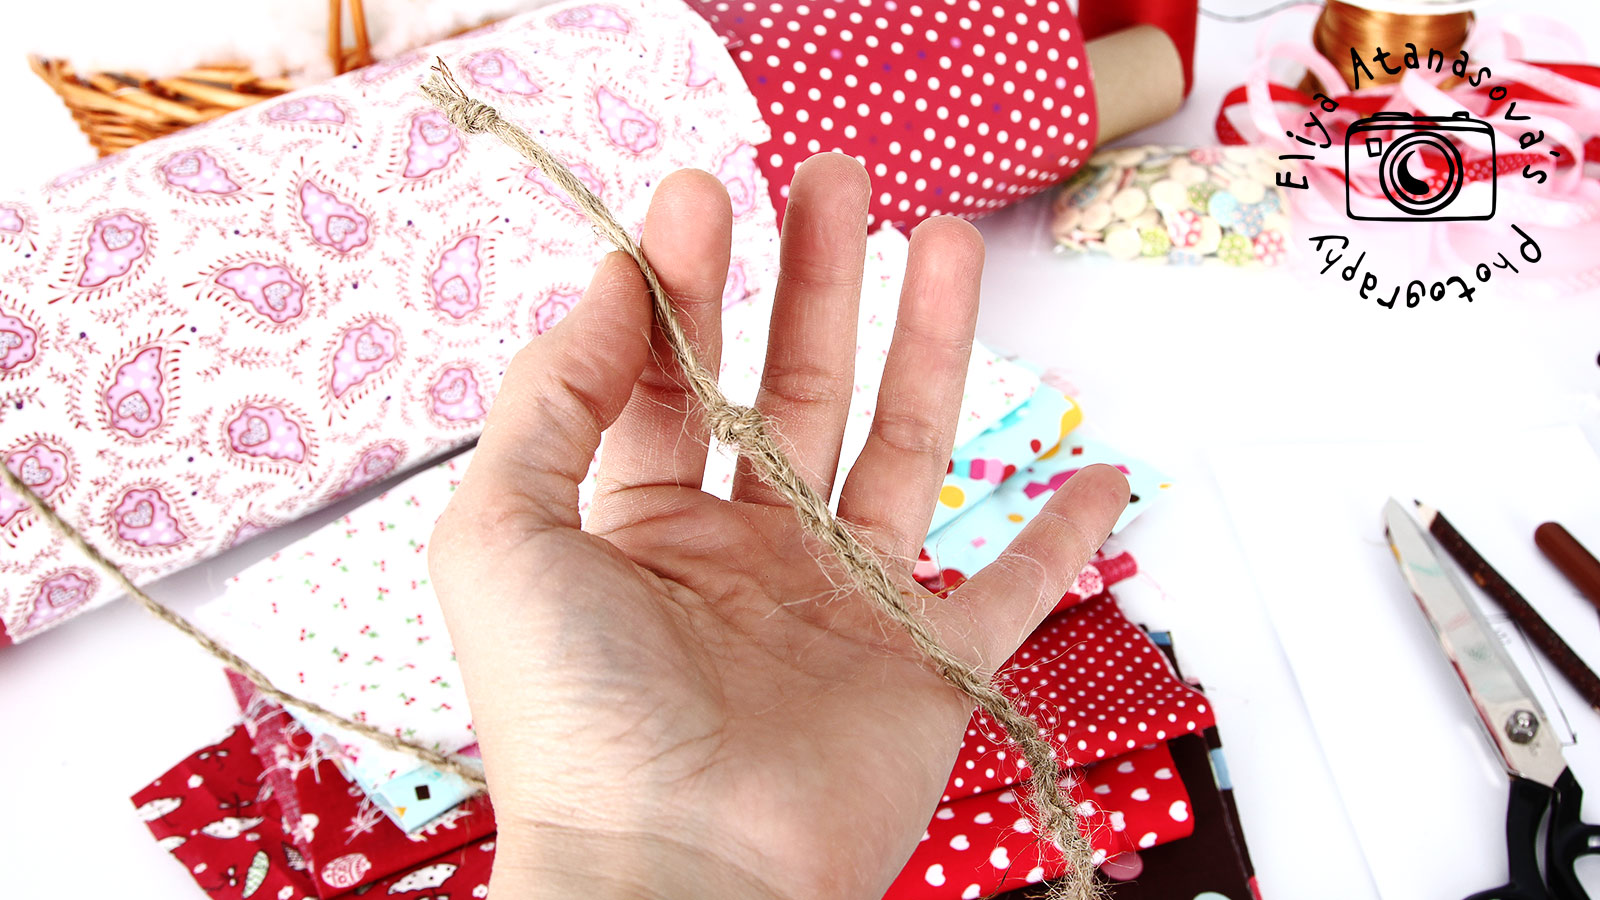
2. First, prepare a rope as long as you would like the garland to be. Mine is about 120 cm long (approx. 47”). I made it from three single rope pieces. Make a knot on both ends so you can hang it after it is ready.
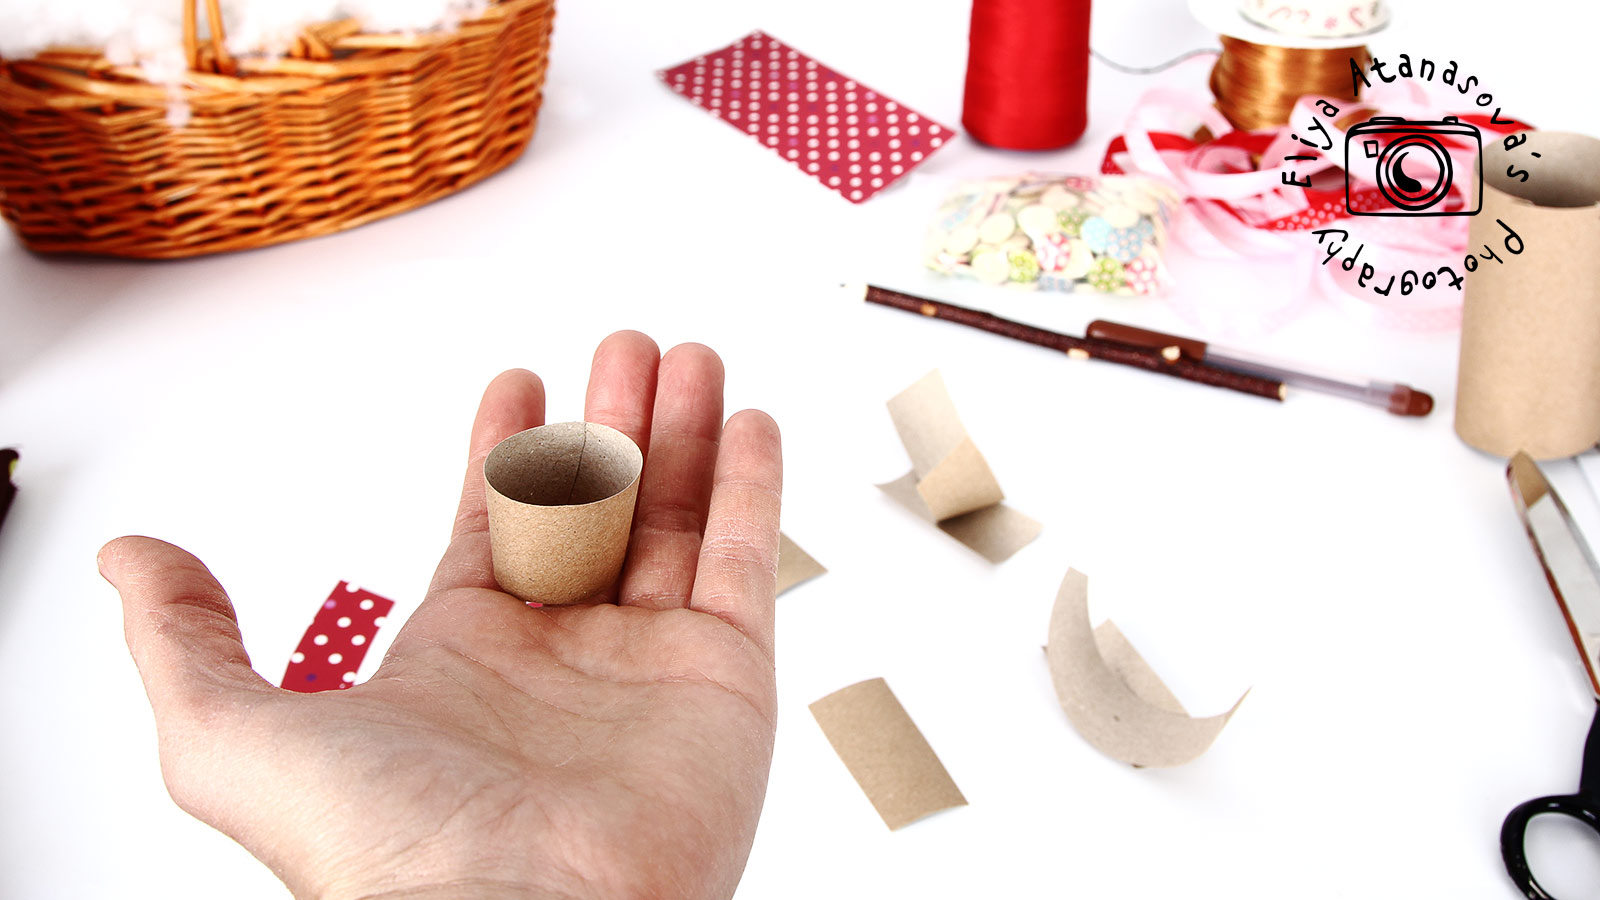
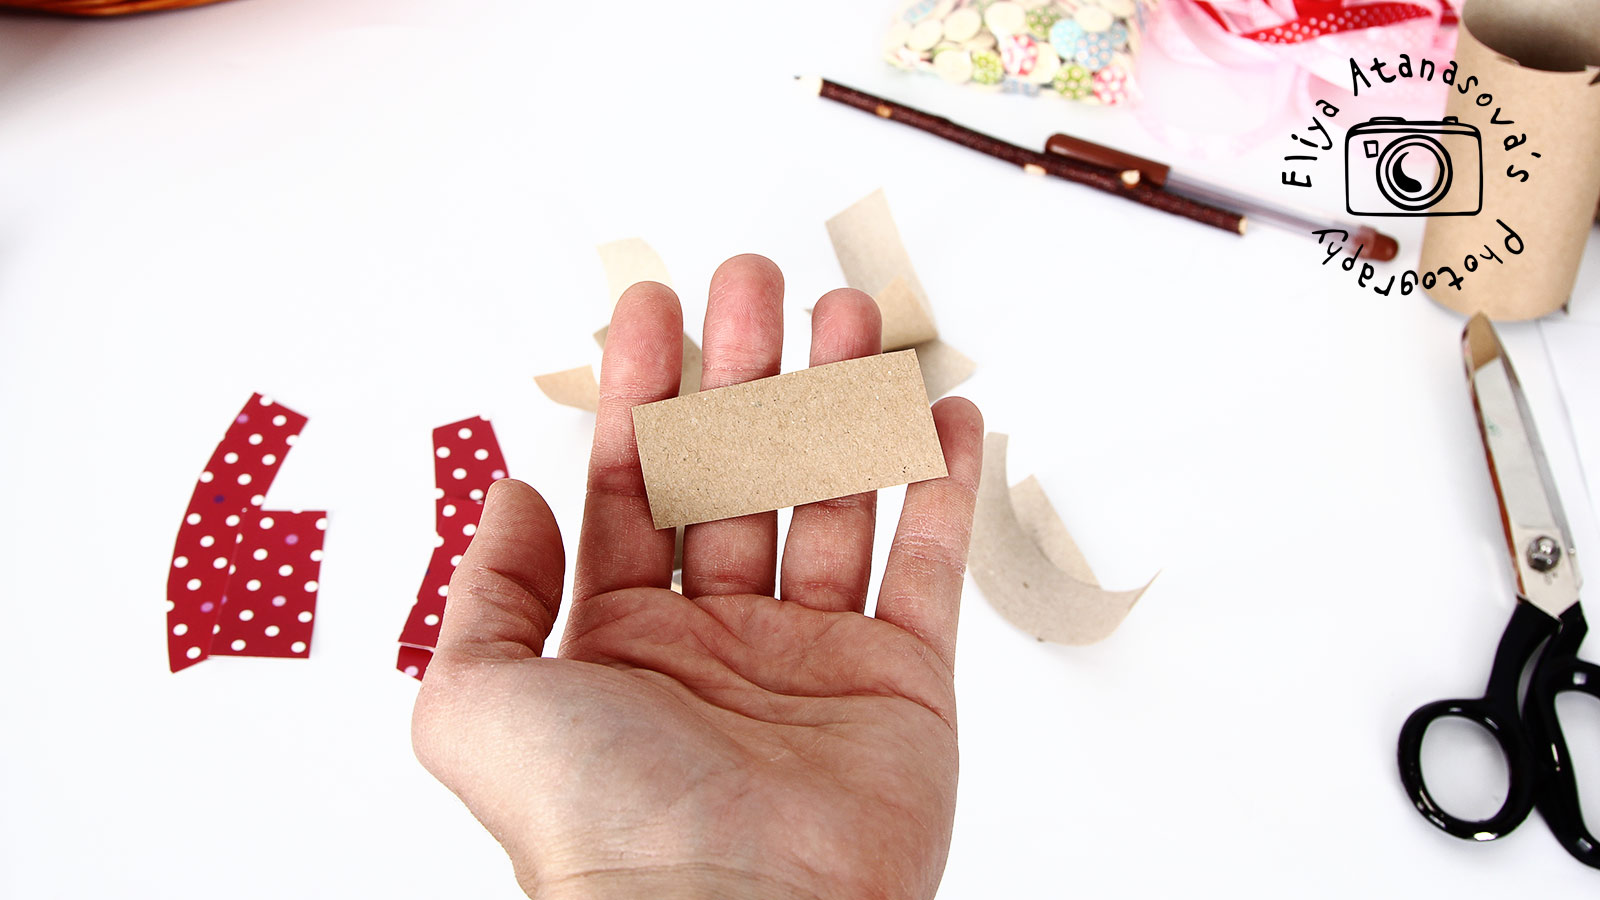
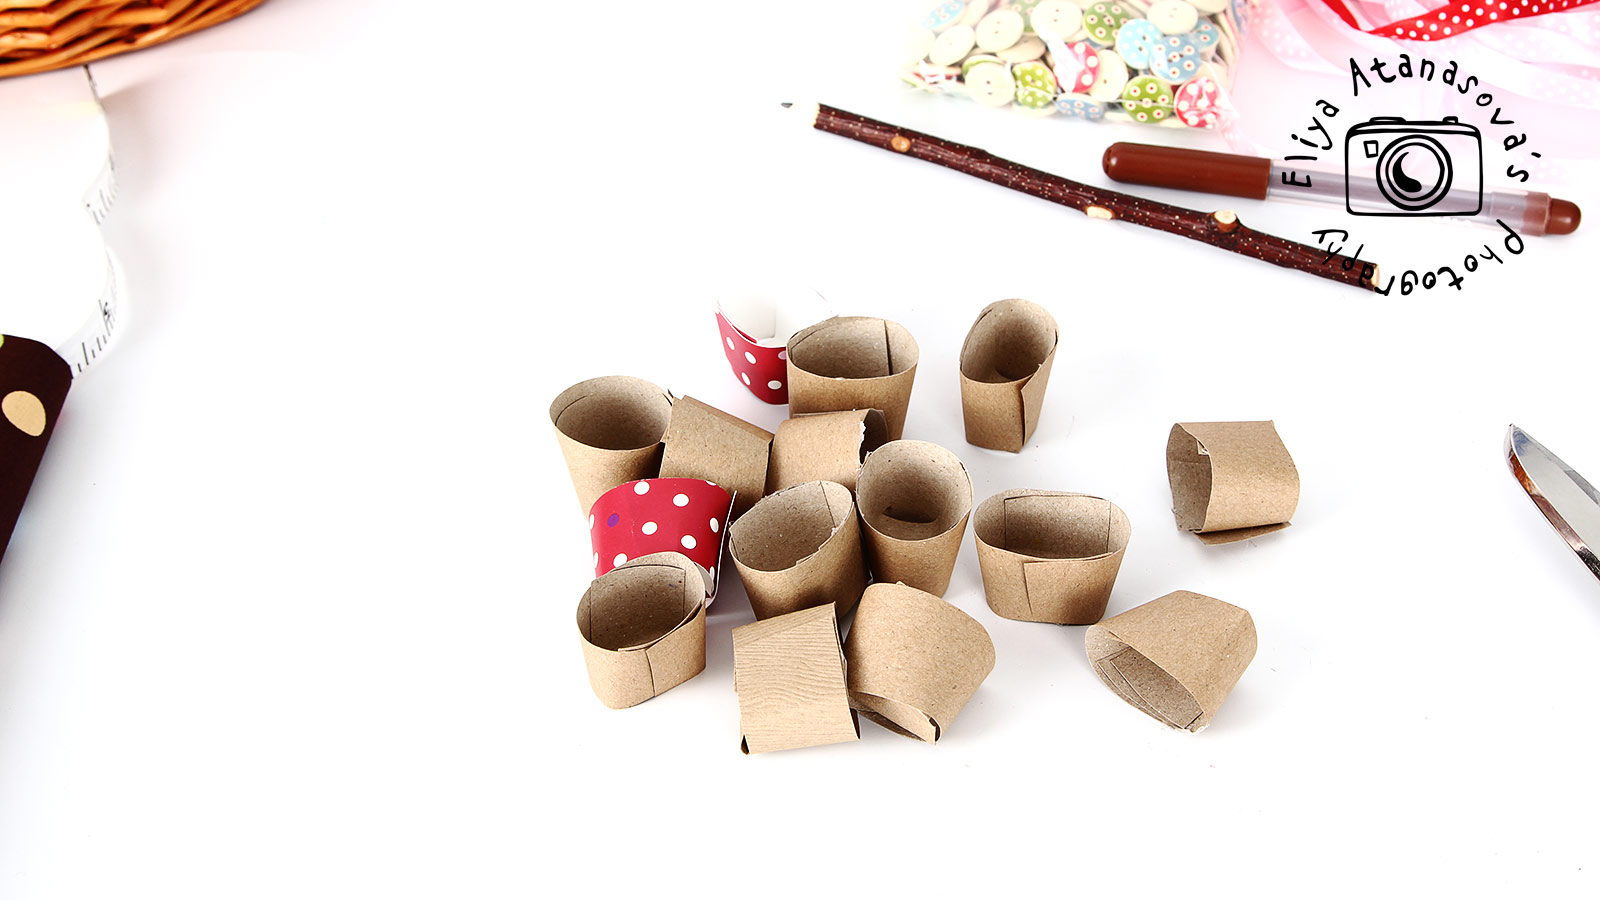
3. Print the pattern for the cupcake base and cut the pieces. These are the pieces for the paper base. Cut the same pieces from the heavier pater that you prepared for the cupcake base – there are two pieces for each base, for every cupcake.
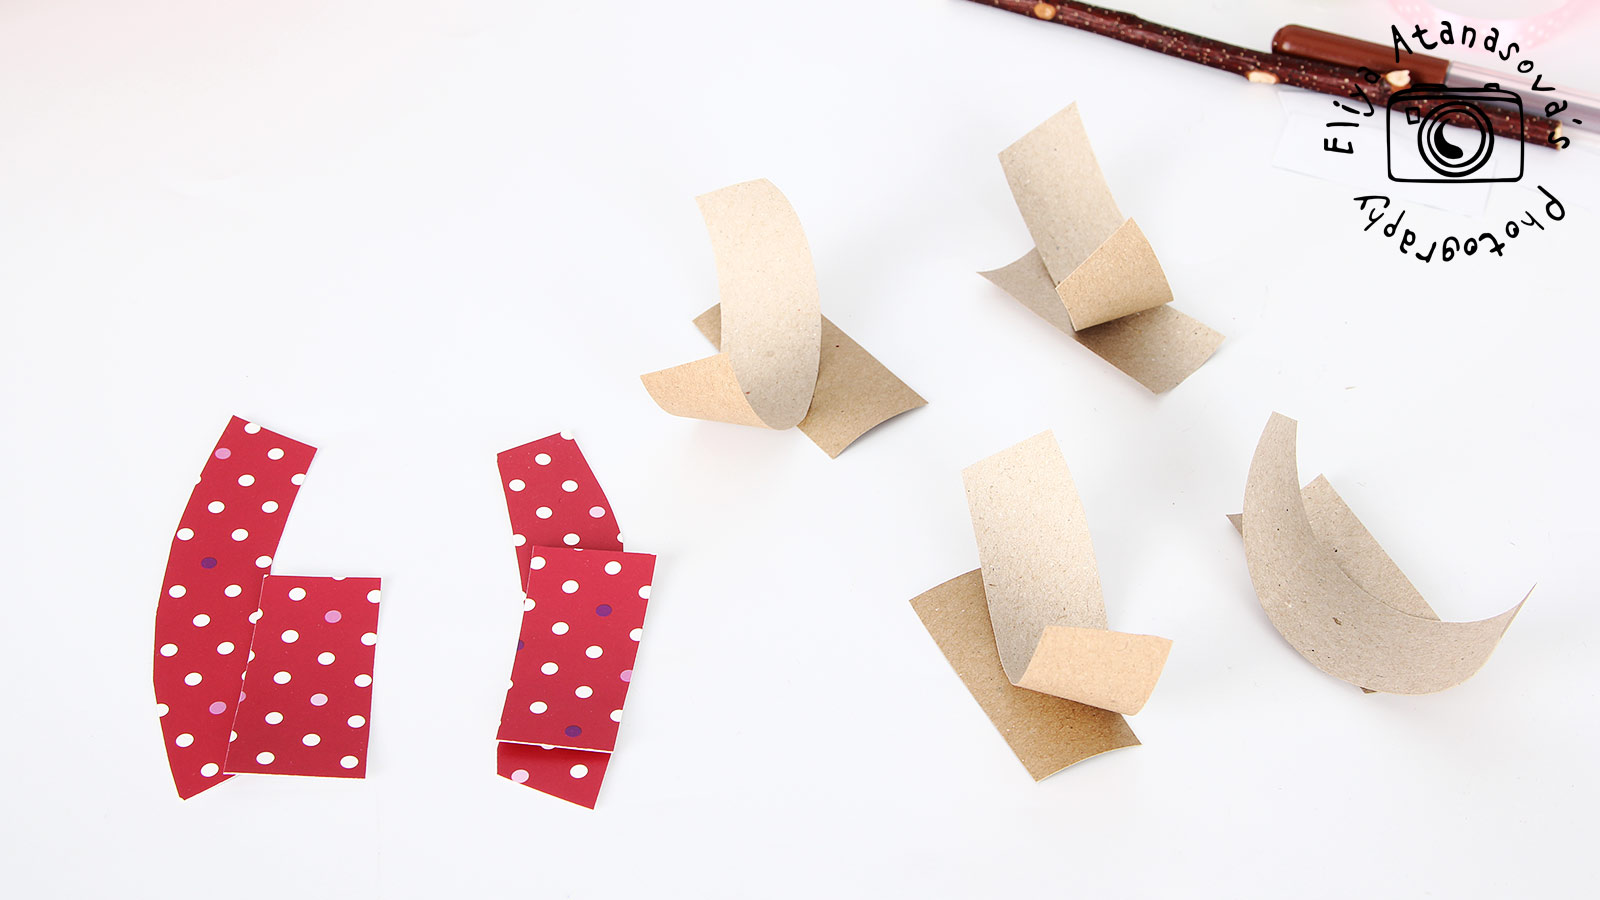
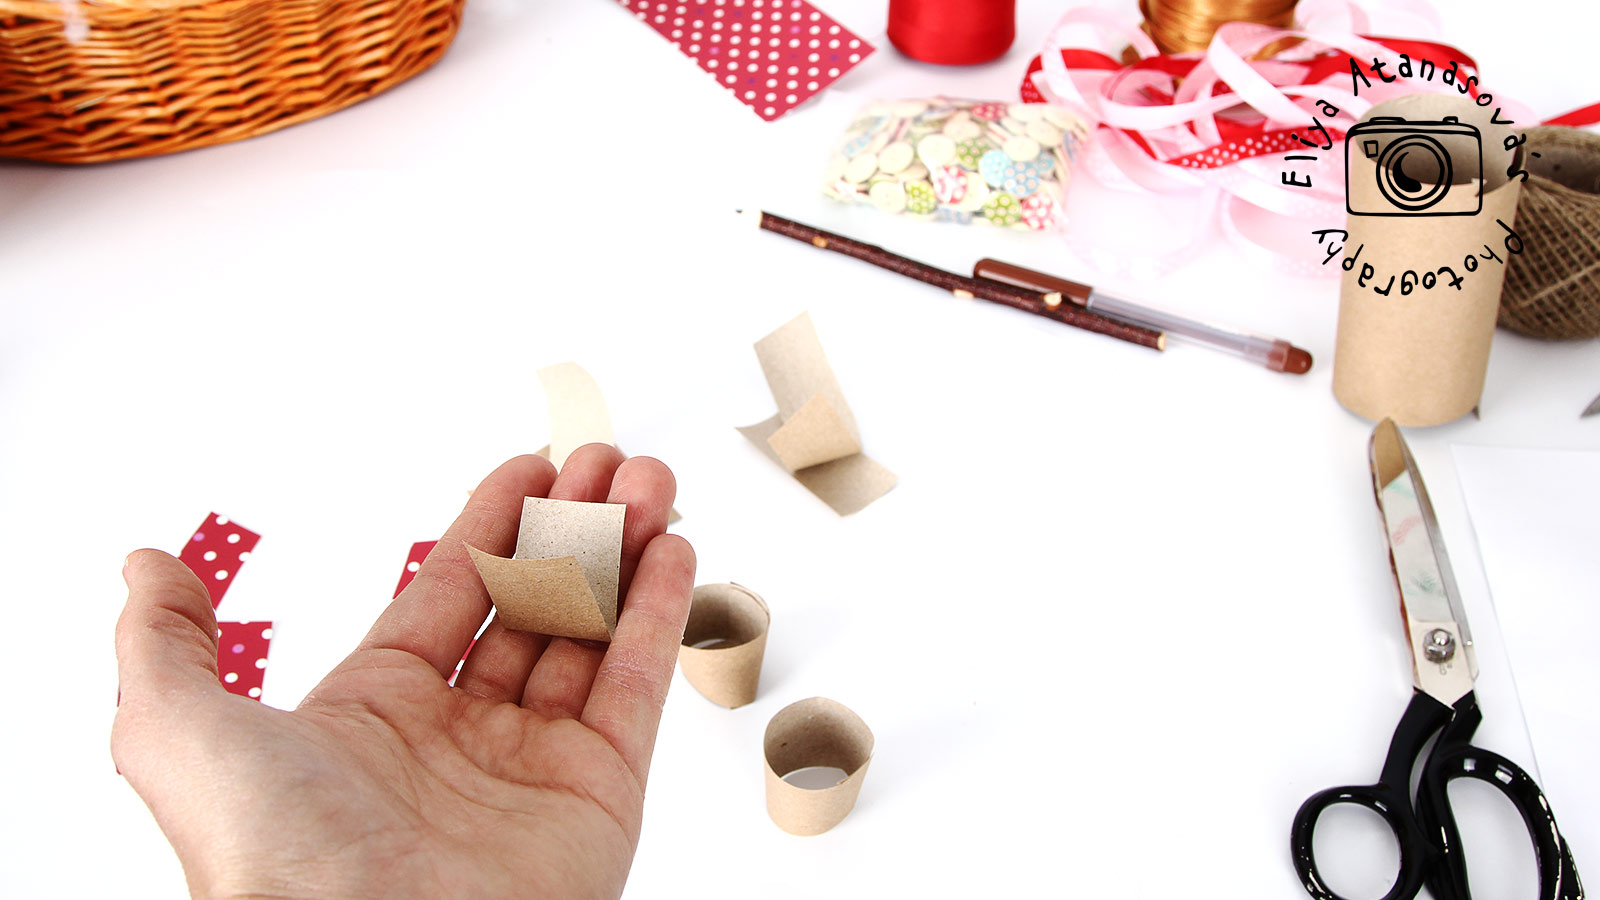
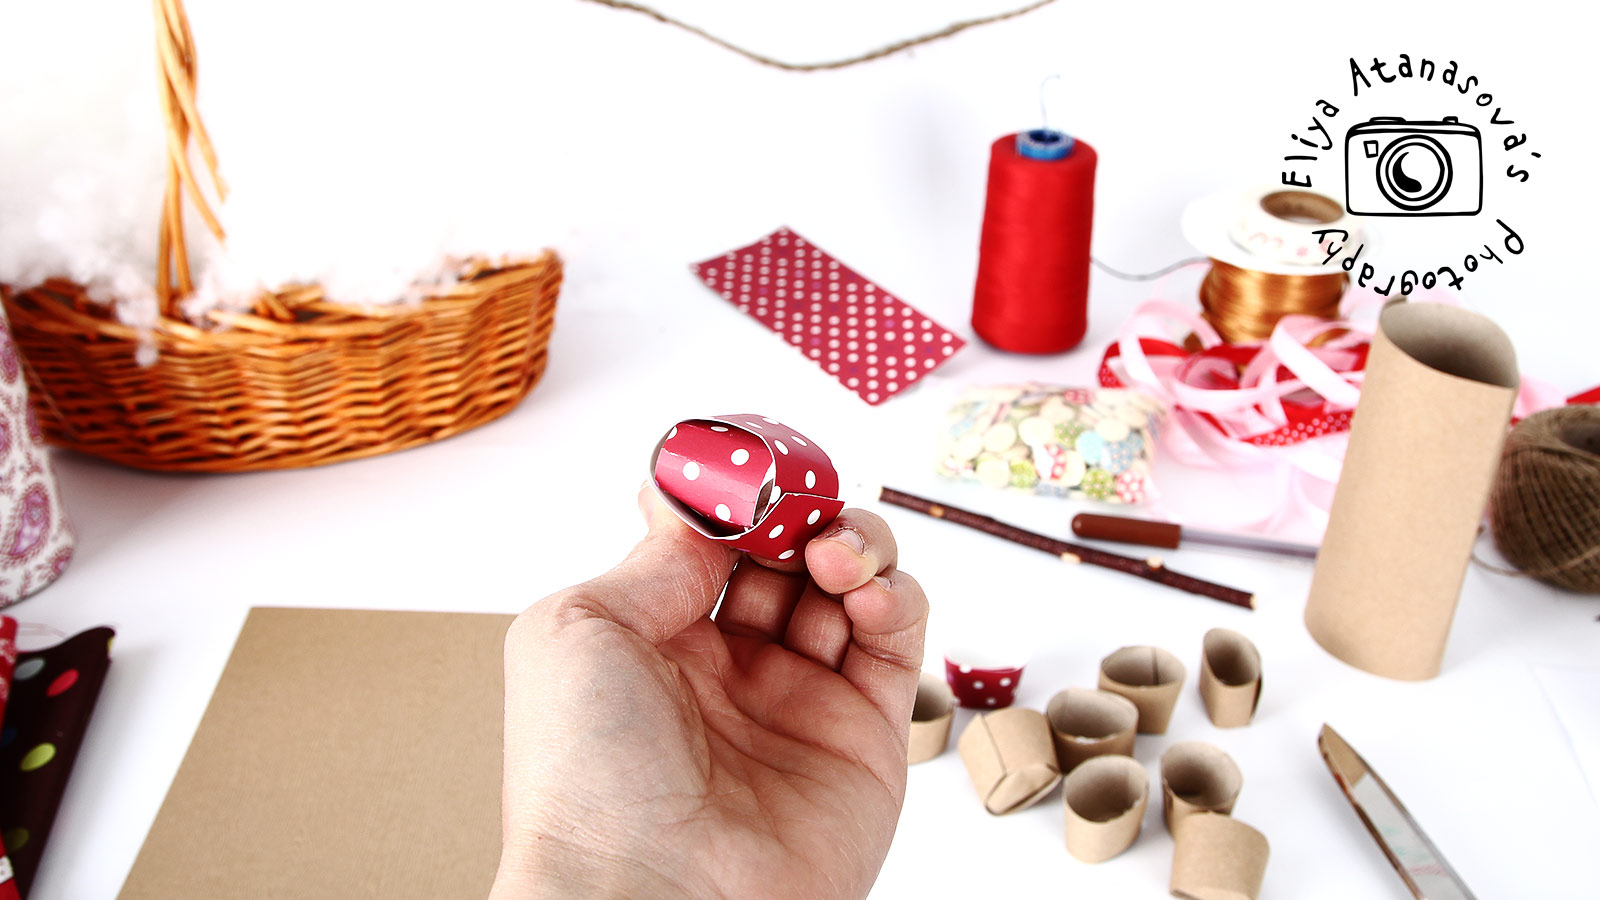
4. Attach the pieces, first carefully close the side piece – attaching the left and the right side. You will have this:
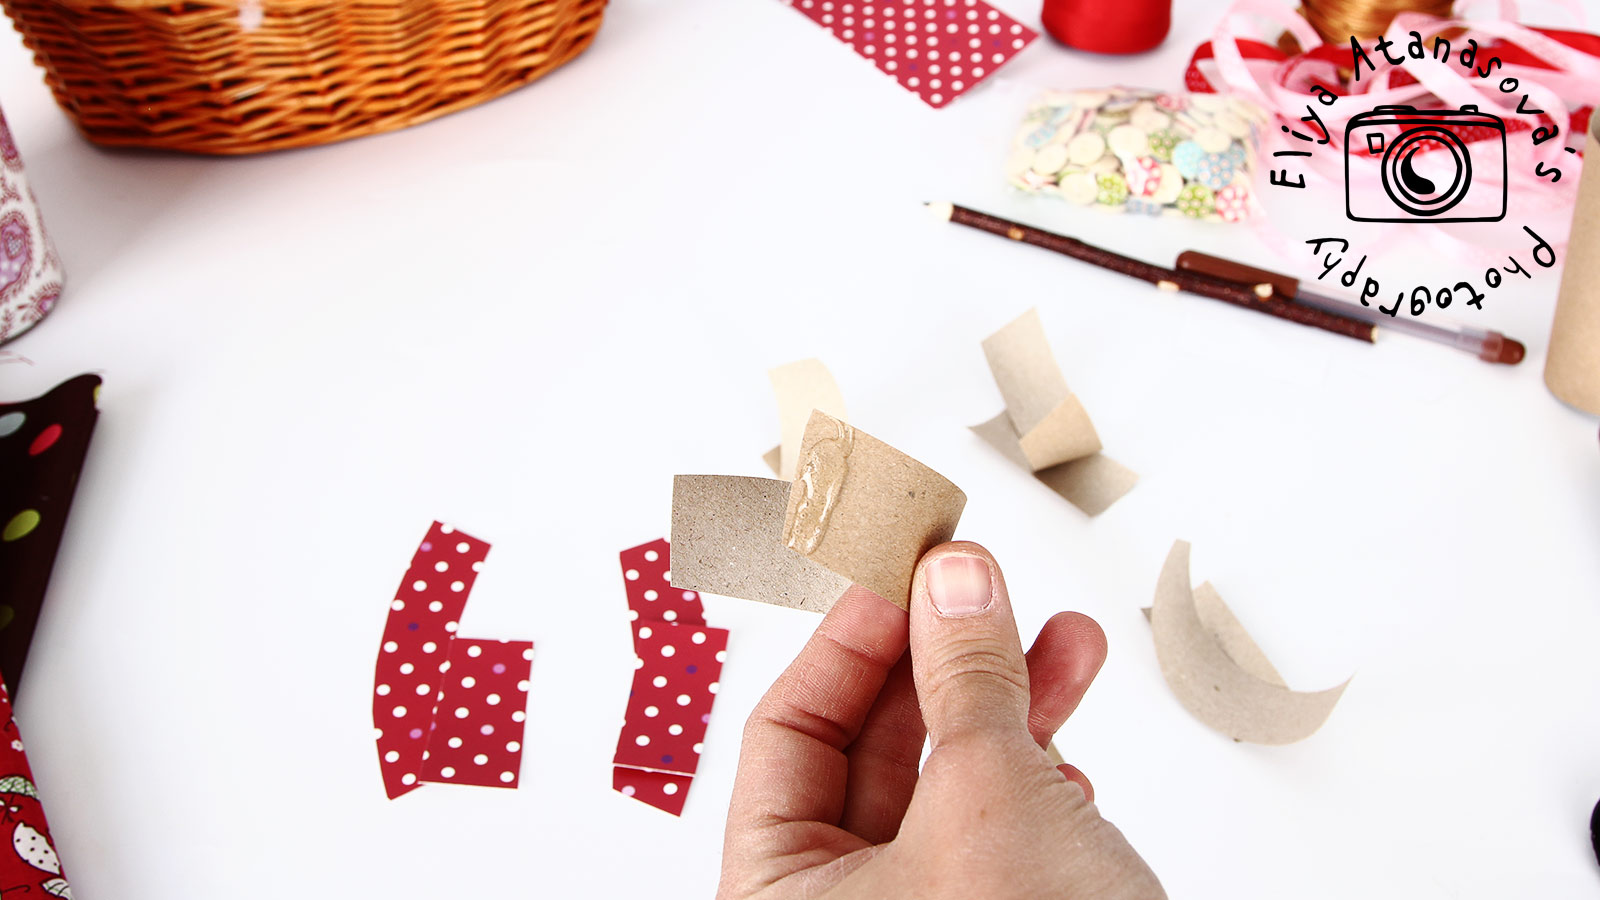
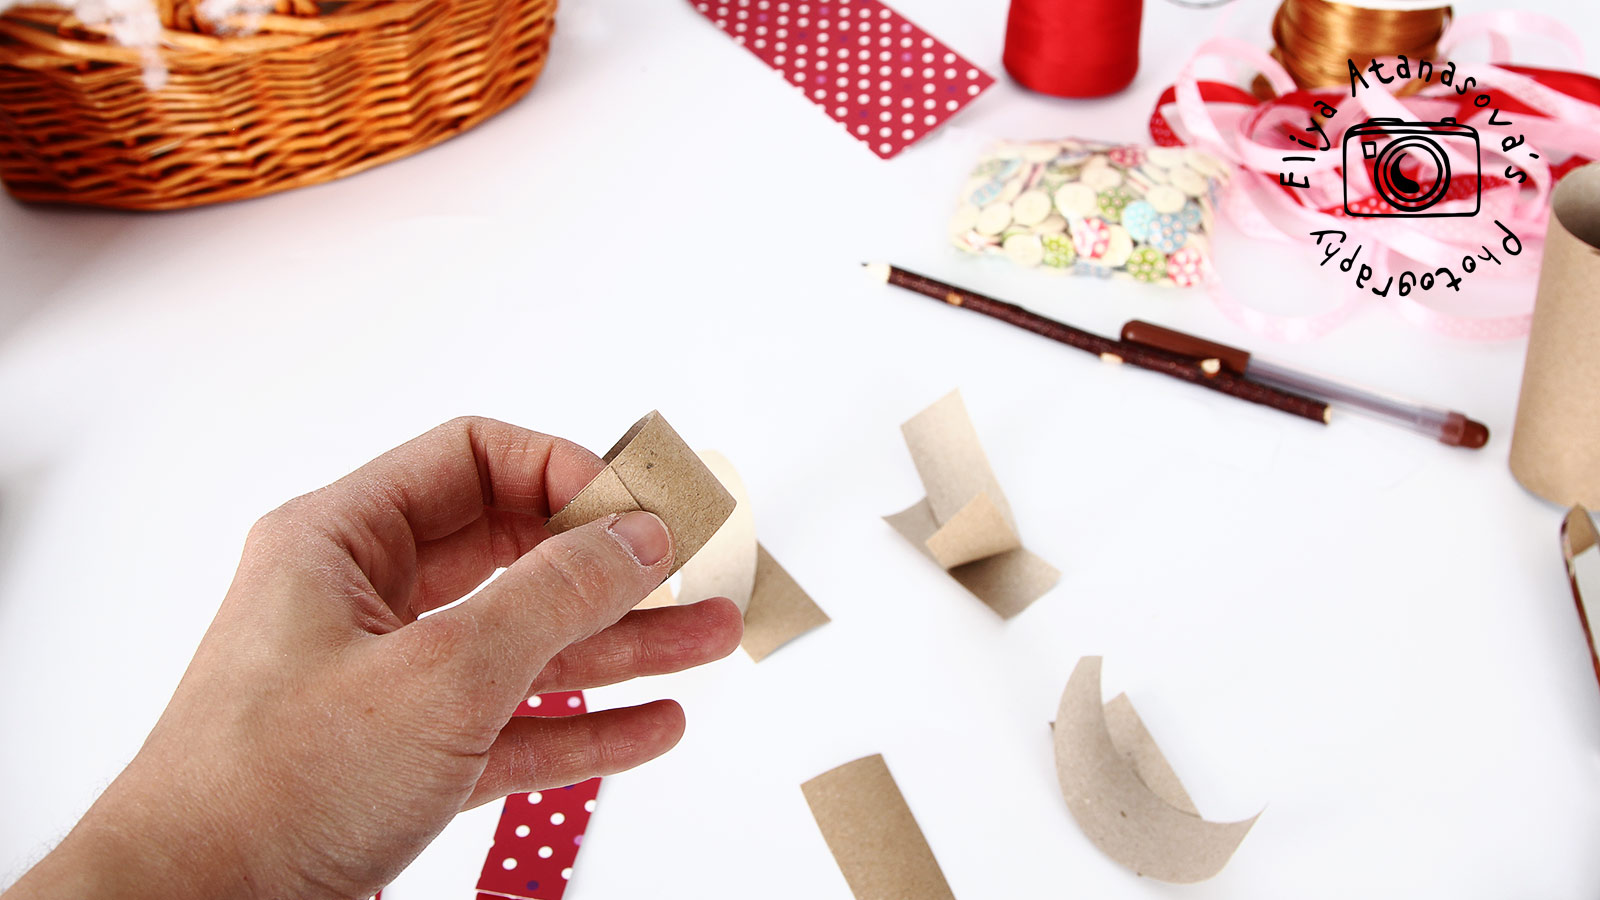
5. Fold slightly the base piece and place it into the side piece that you just attached. Use small amounts of hot glue and be careful with it, as it is very hot.
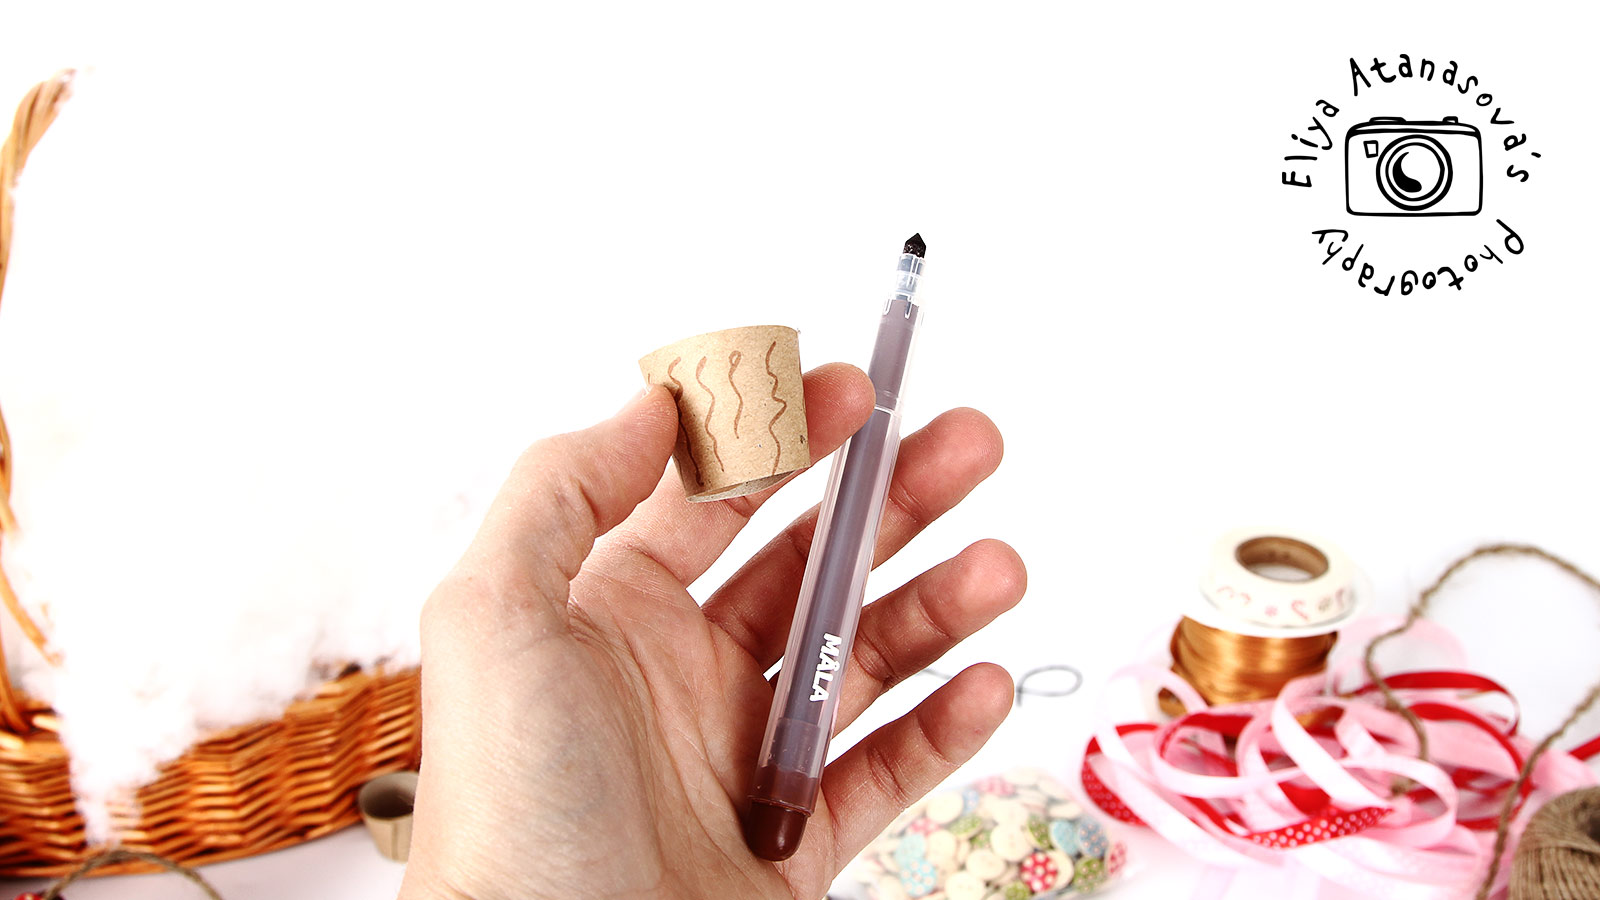
6. Now the bottom part of our very small cupcake is ready. I decorated mine further with the brown pen.

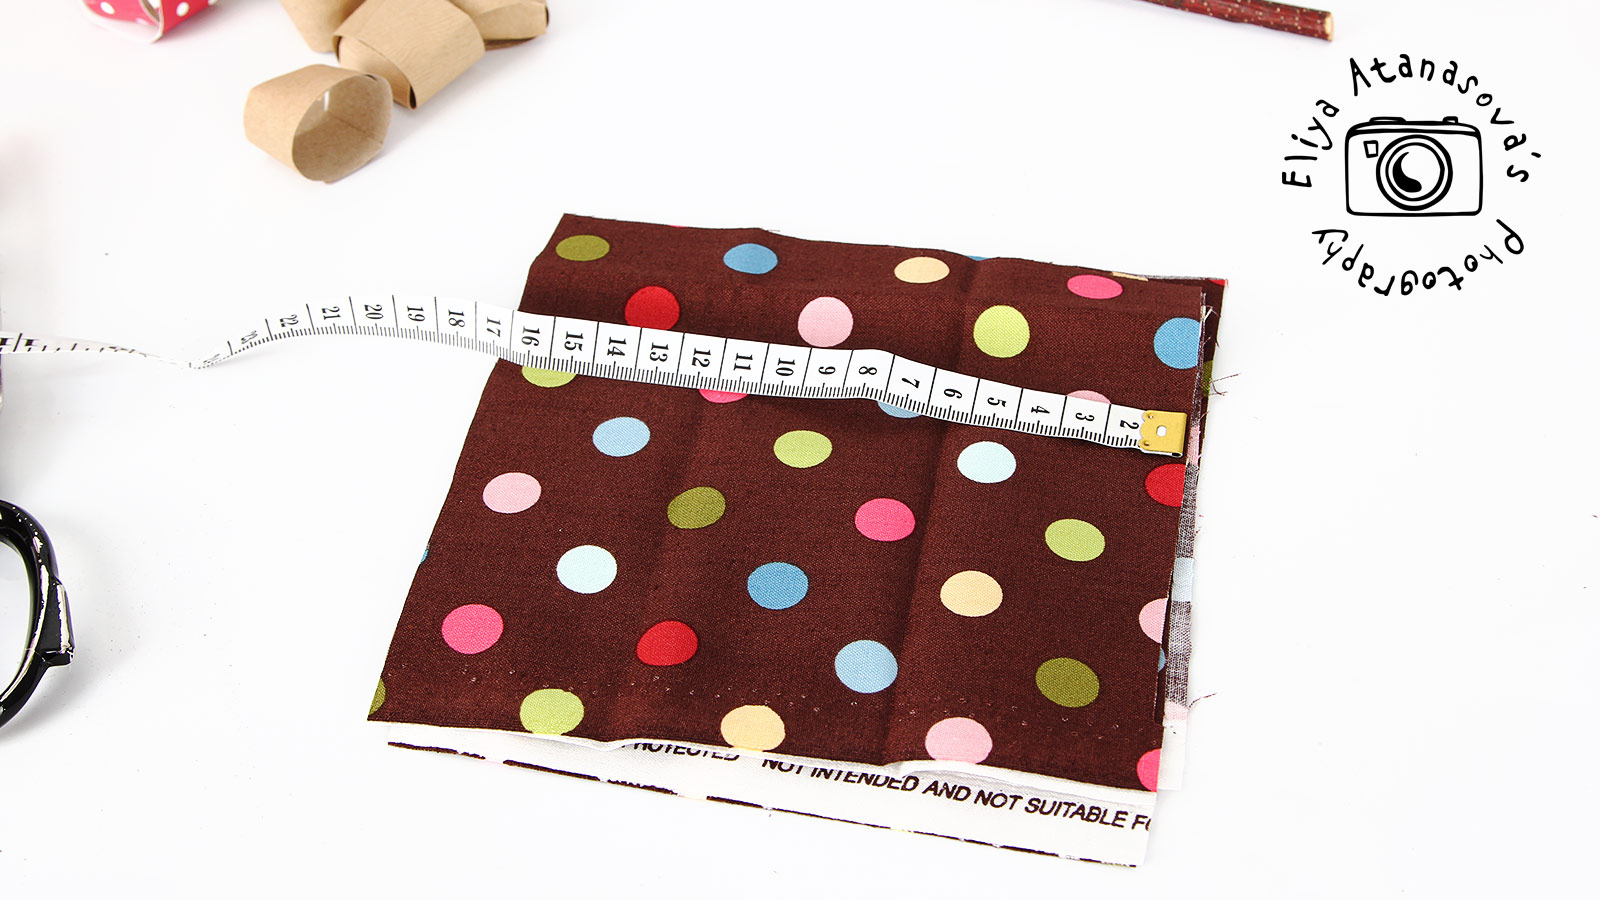
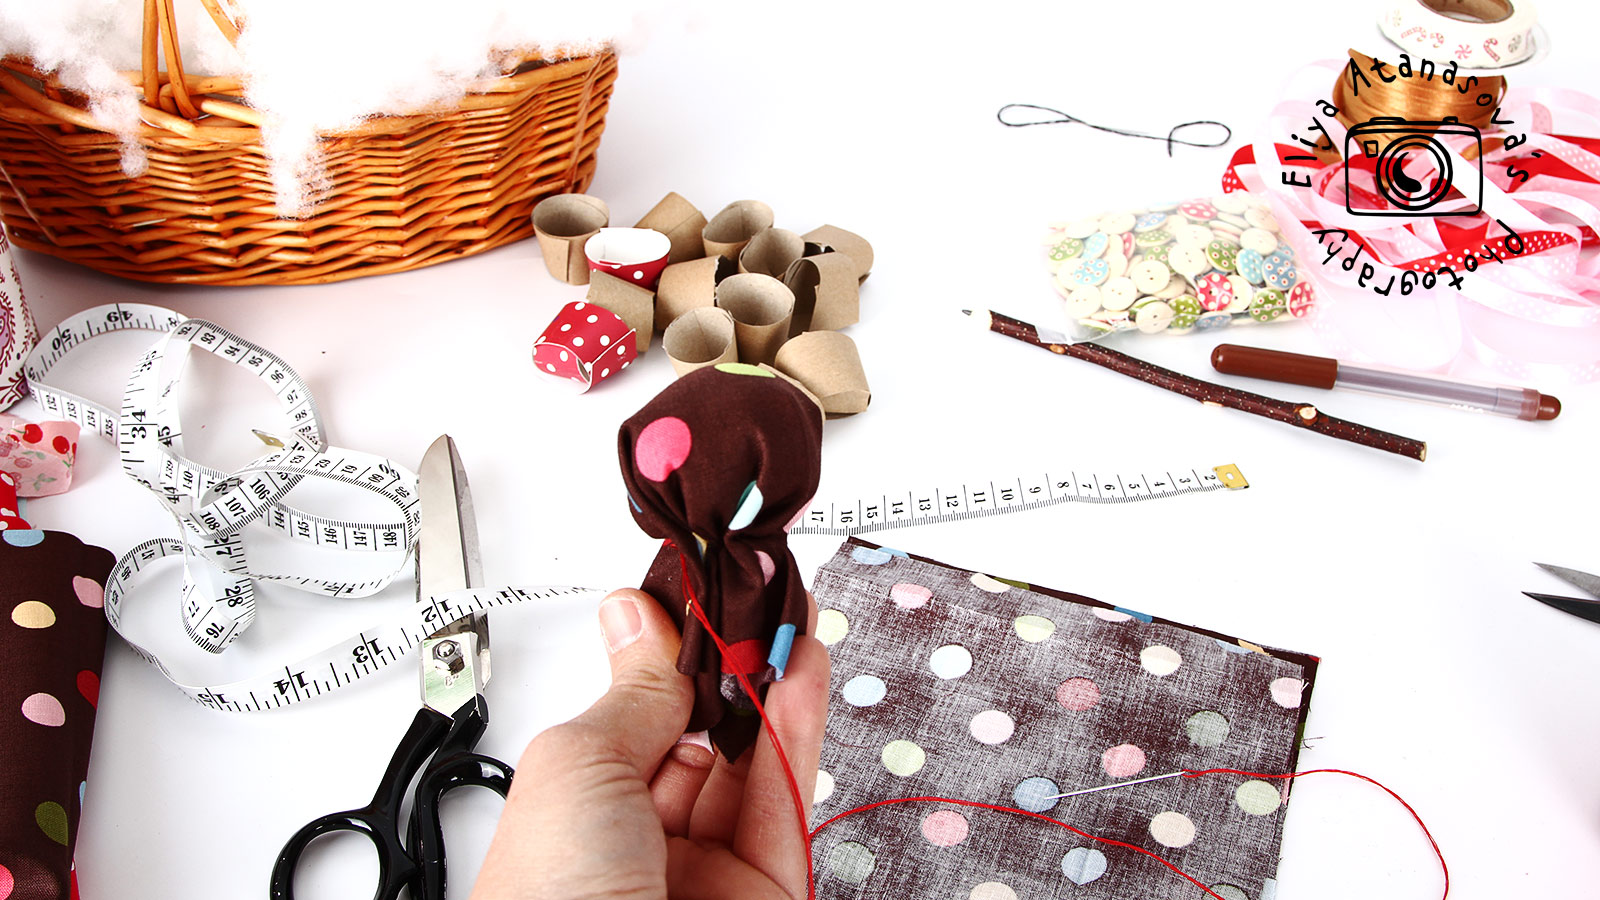
7. Cut square pieces about 13 х 13 cm (approx. 5”x 5”), put filling inside the textile square and wrap it. You need a very small amount of filling.
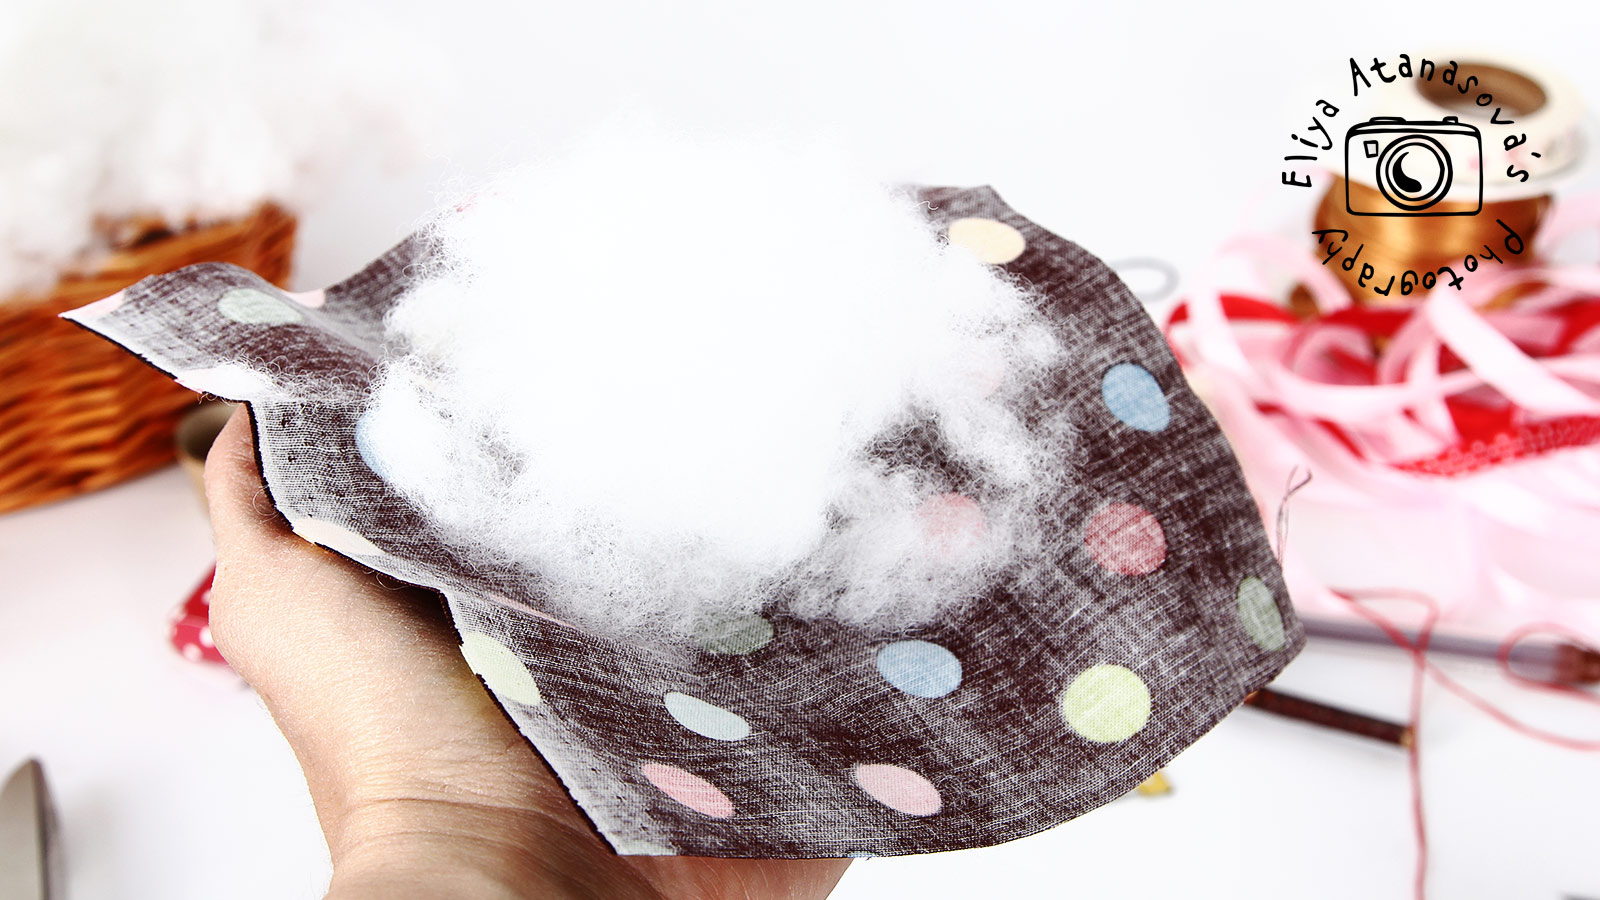
8. Wrap, so you can kame the upper part in the shape of a small ball. I used a lot of thread to wrap it.

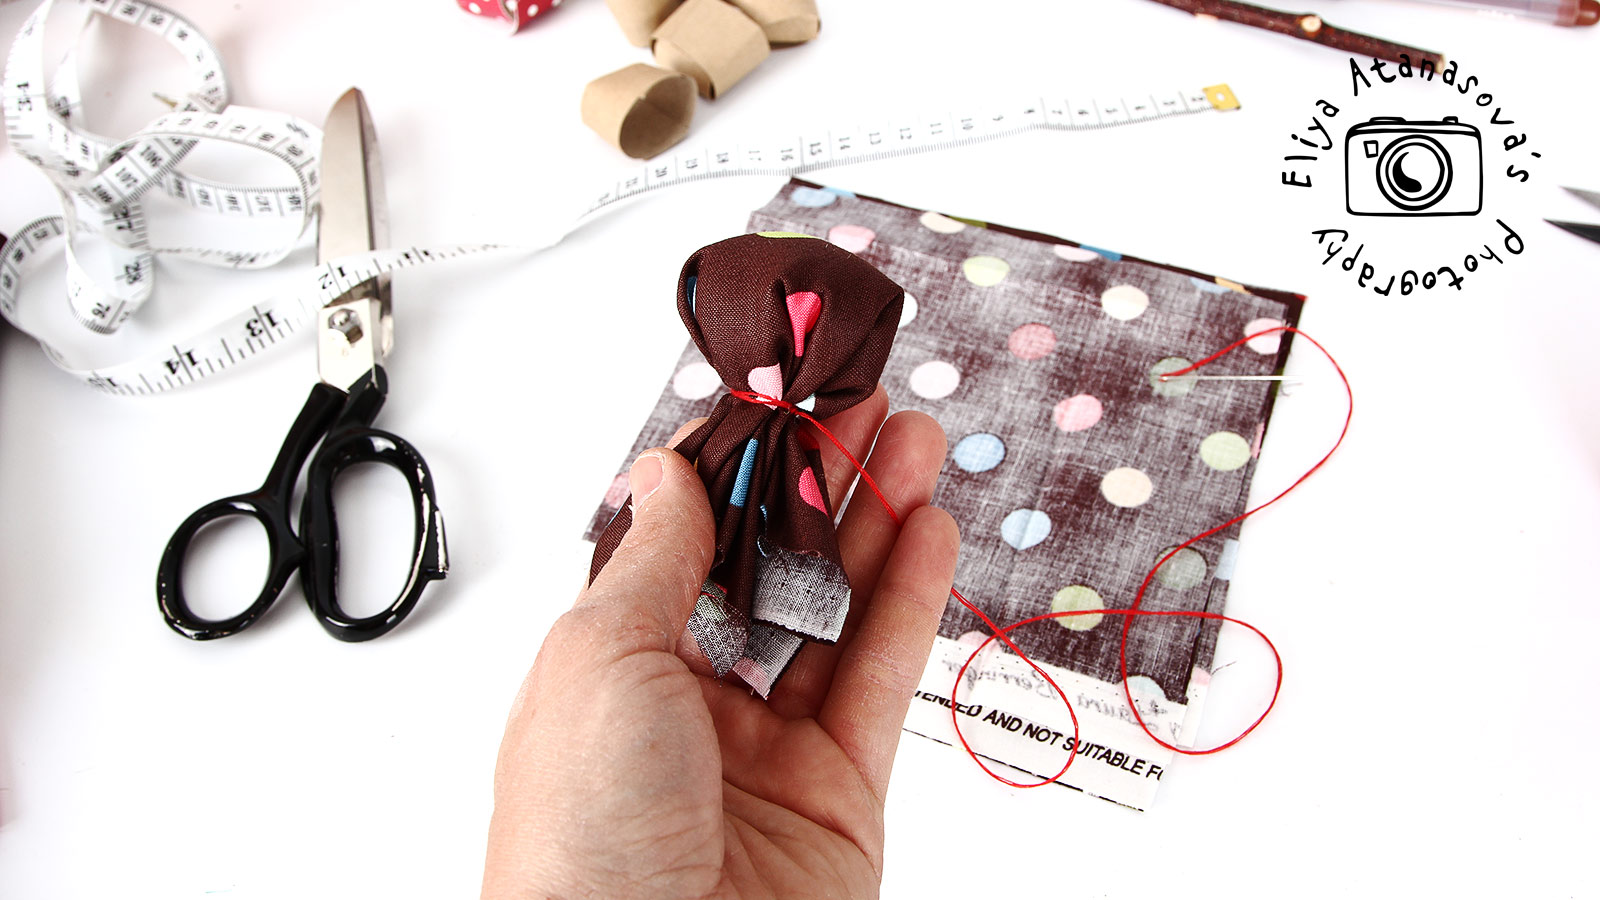
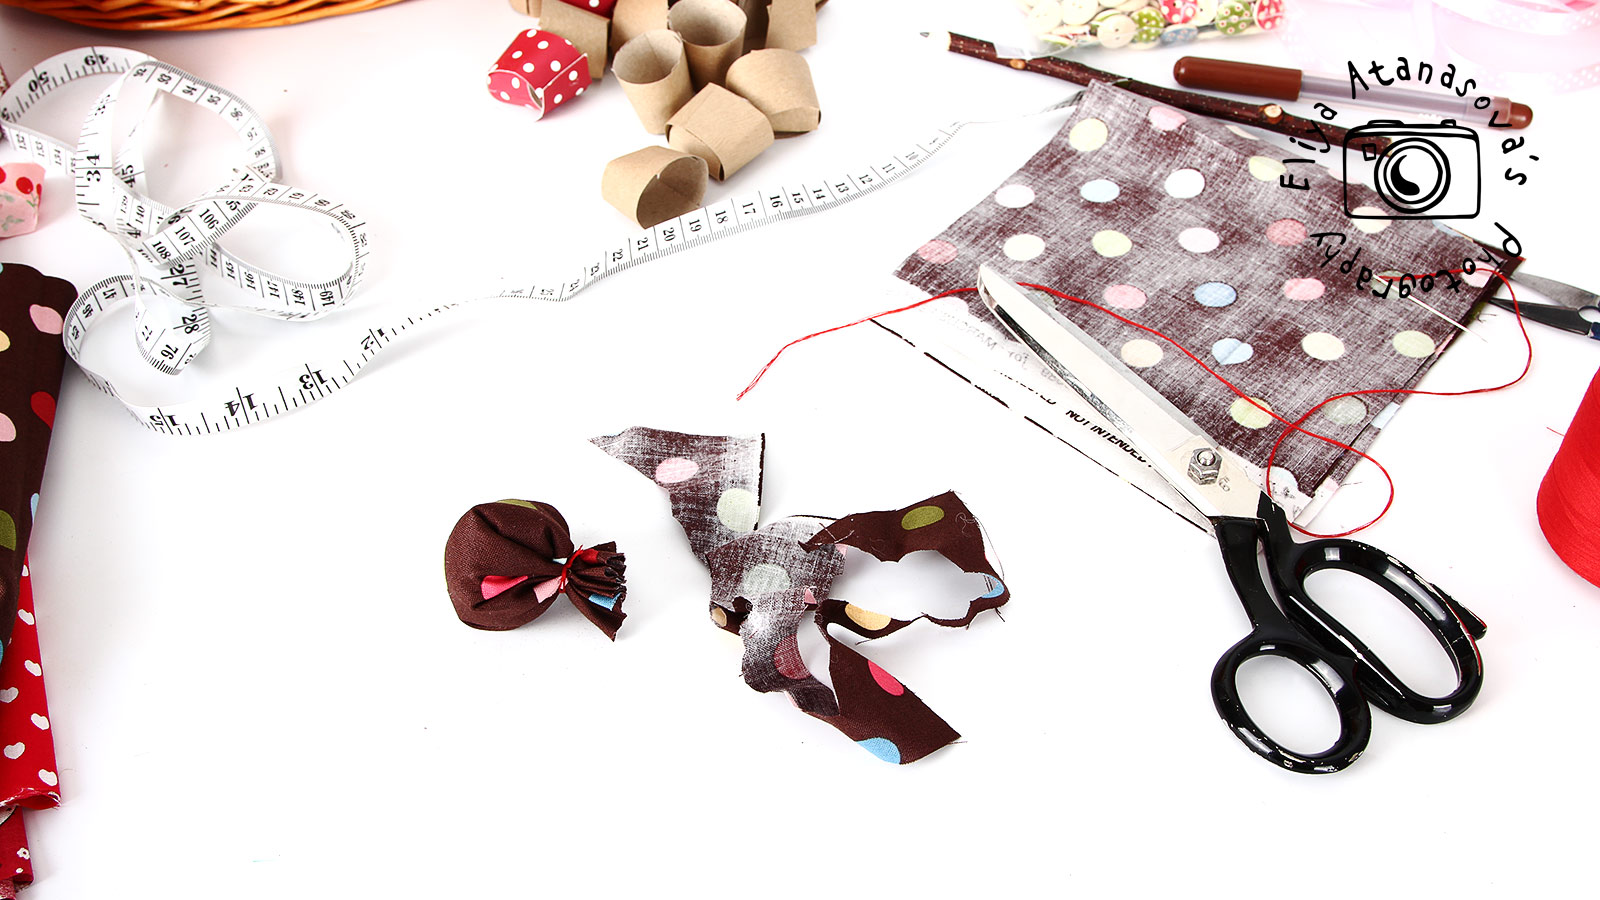
9. Cut the rest of the unnecessary fabric under the knot, but leave about 1.5 cm under the know (0.6”)
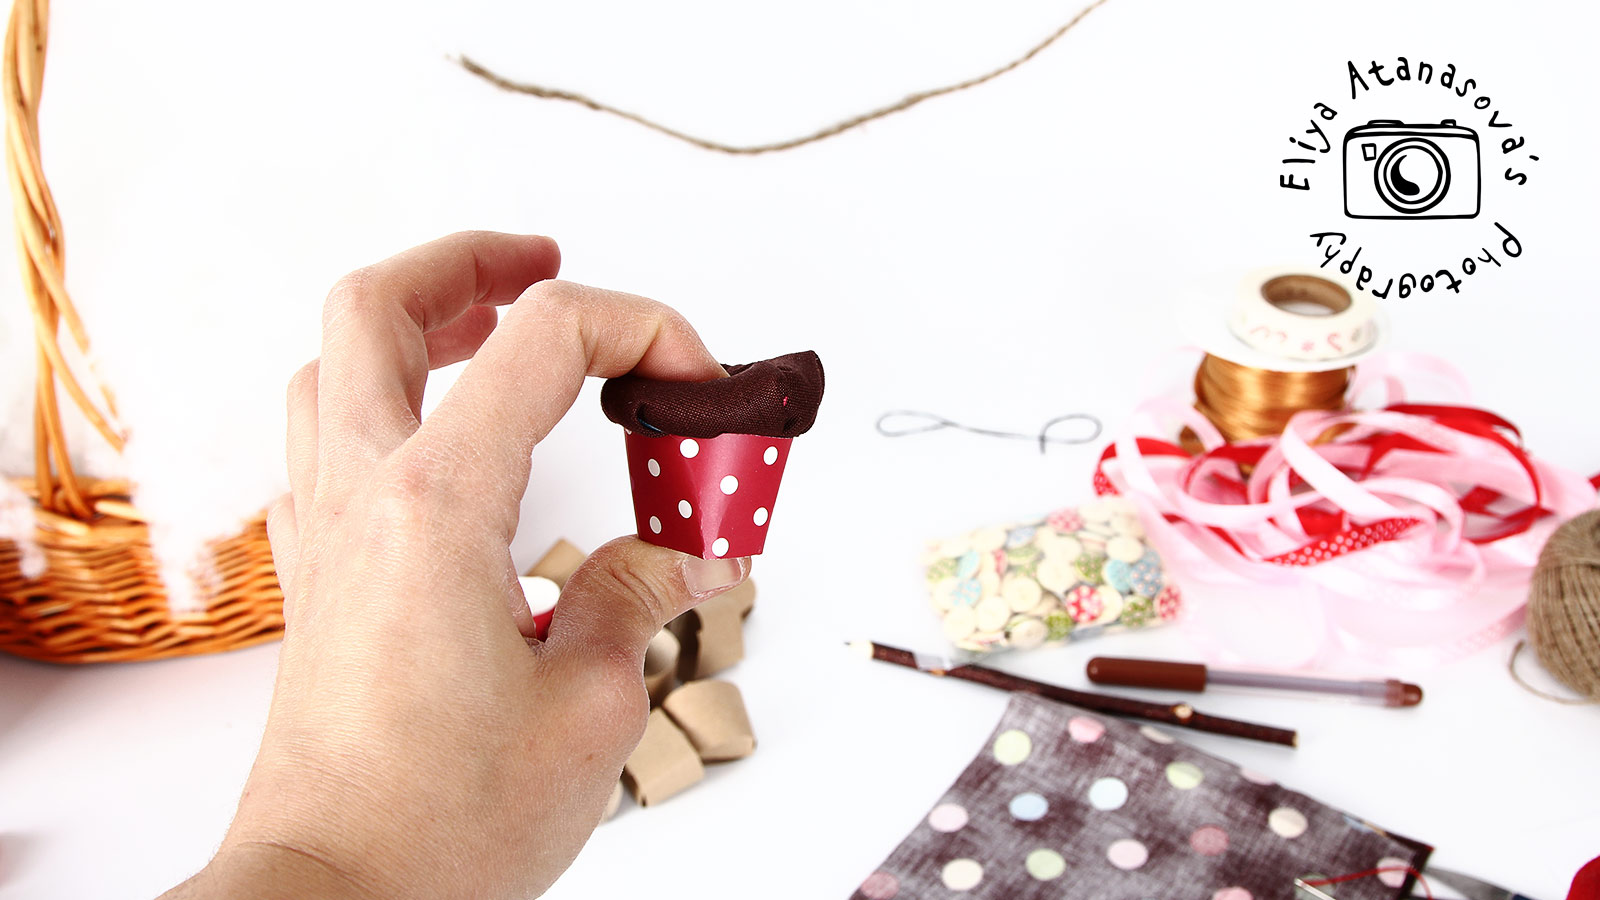
10. Attach the upper part of the cupcake to the bottom part. I used hot glue again, but again – you should be careful 🙂
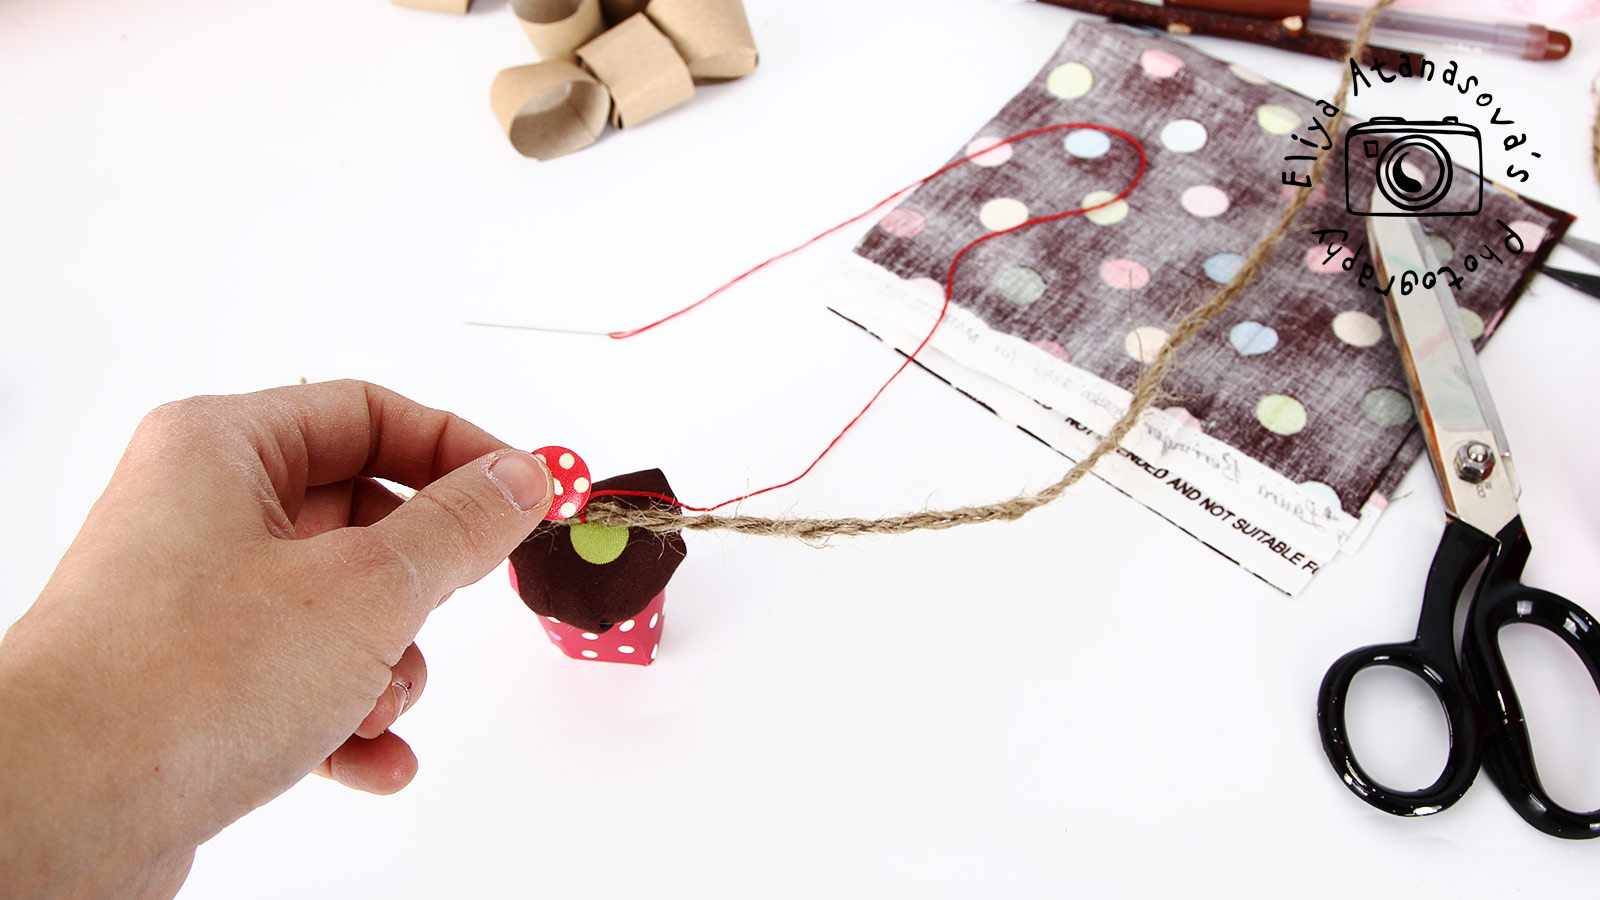
11. Sew the upper part of the cupcake to the rope and add a button.

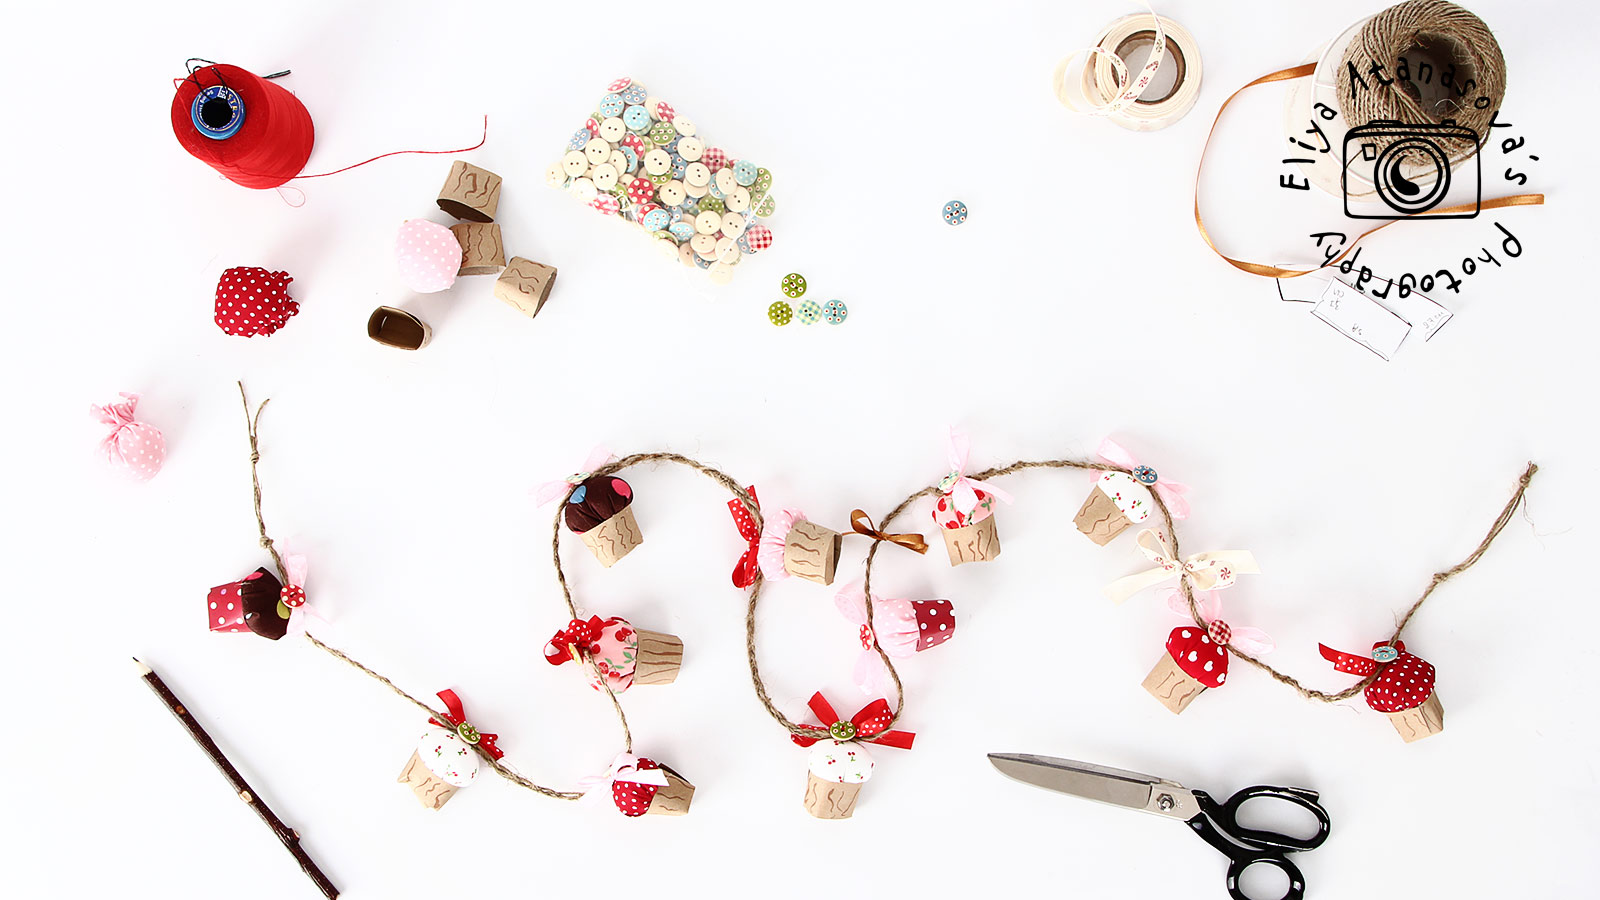
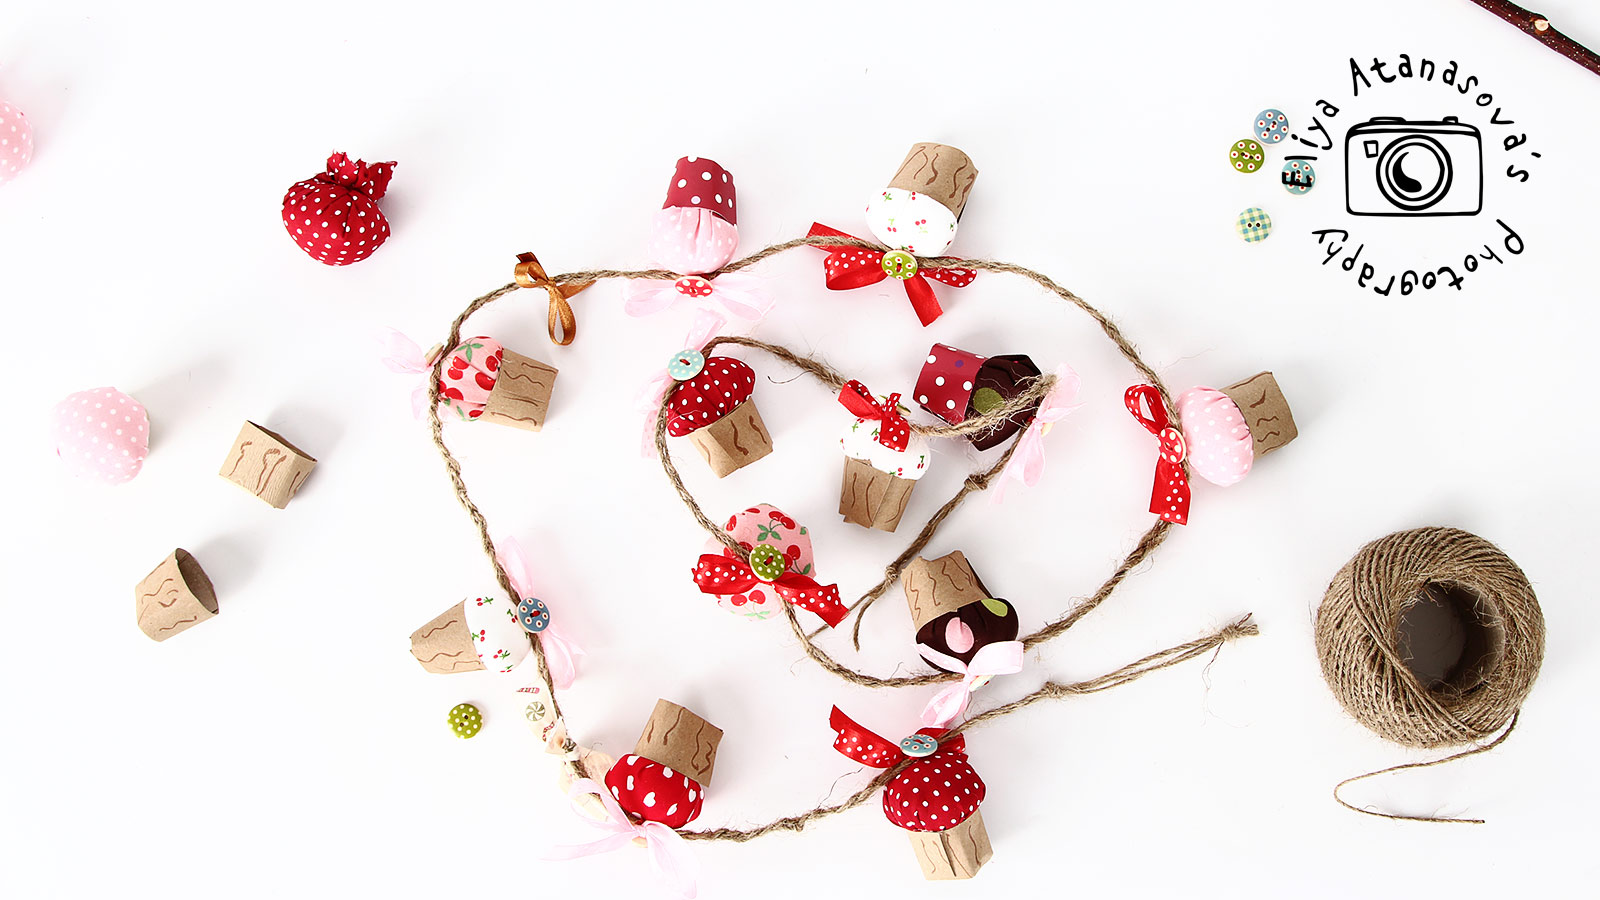
12. And do the same with all the cupcakes.
Here it is the ready garland 🙂

I wish you a wonderful Monday!