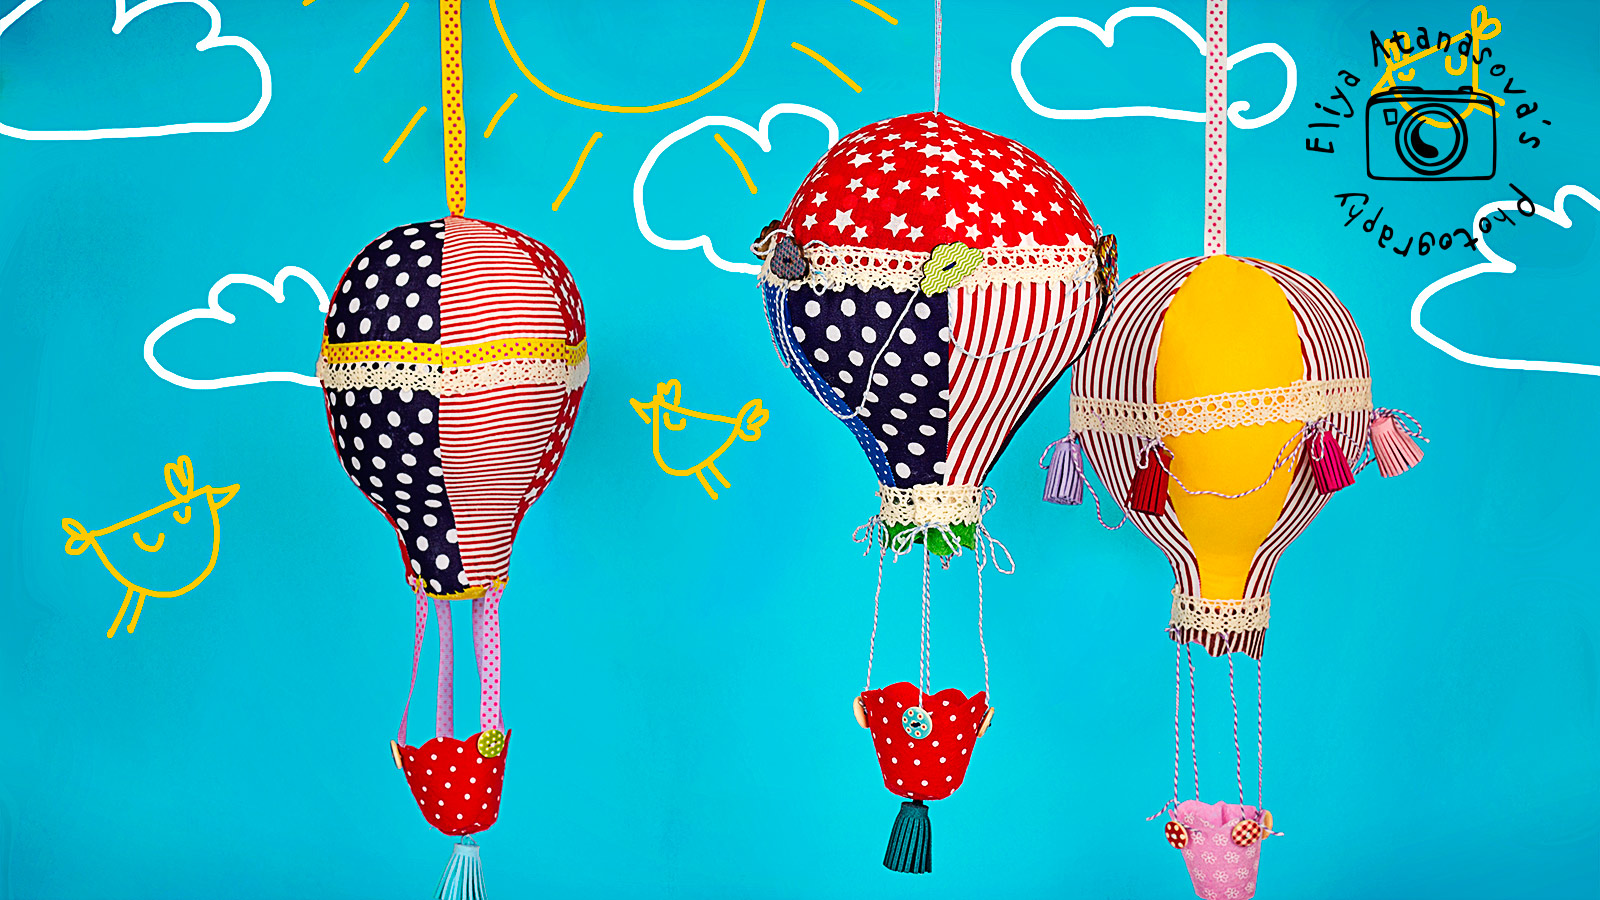
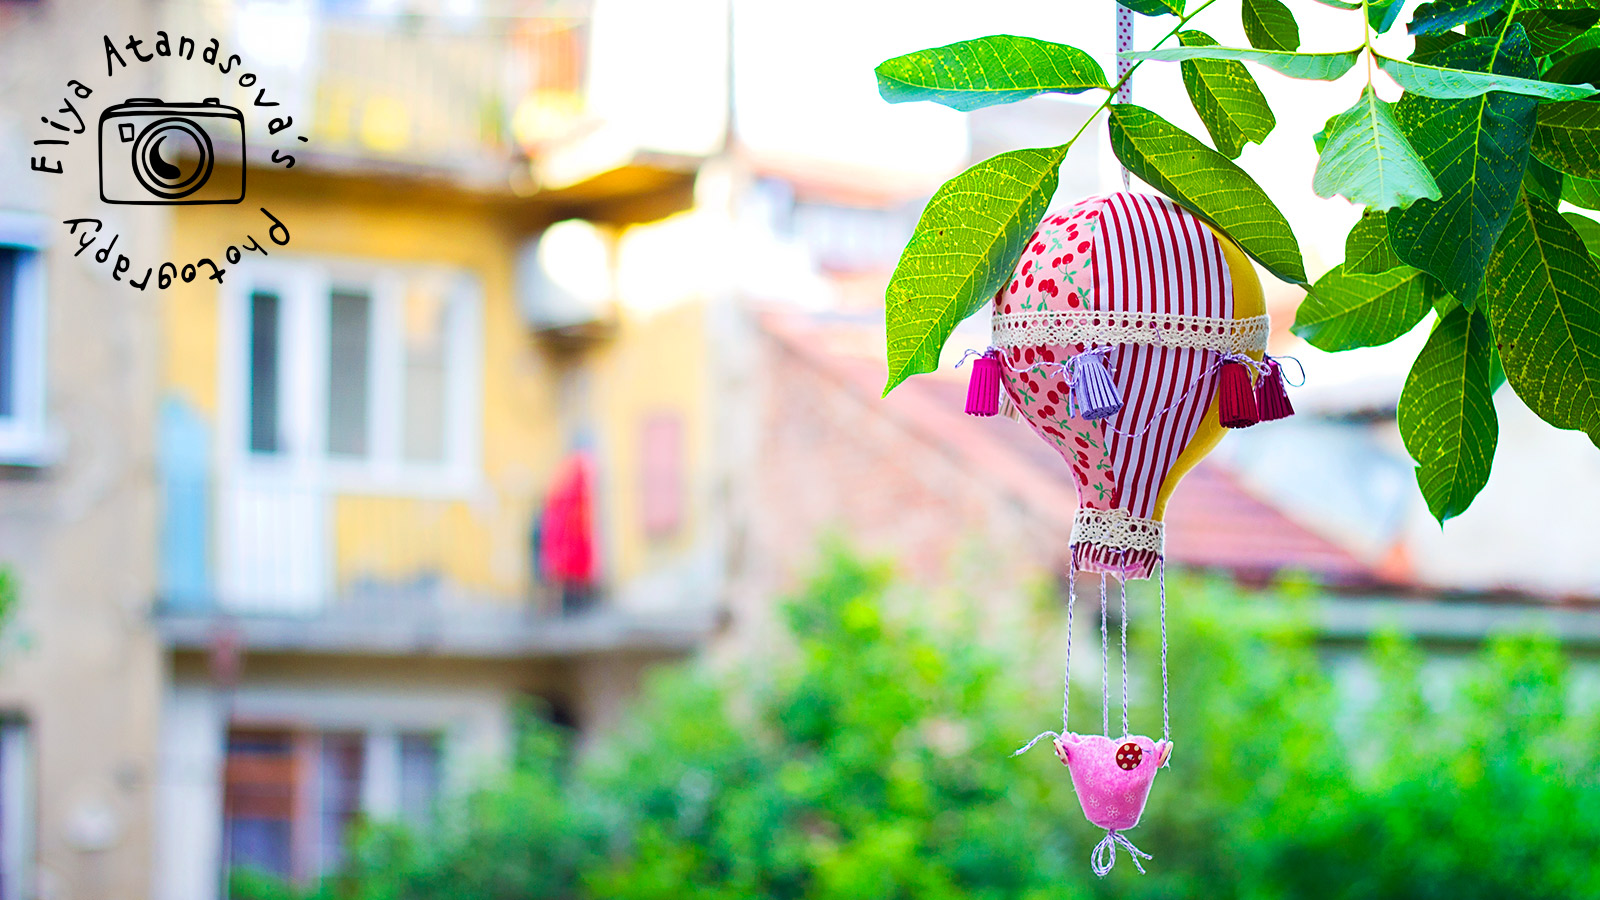
The summer textile home accessories should include hot air balloons … and watermelon :-).
These textile hot air balloons do not have any functions, but are cozy :-).
And here is how i made them step by step:
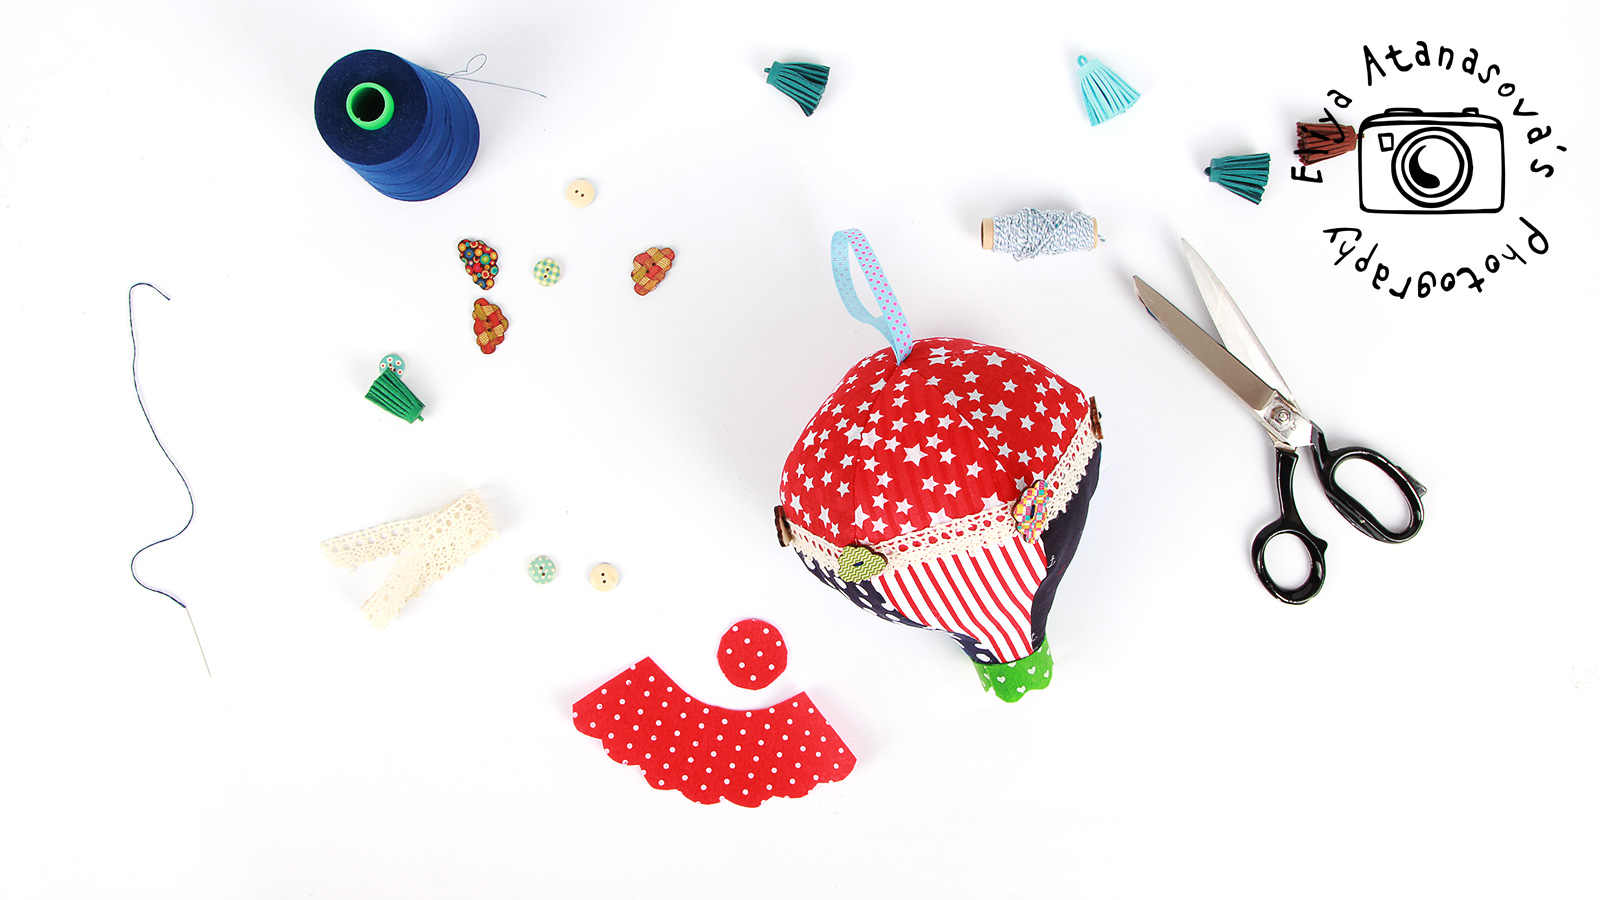
Necessary materials:
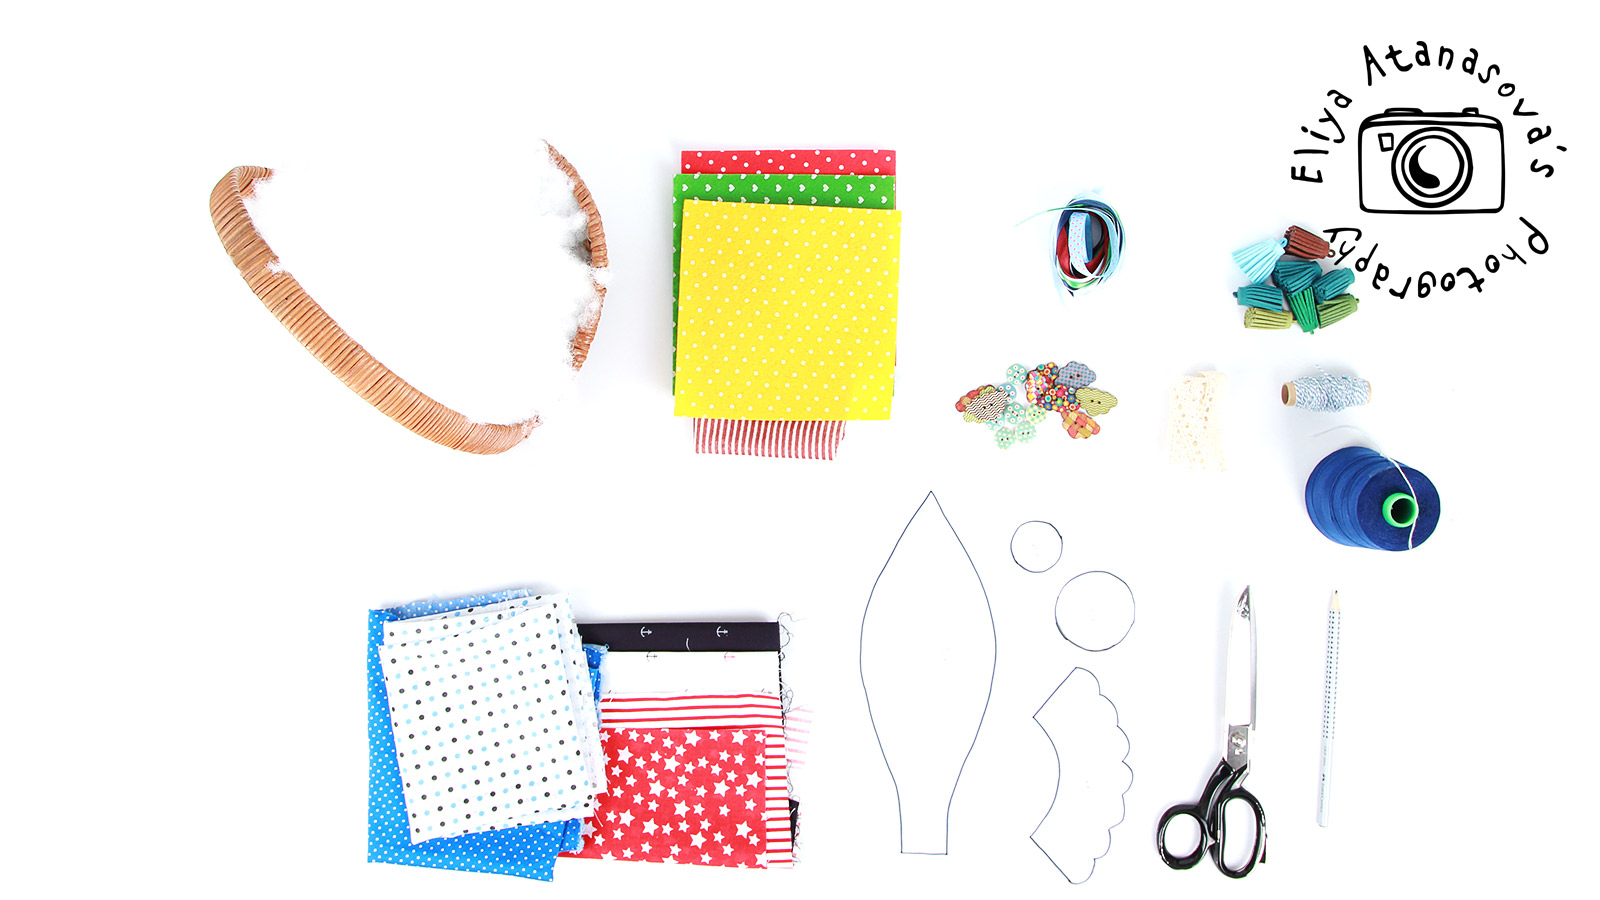
– some textiles in colorful patterns (you will need very small quantities and the more colorful the better)
– felt (again in bright colors)
– needle and thread and a sewing machine (you can sew everything using just the needle and thread but it will take much longer and hte result with sewing machine will be better)
– buttons, ribbons, lace and other decorative elements that you like
– silicone granules or other light filling
– The printed pattern that you can download here below (when you print the pattern, please choose “actual size” as printing preference in the printer dialog window and then make sure that the test squares are 1 cm and 1 inch respectively :-))
DOWNLOAD THE PATTERN
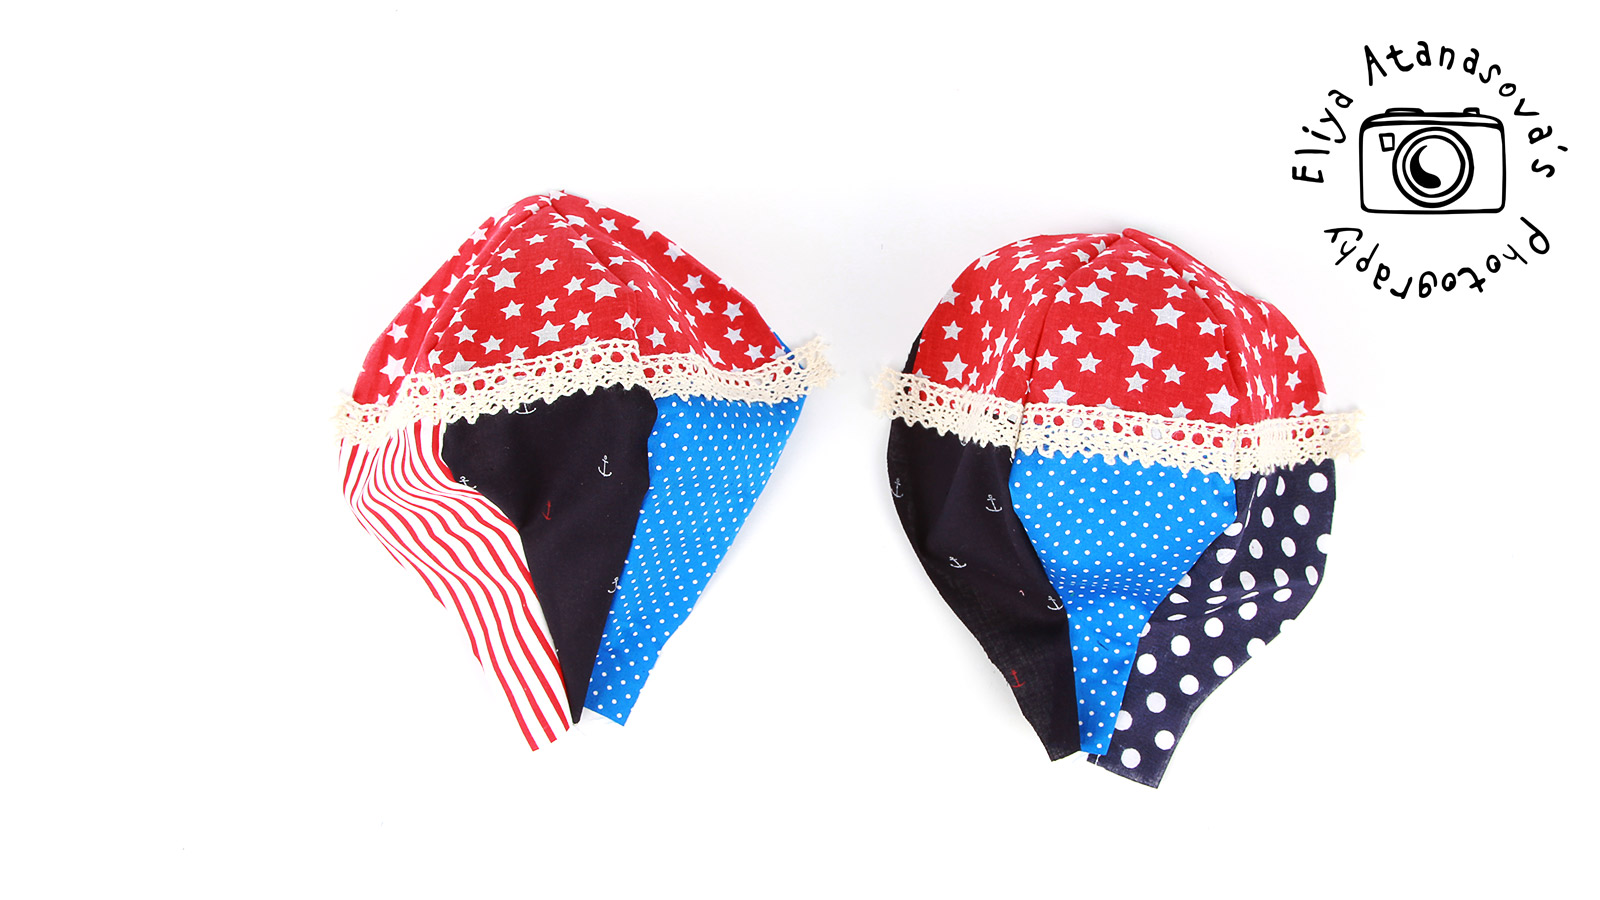
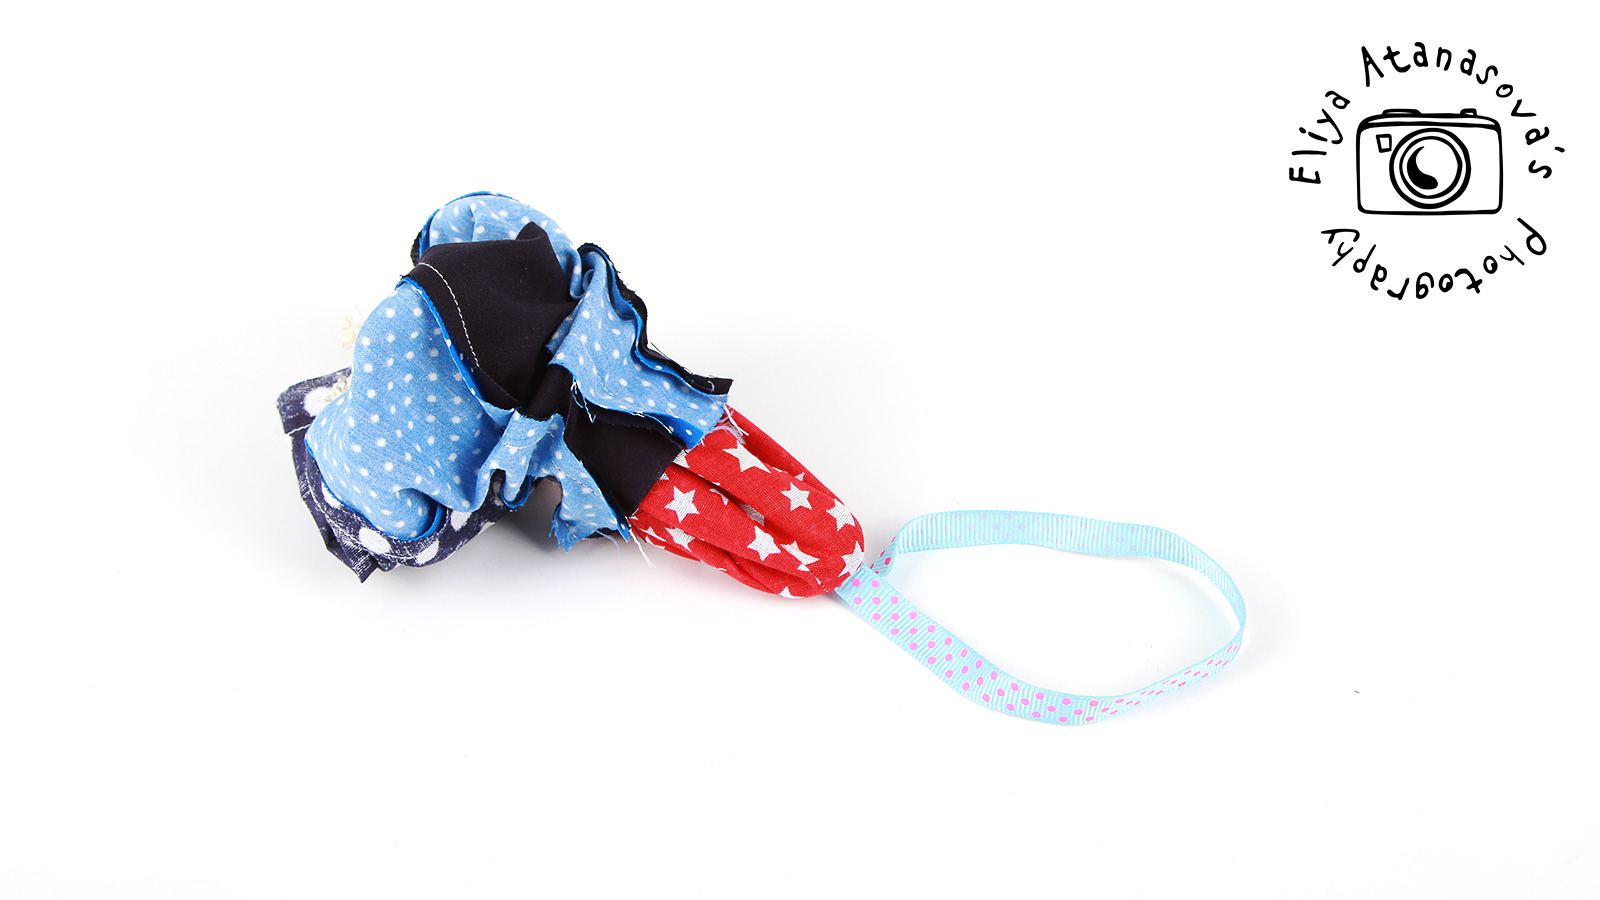
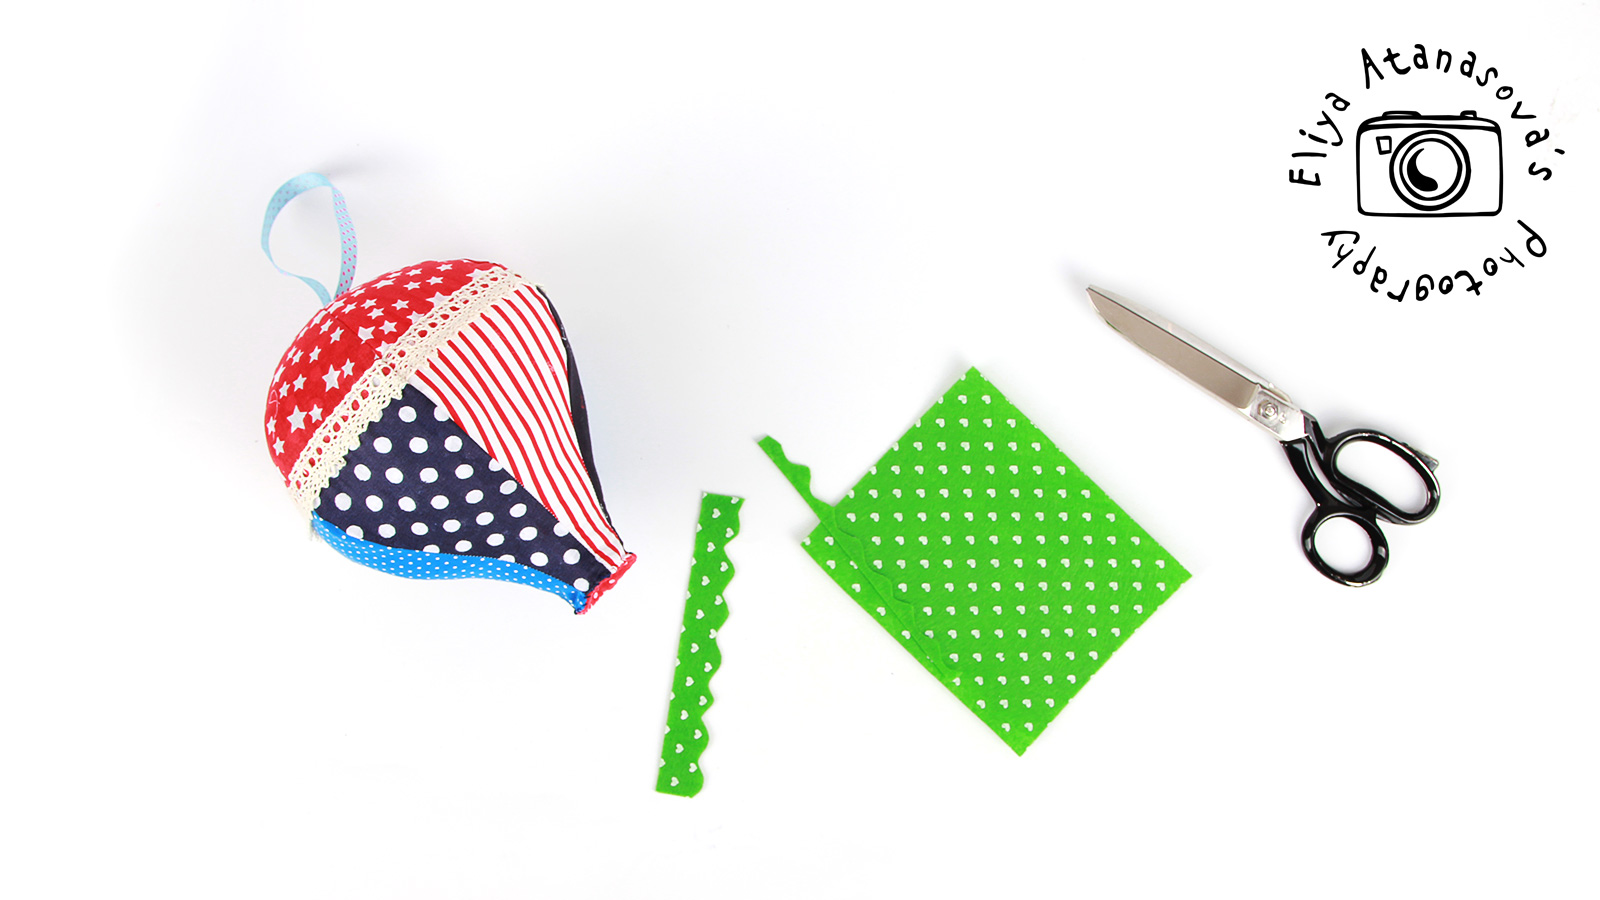
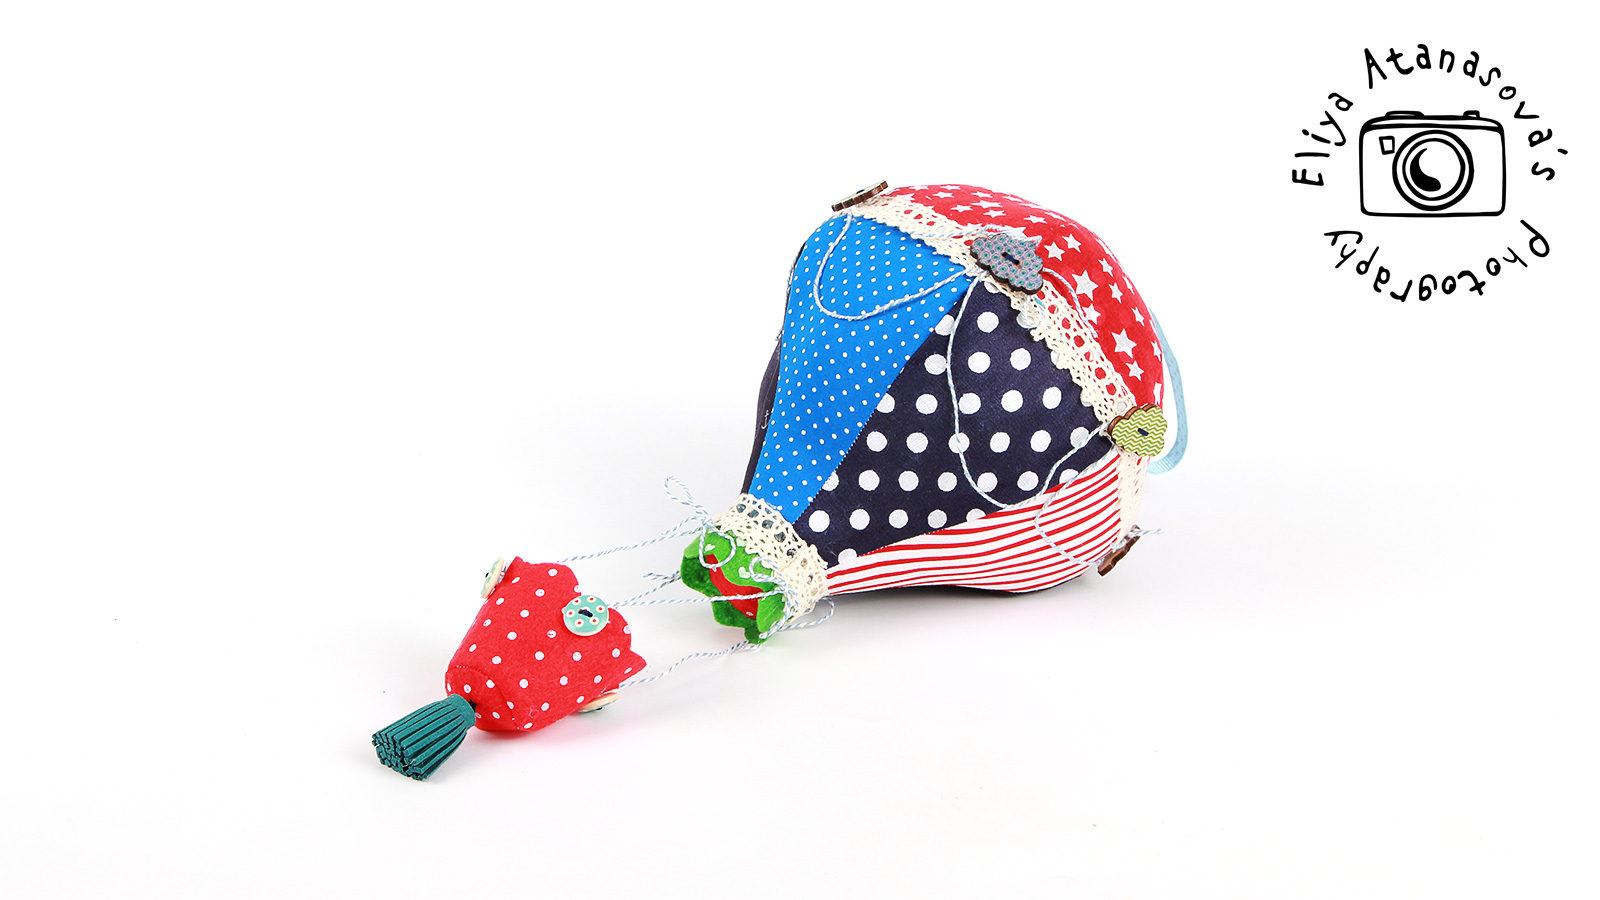
Print the pattern and cut the pieces. Cut the fabric pieces (you ca use pencil to draw the pattern pieces on the wrong side of the fabric): 6 different pieces for the main balloon part and one piece for the basket and one piece pf felt for the top and bottom of the balloon.
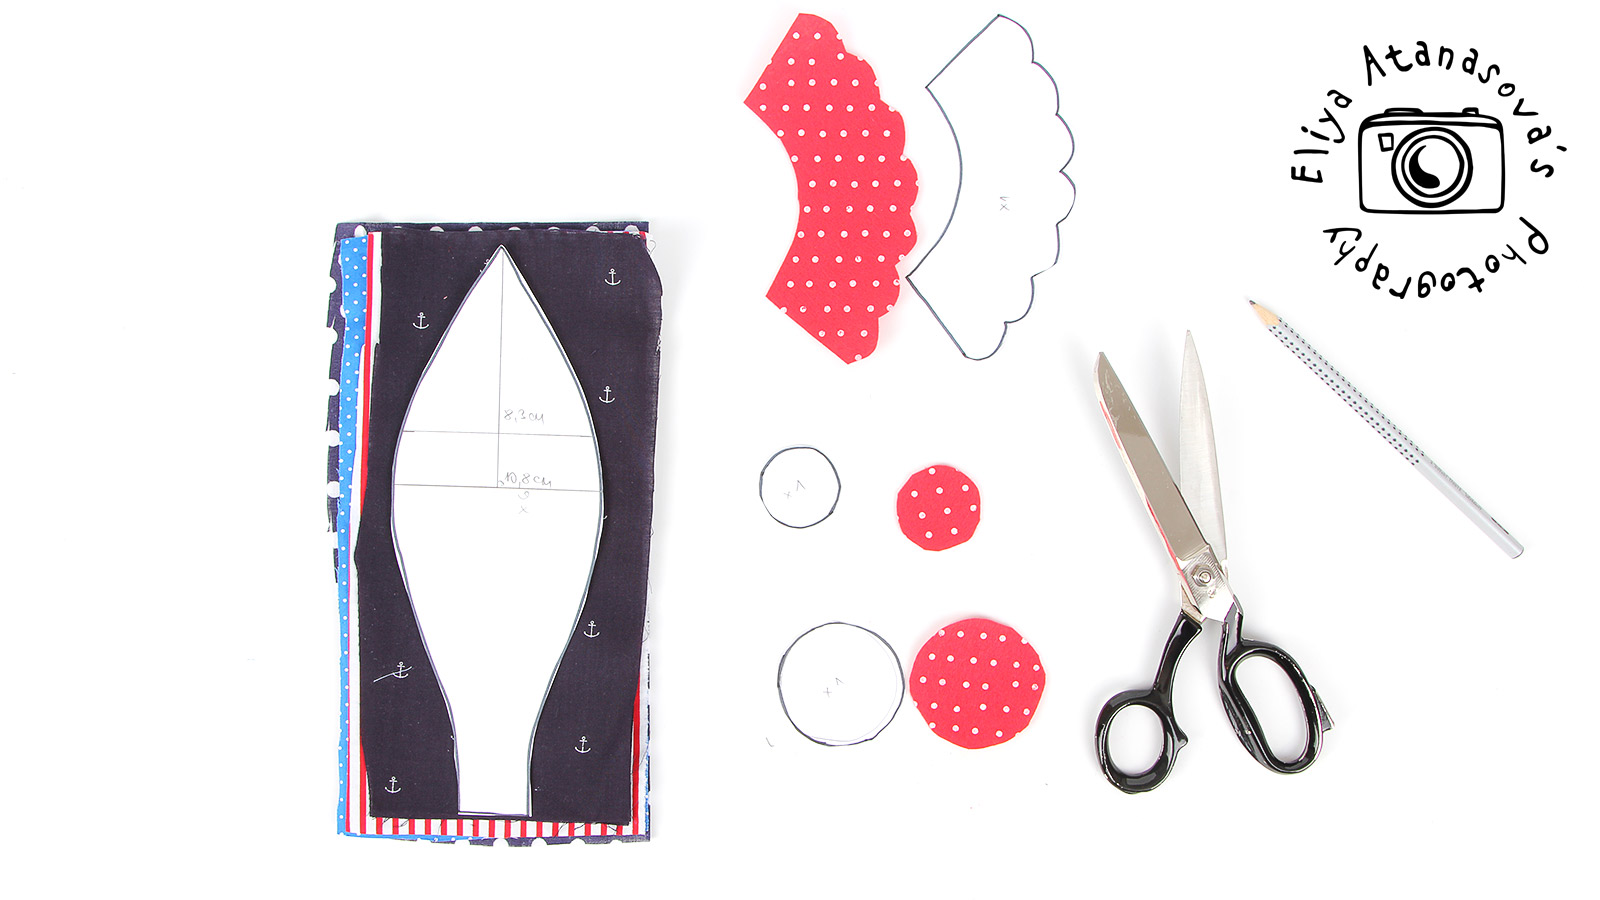
I made all six main pieces out of two separate pieces each to be more colorful, but you can skip this step.
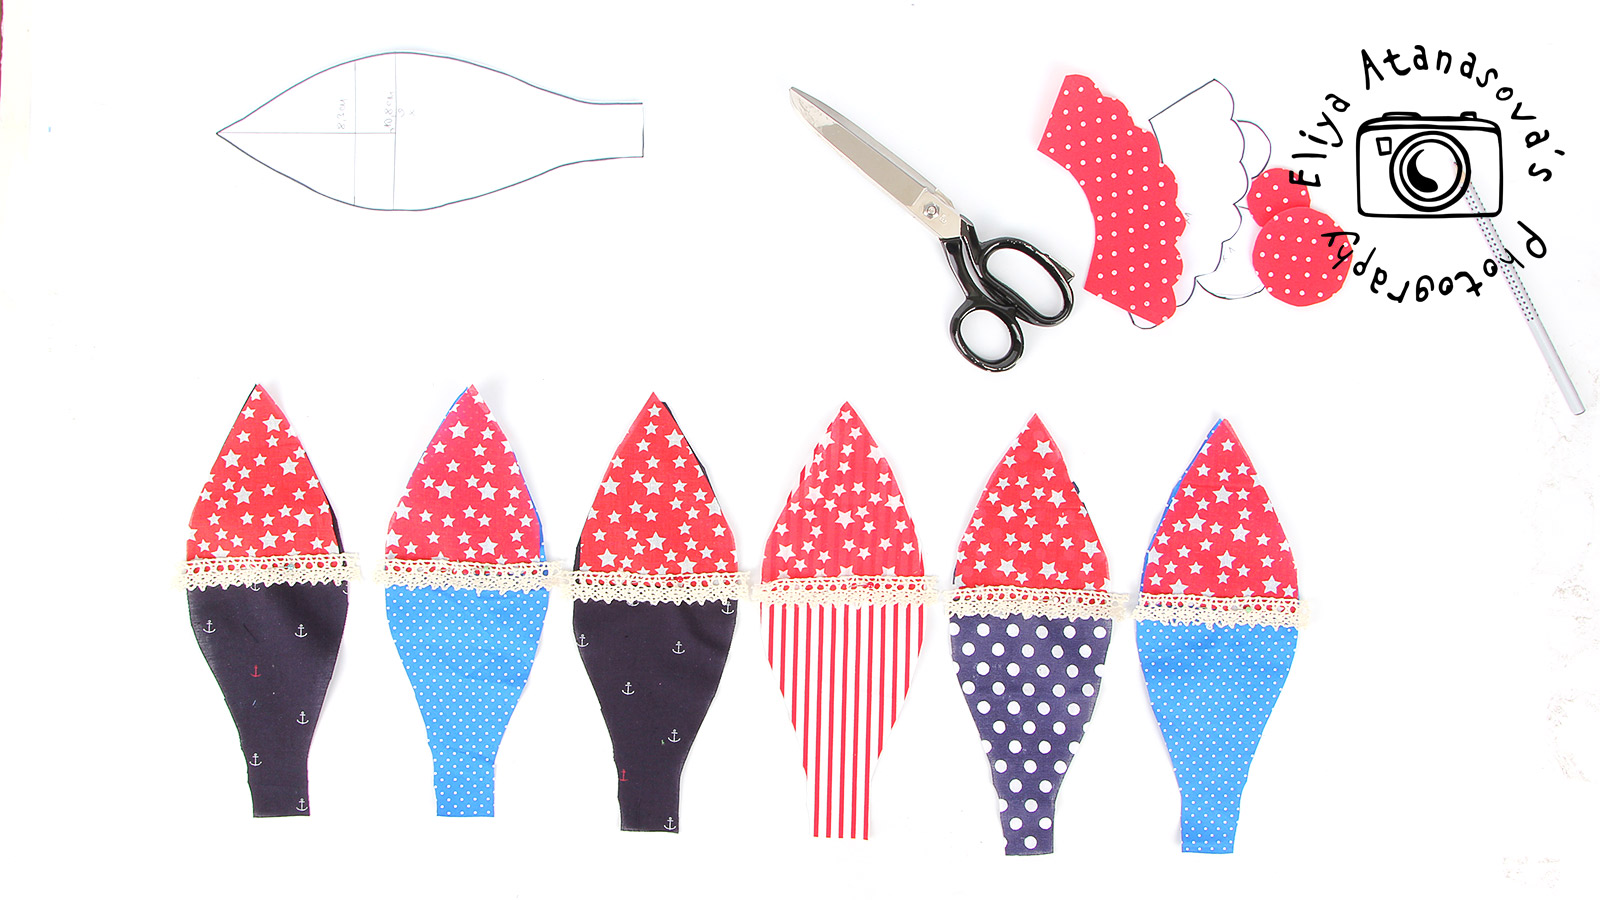
I also added lace on top of the main six pieces. Then, attach the main pieces carefully making a stitch along the linger side. I first attached 3 of the pieces one to another and then the next three. Be careful if you have pieces from the same fabric to put a different fabric between them.
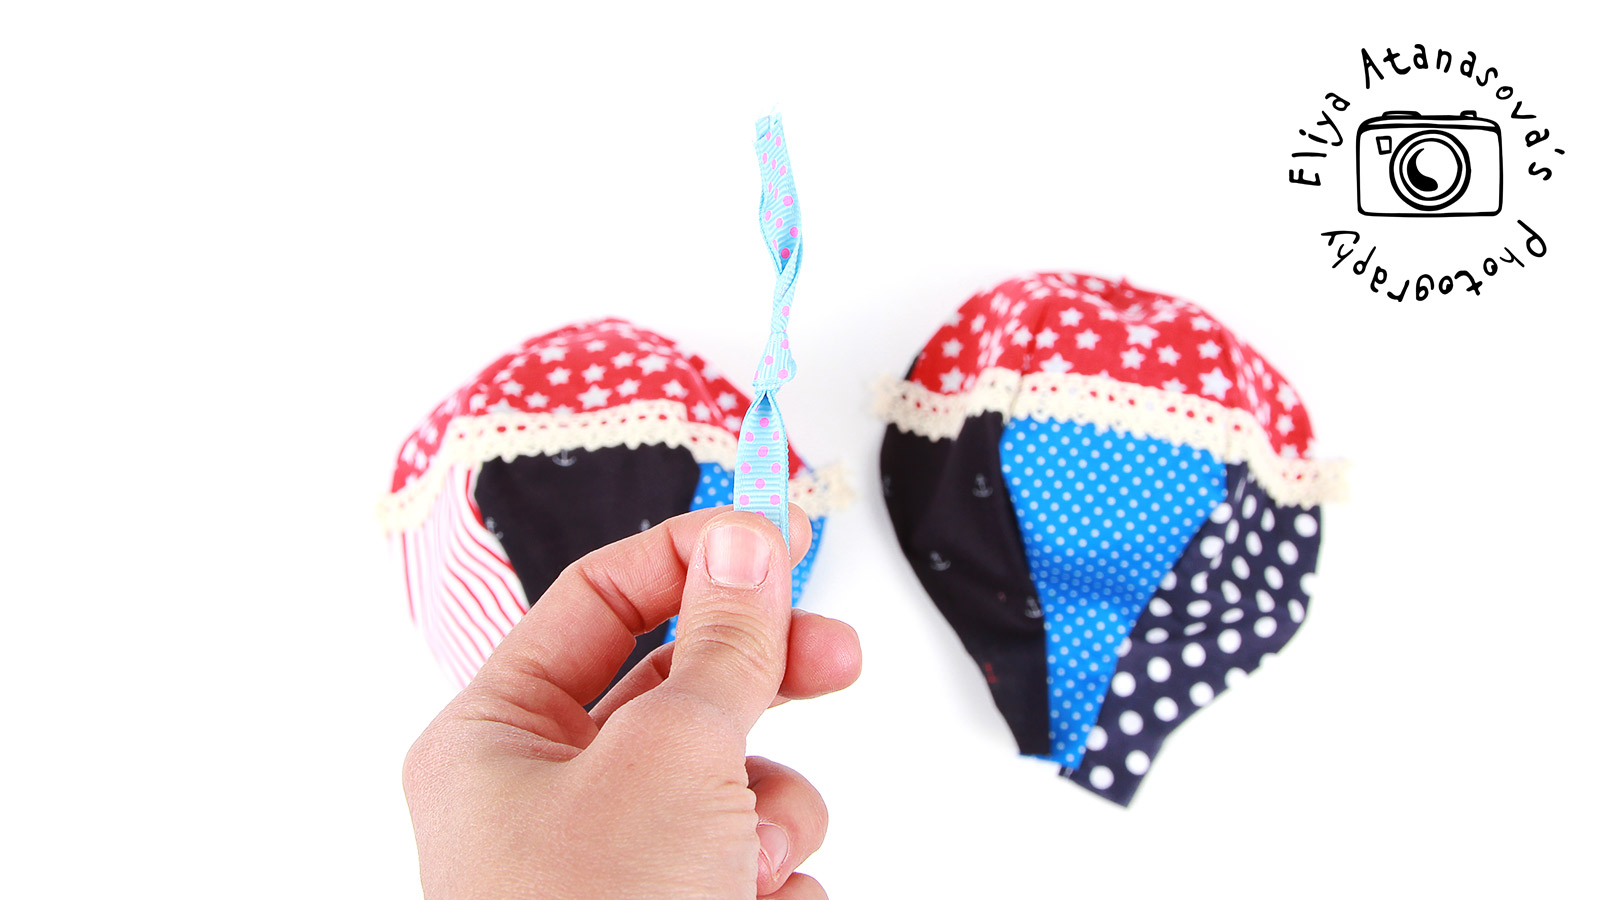
Cut around 30 cm (or 12″) of ribbon and make a knot. This will be the balloon hanger. The know will be sewn inside the balloon on top of it and this will make it more durable in time. Place the ribbon with the hook towards the outer part of the balloon, the knot touching the inner part, with the outer parts facing together and attach the final pieces, as shown on the pictures.
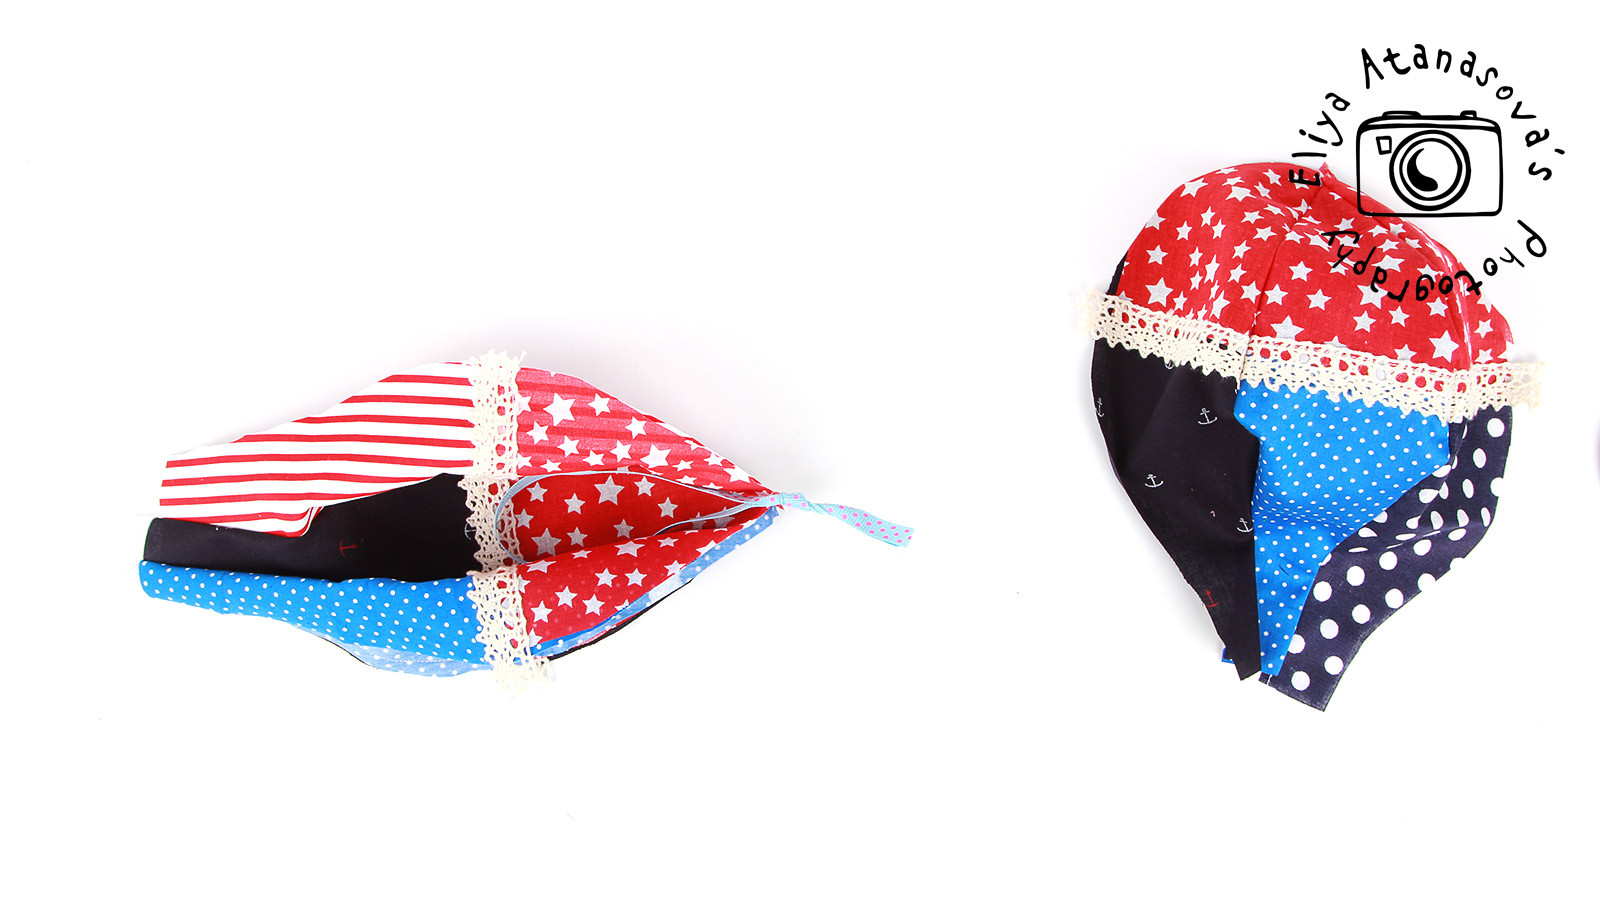
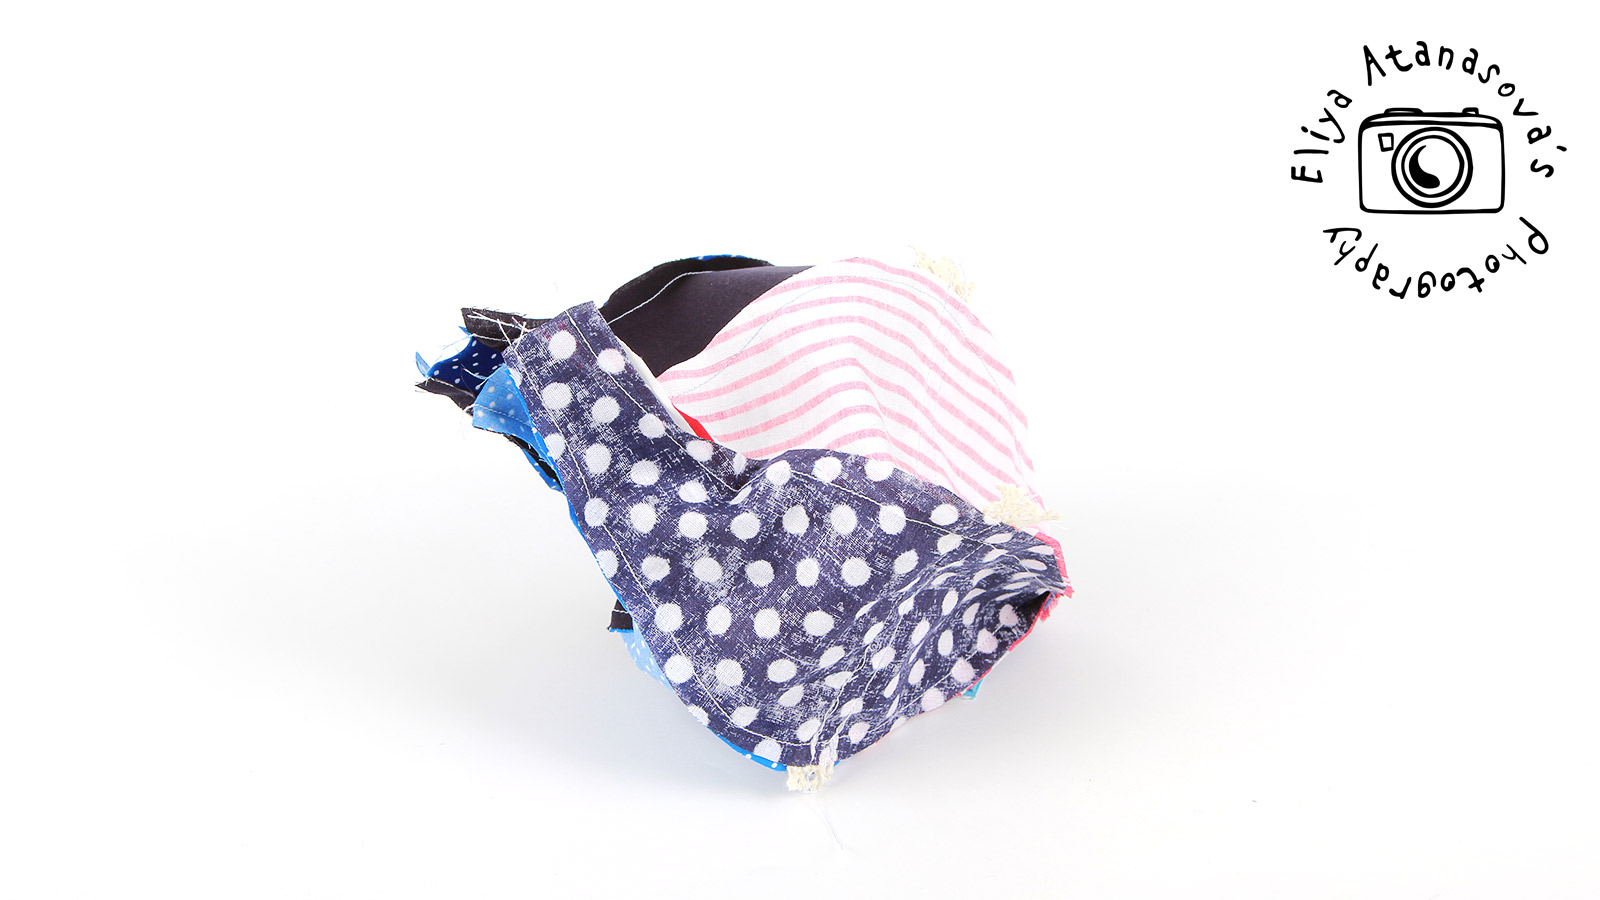
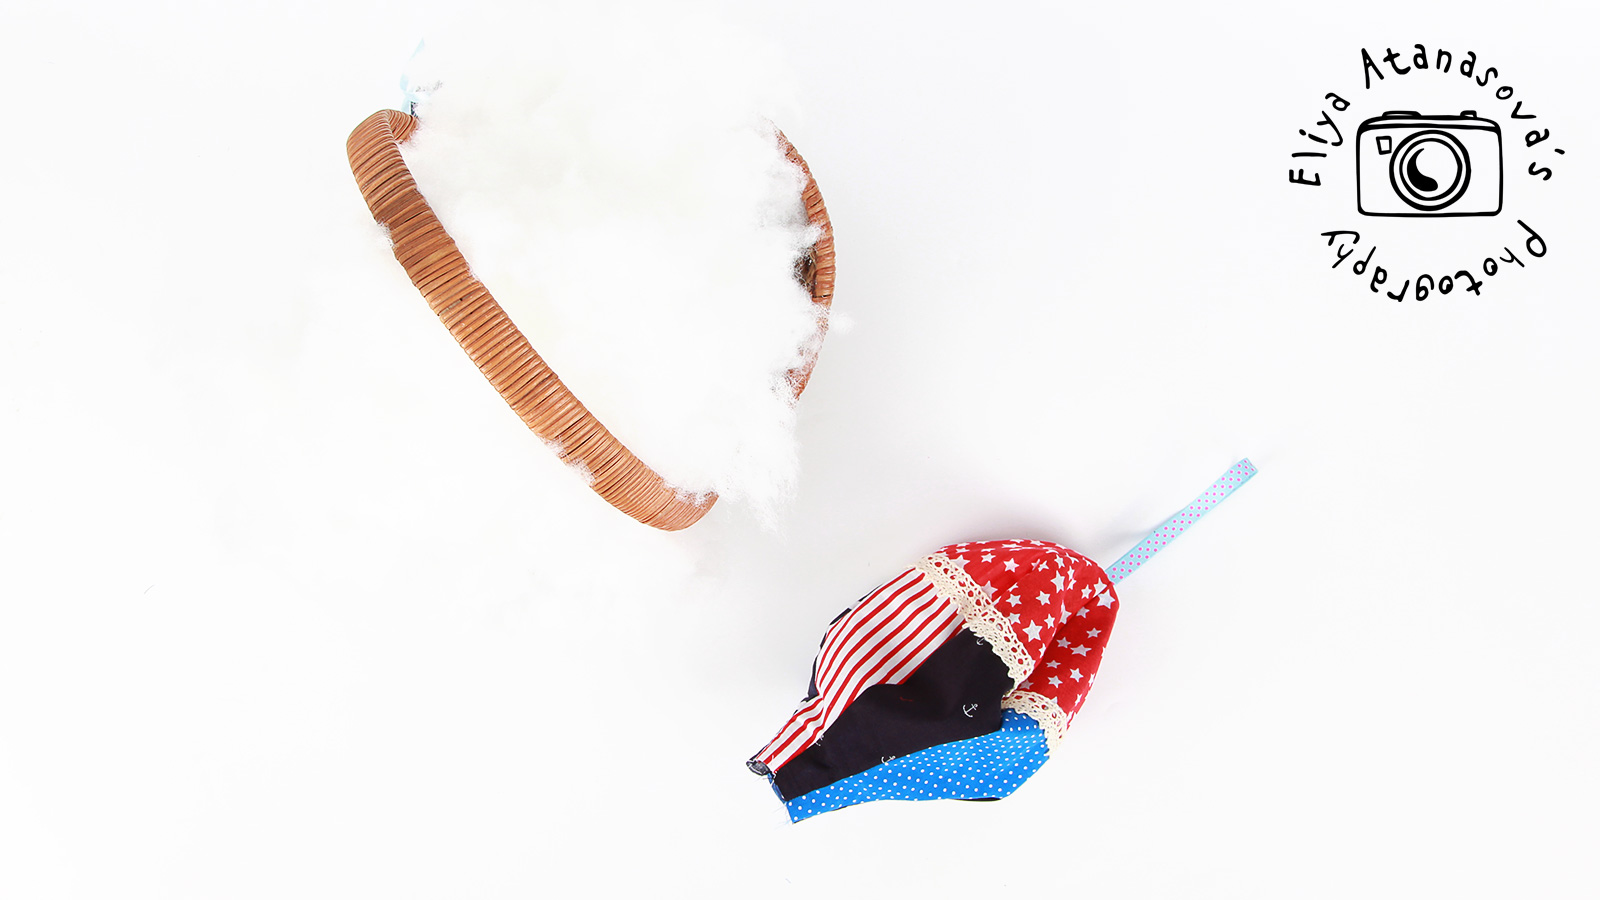
Then bring out the right side of the balloon, the ribbon hook will help. Fill in the balloon with silicon granules or the filling that you have prepared. Then make a rough stitch on the bottom. Finally close the bottom part of the balloon with the felt circle.
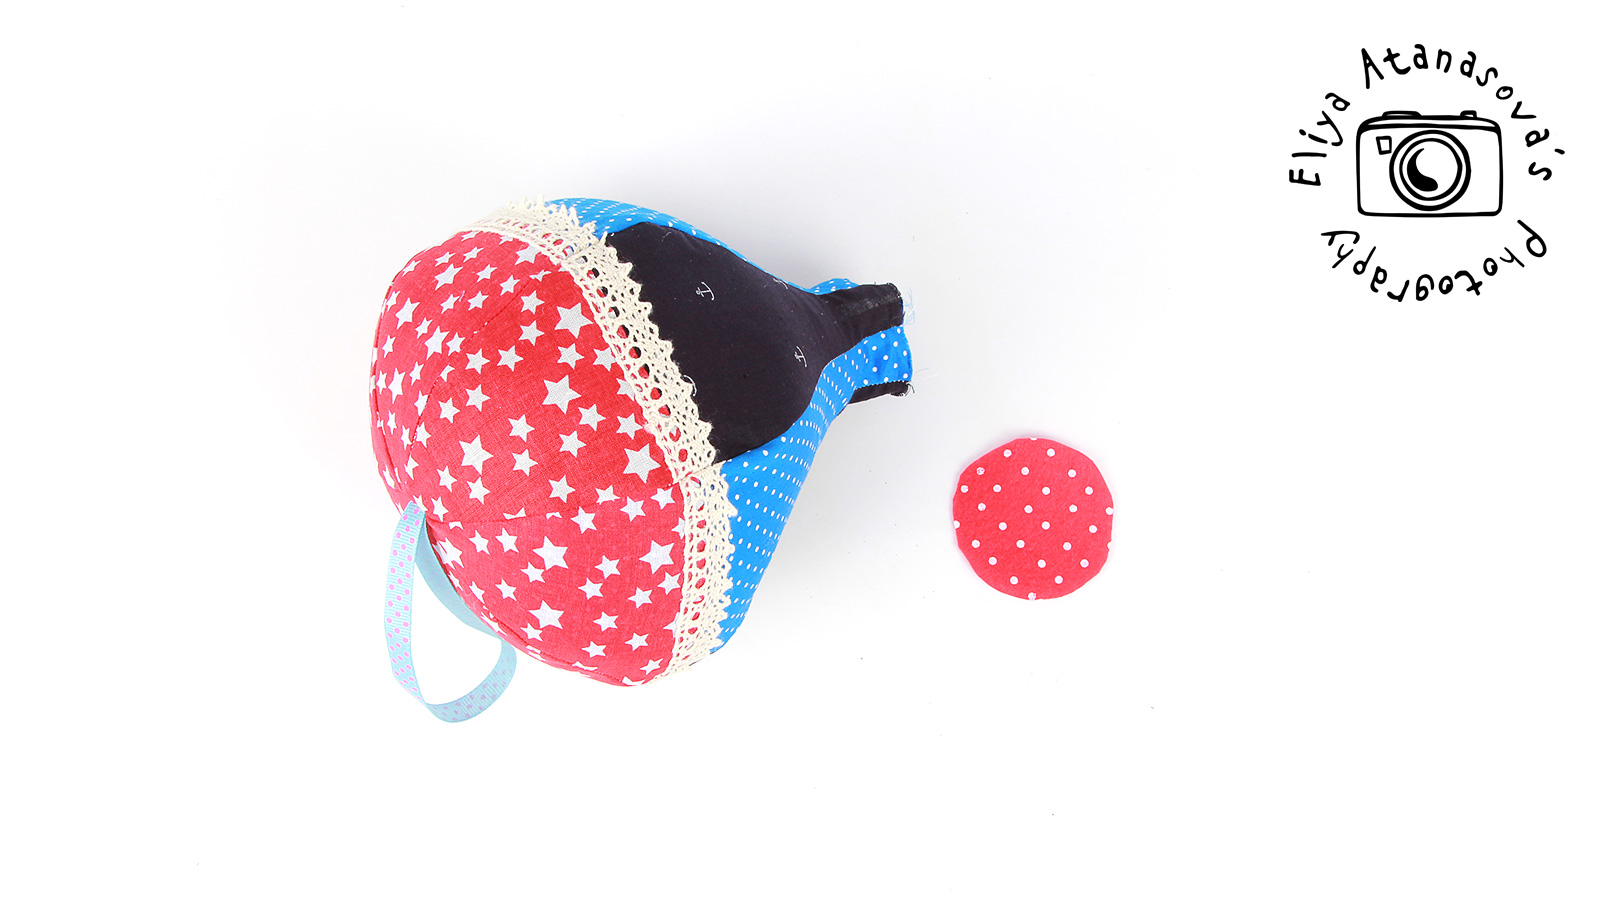
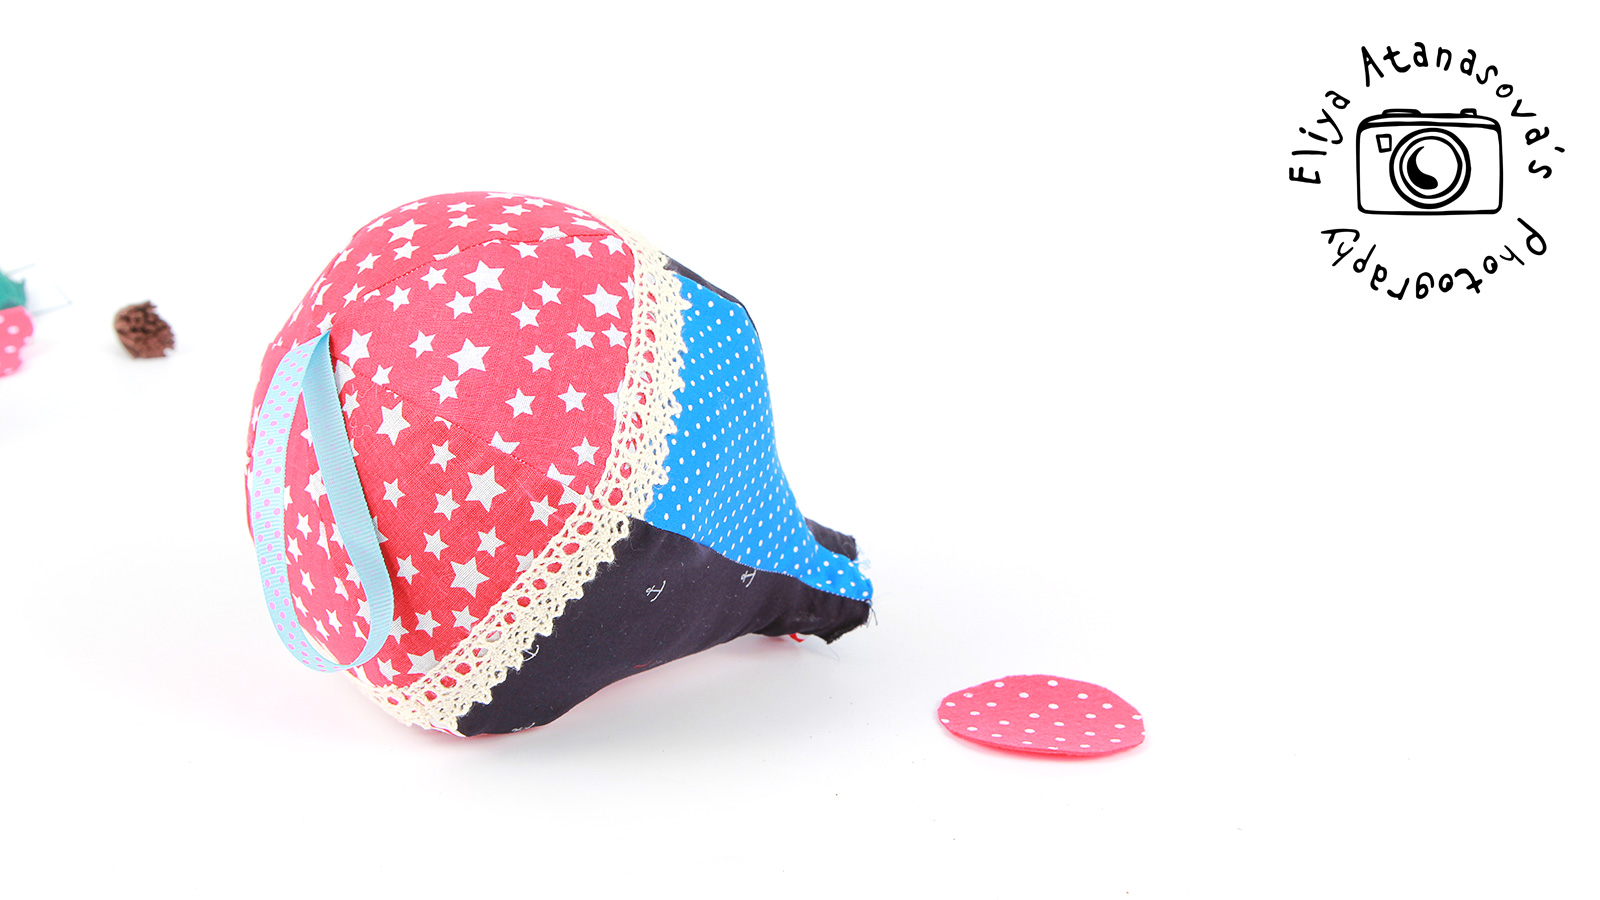

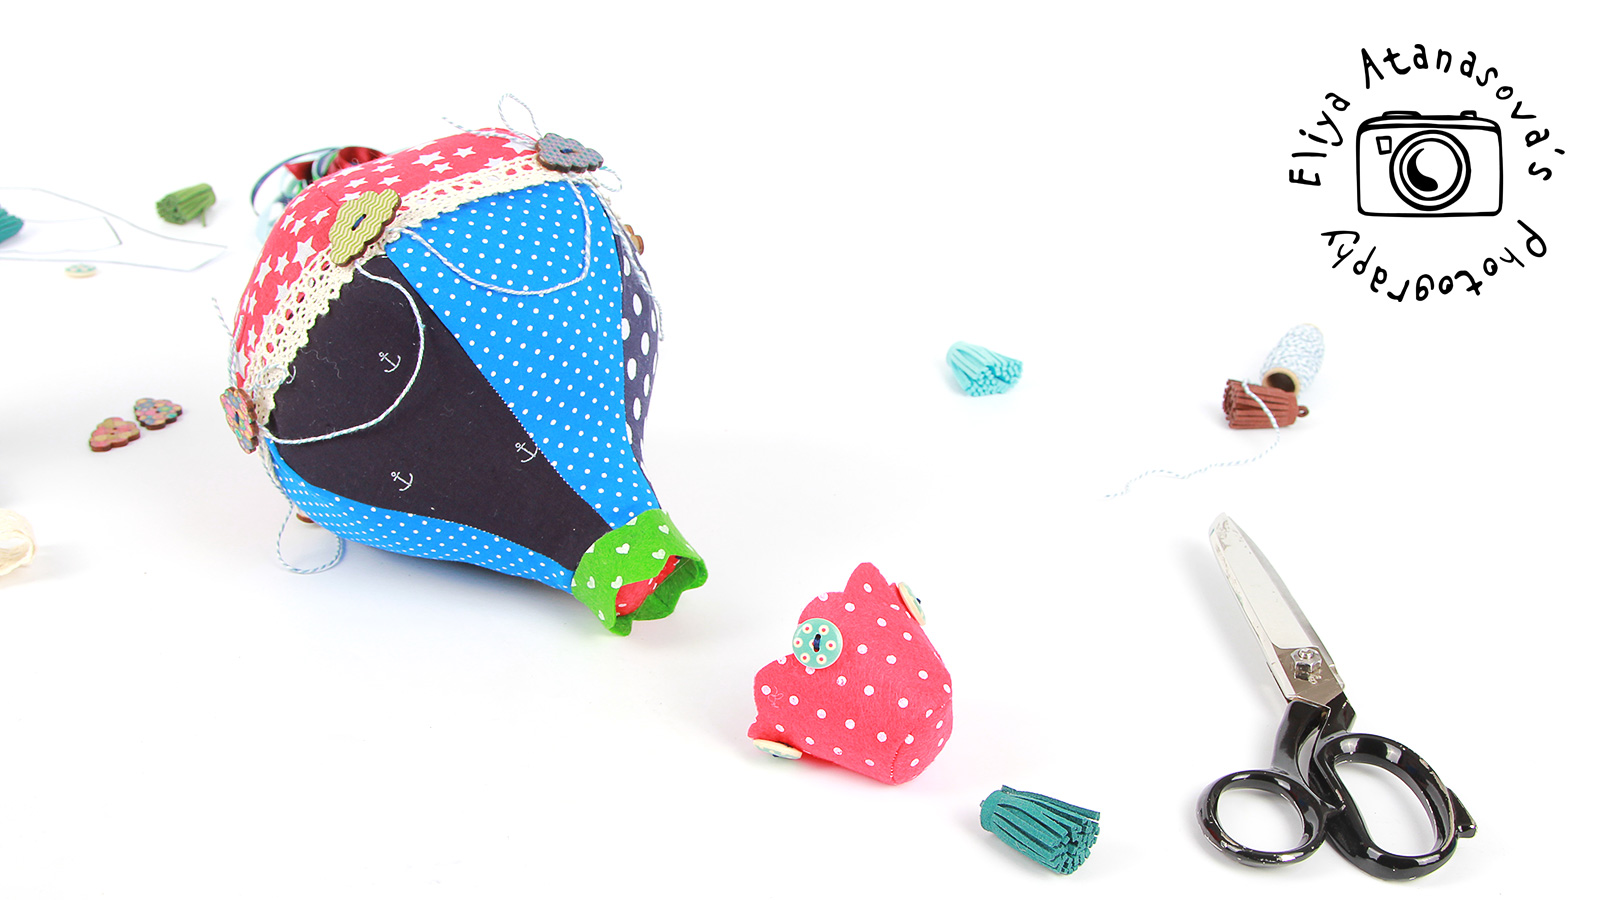
Decorate according to your taste – felt pieces and ribbons, whatever you like.
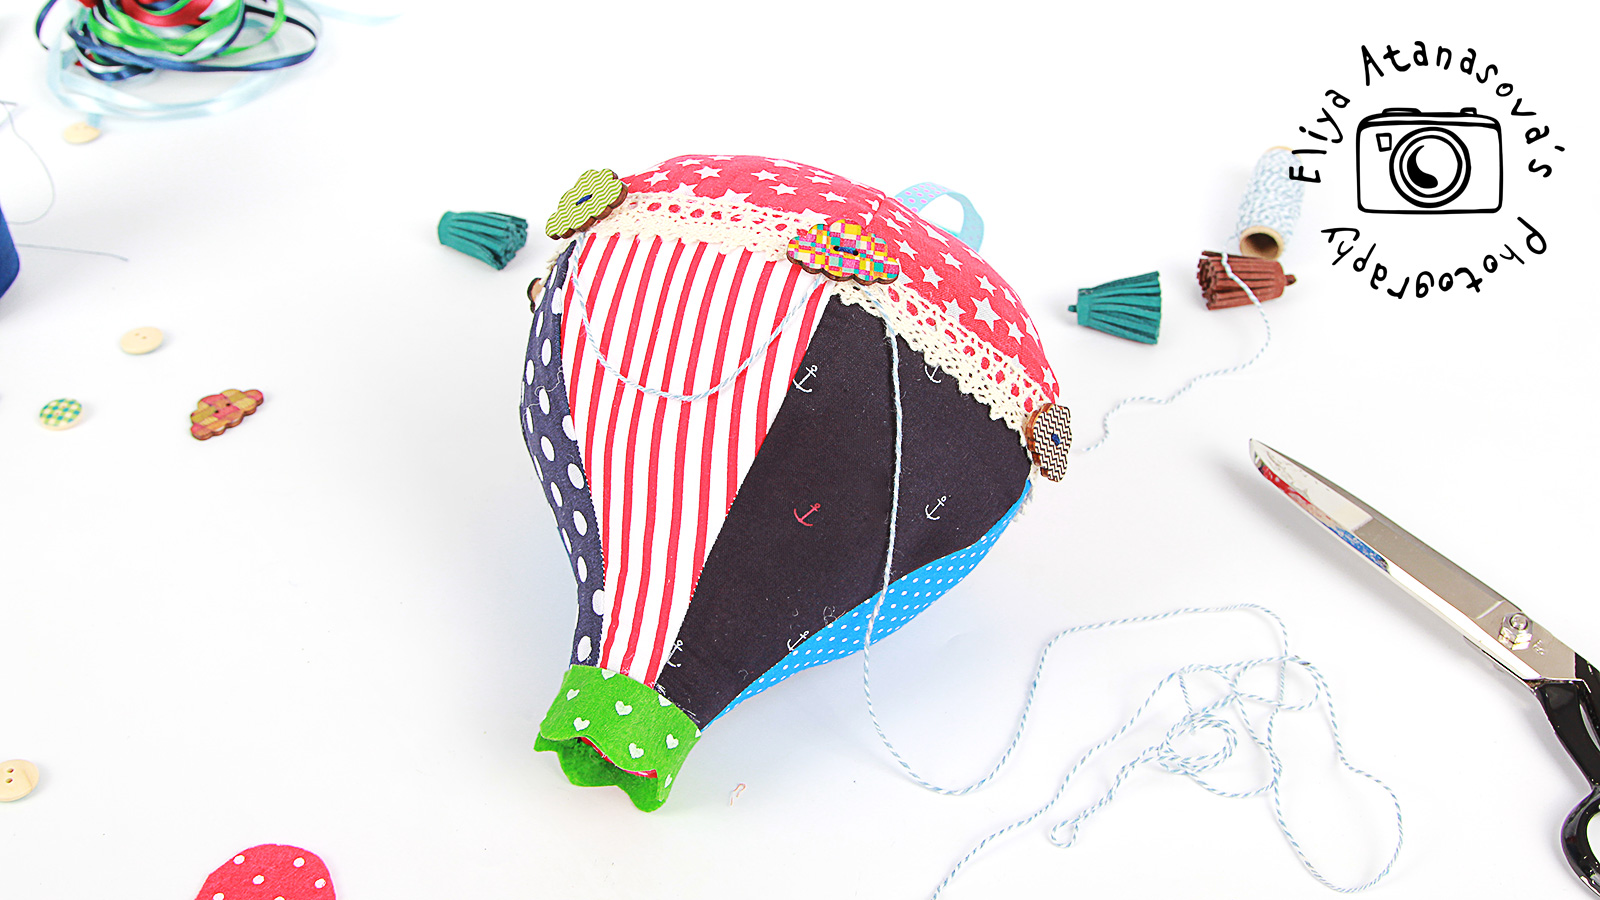
Sew the balloon basket out of the red polka dots felt. I used buttons and decorative rope to attach the basket to the balloon.
And voila!
Then find a place for your balloon 🙂
I hope you like it!