I found the pictures for this tutorial recently. It was shot long ago 🙂
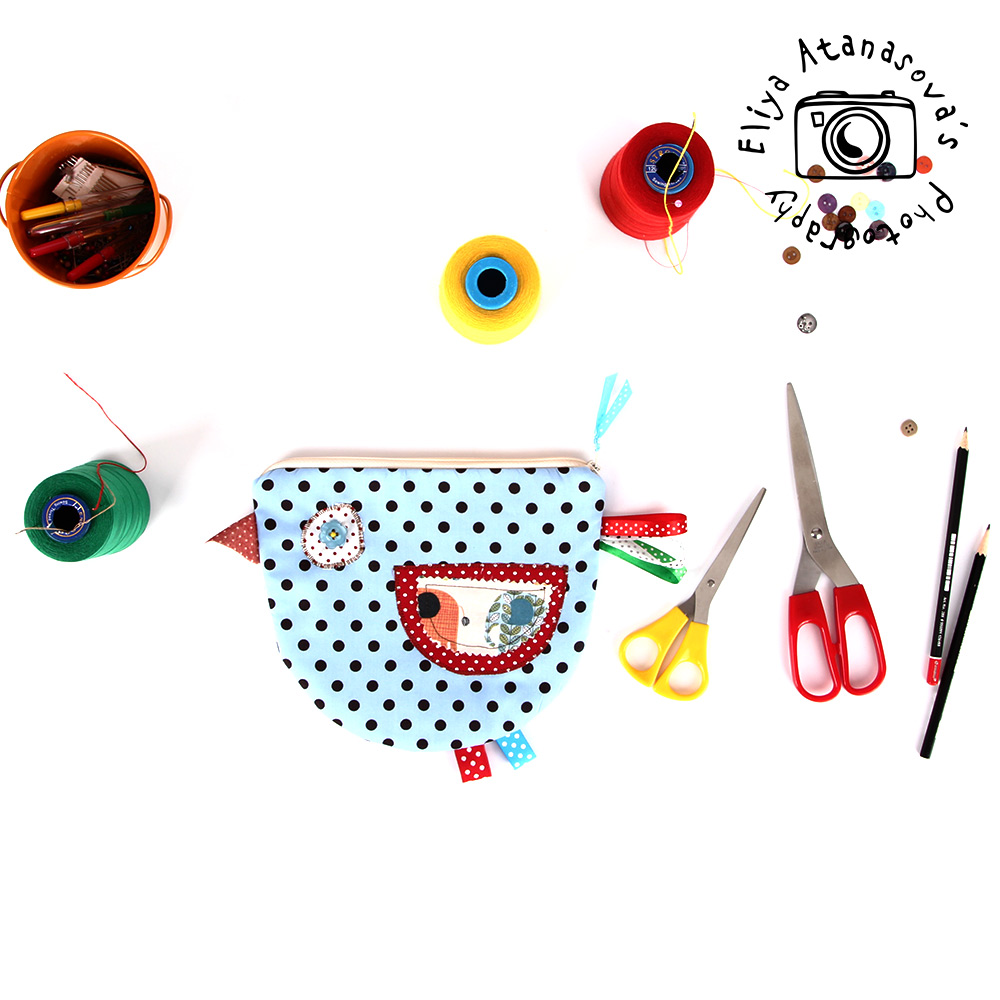
The final width ready case is about 20 cm 🙂
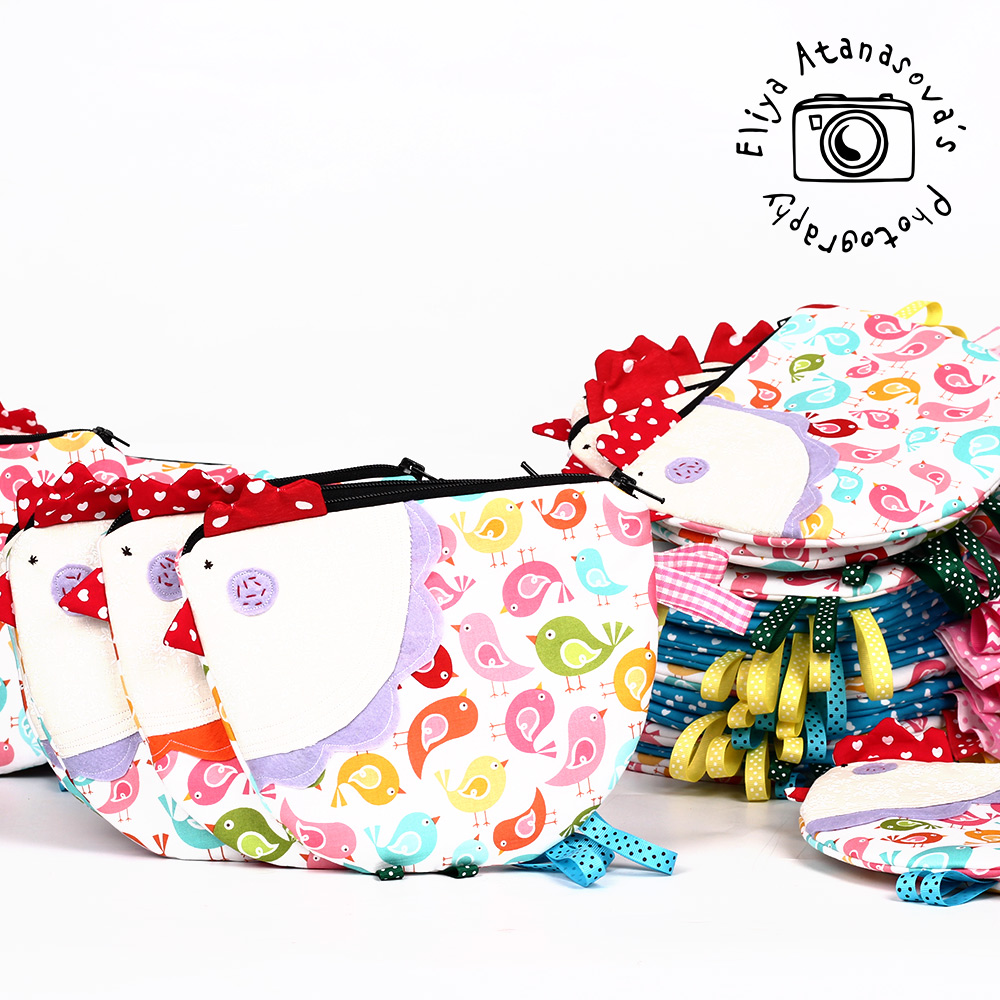
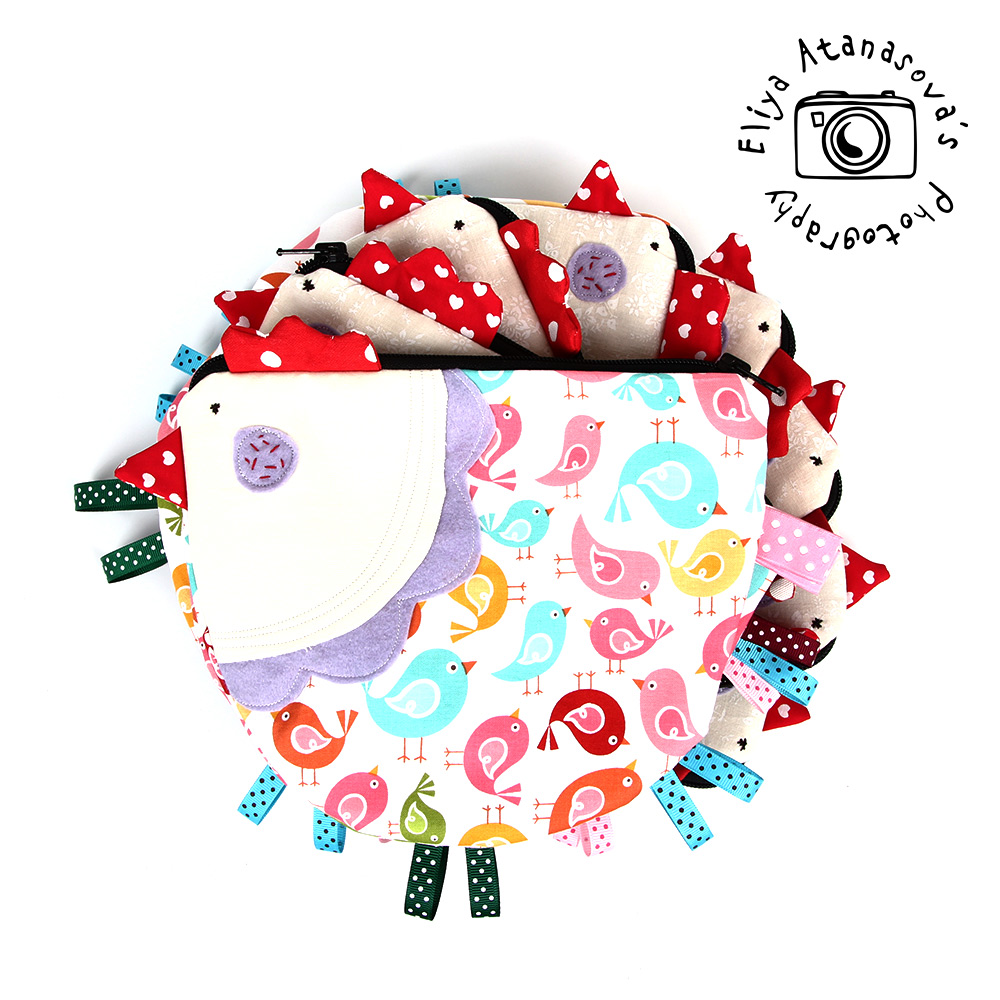
Here is how the ready bird shaped case looks like:
And below you can find how to make yours, step-by-step:
Necessary materials:
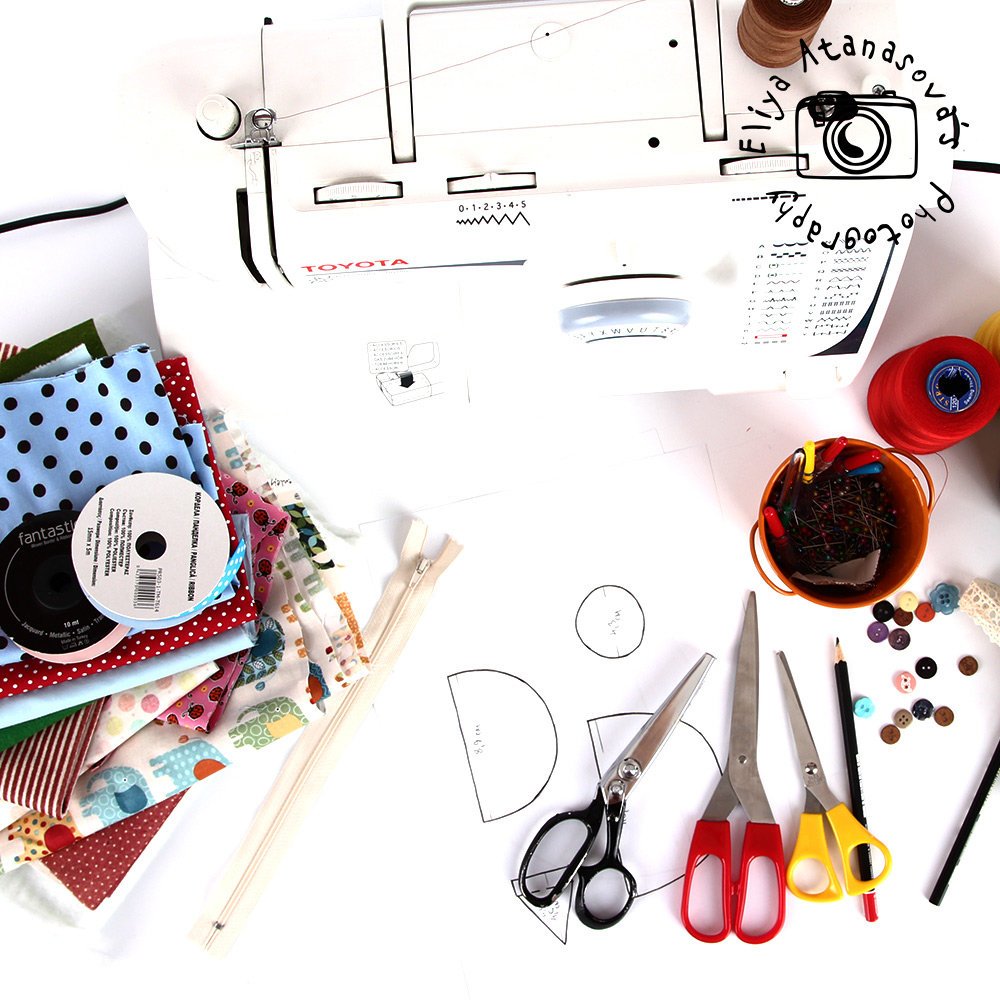
– Fabric, preferably cotton, in bright colors and patterns, you will need fabric for the outer part of the case, for the inner part and the other elements (i.e. bird wings).
– Batting
– Ribbons, laces and other decorations
– A few centimeters of felt, if you would like to use felt for the bird decoration
– Zipper – around 25 cm or longer (we will cut after sewing if necessary)
– Sewing machine (you can do it with needle and thread but will take much longer)
– Scissors and pins
– Buttons for decoration
– Pencil
– Needle and thread for sewing the decorative elements
– Printed pattern that you can download from the link below (when you print the pattern, please choose “actual size” as printing preference in the printer dialog window and then make sure that the test squares are 1 cm and 1 inch respectively).
DOWNLOAD THE PATTERN HERE
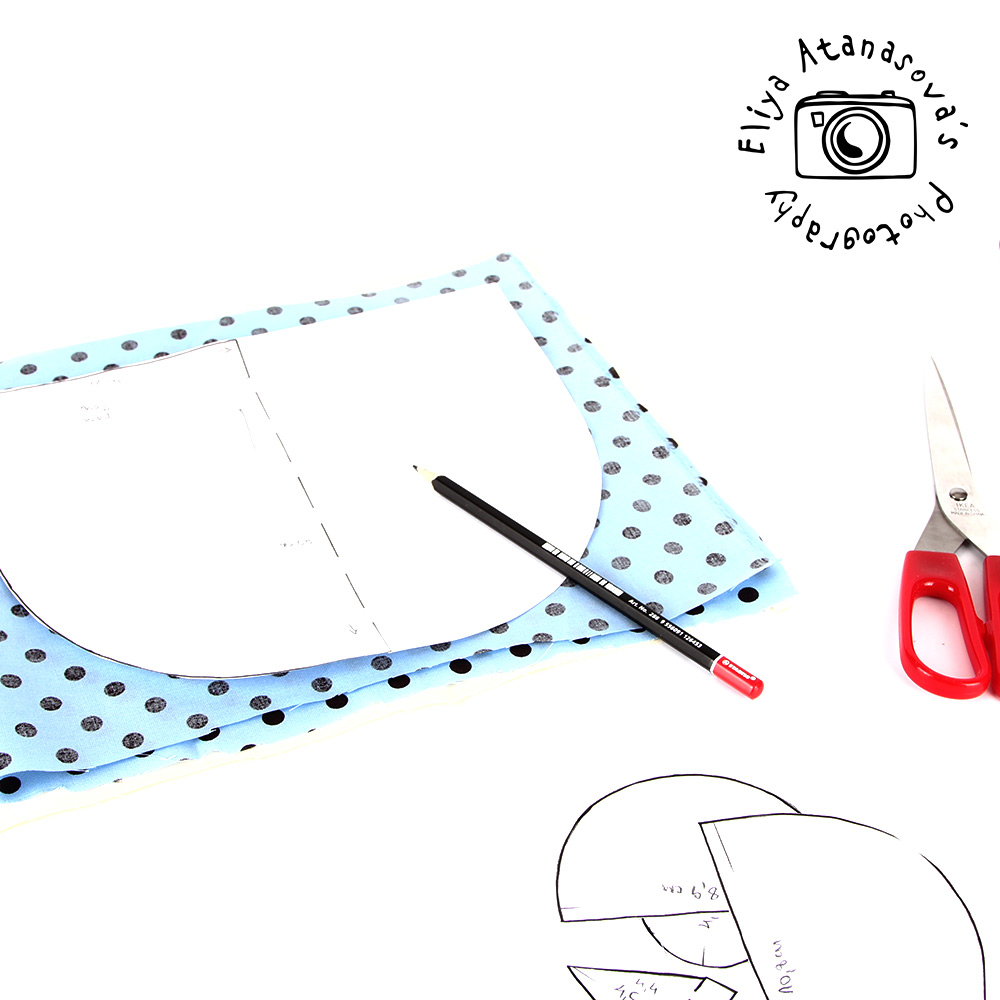
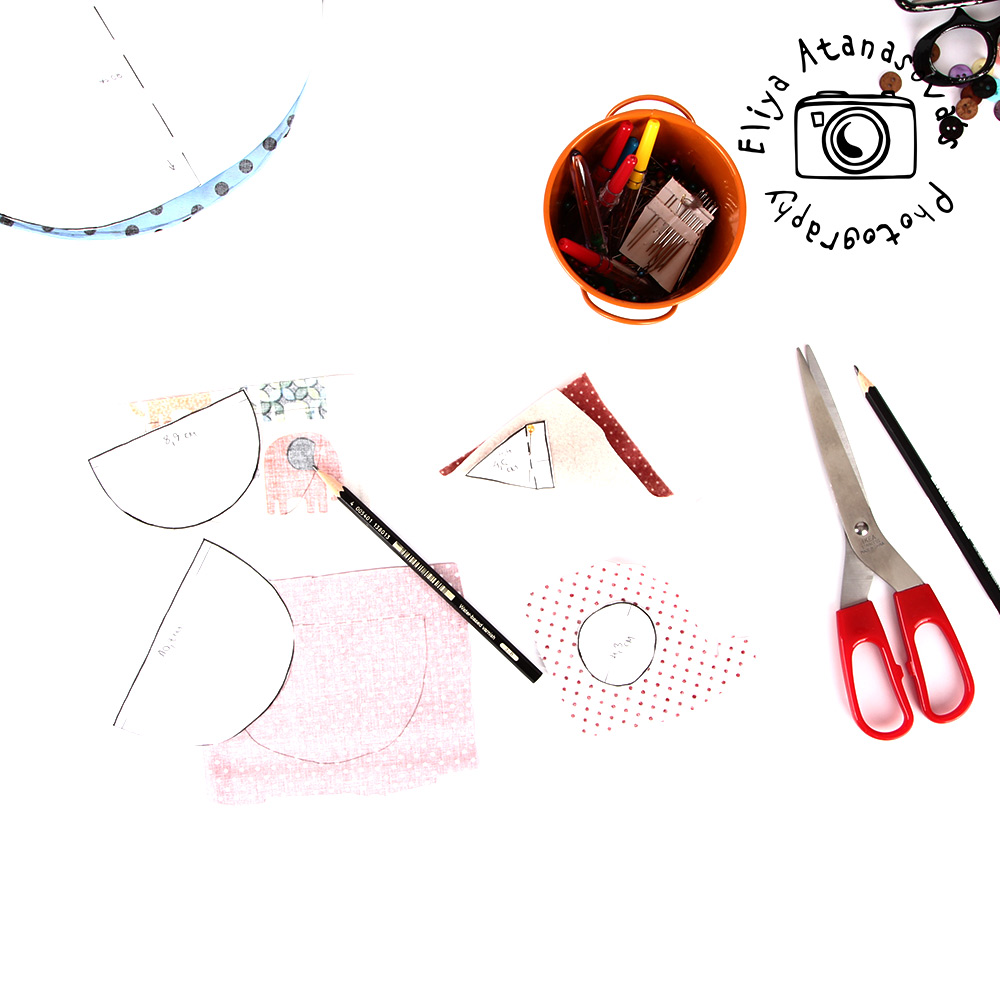
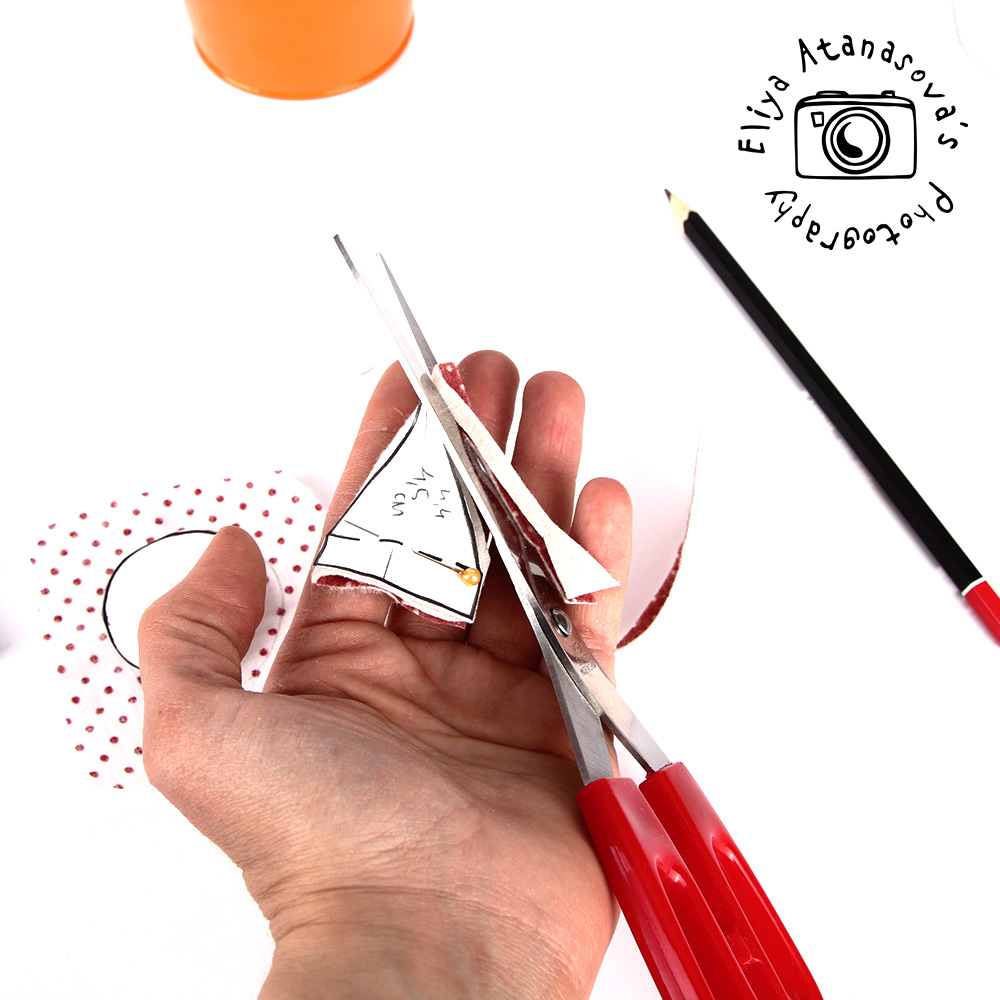
1. Print the pattern pieces. The pieces are in actual size, this is why some pieces are in half. Just print two of the pieces that needs to have a mirror part attached (indicated in the pattern). And cut the necessary number of pieces from each element, as indicated in the pattern:

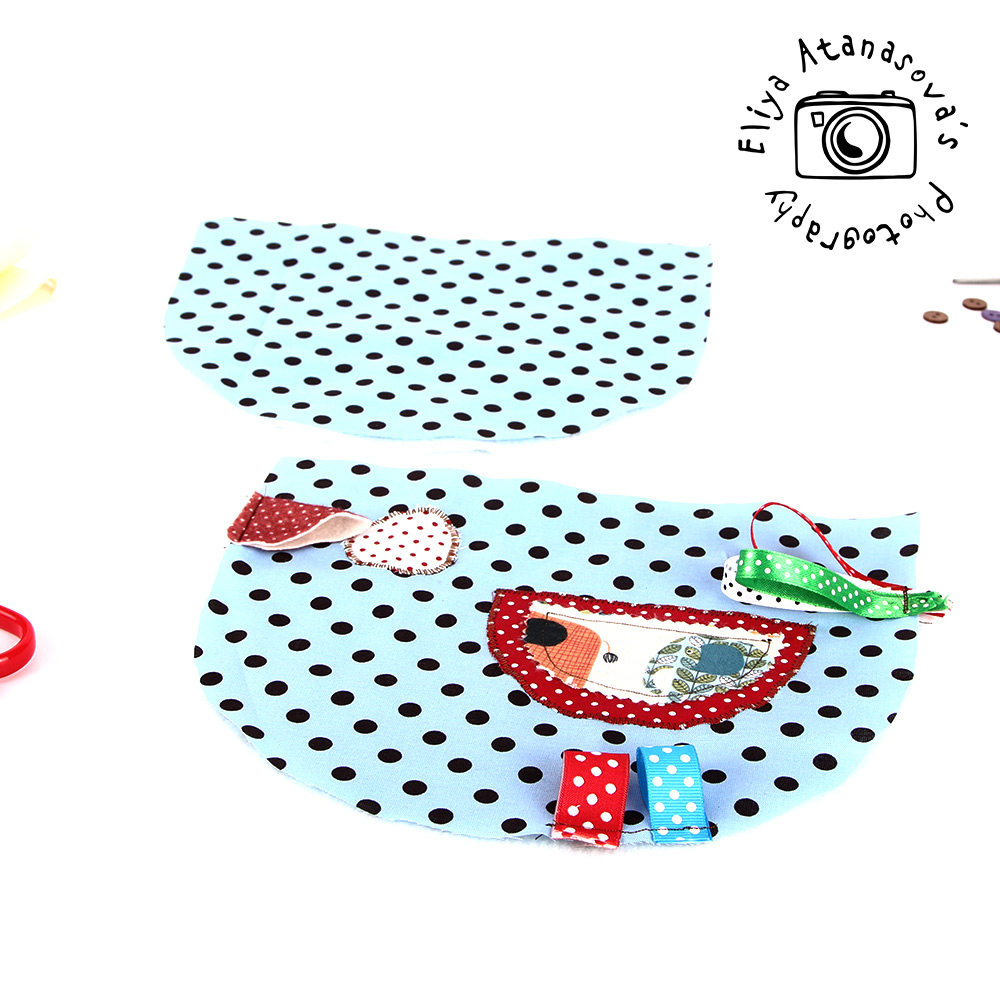
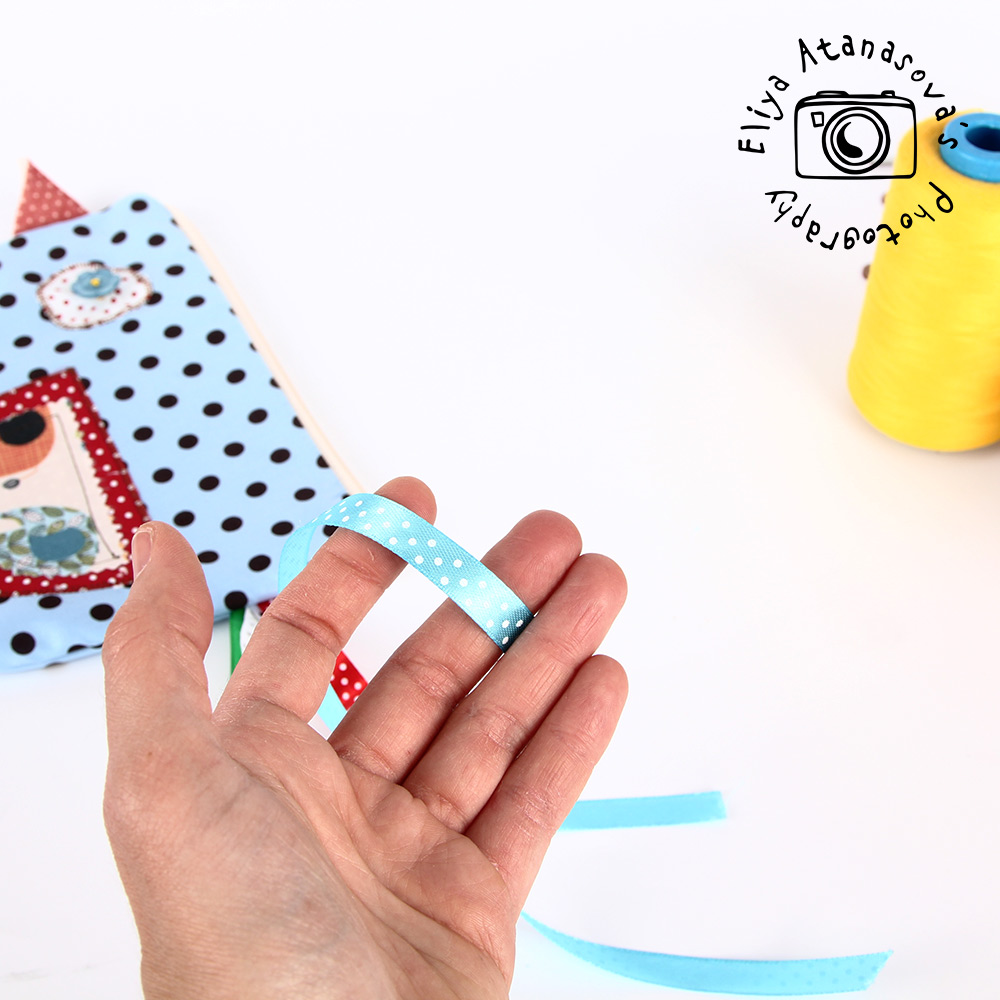
2. Attach the parts for the wing, legs (ribbons for example), beak and other decorative elements with a decorative stitch.

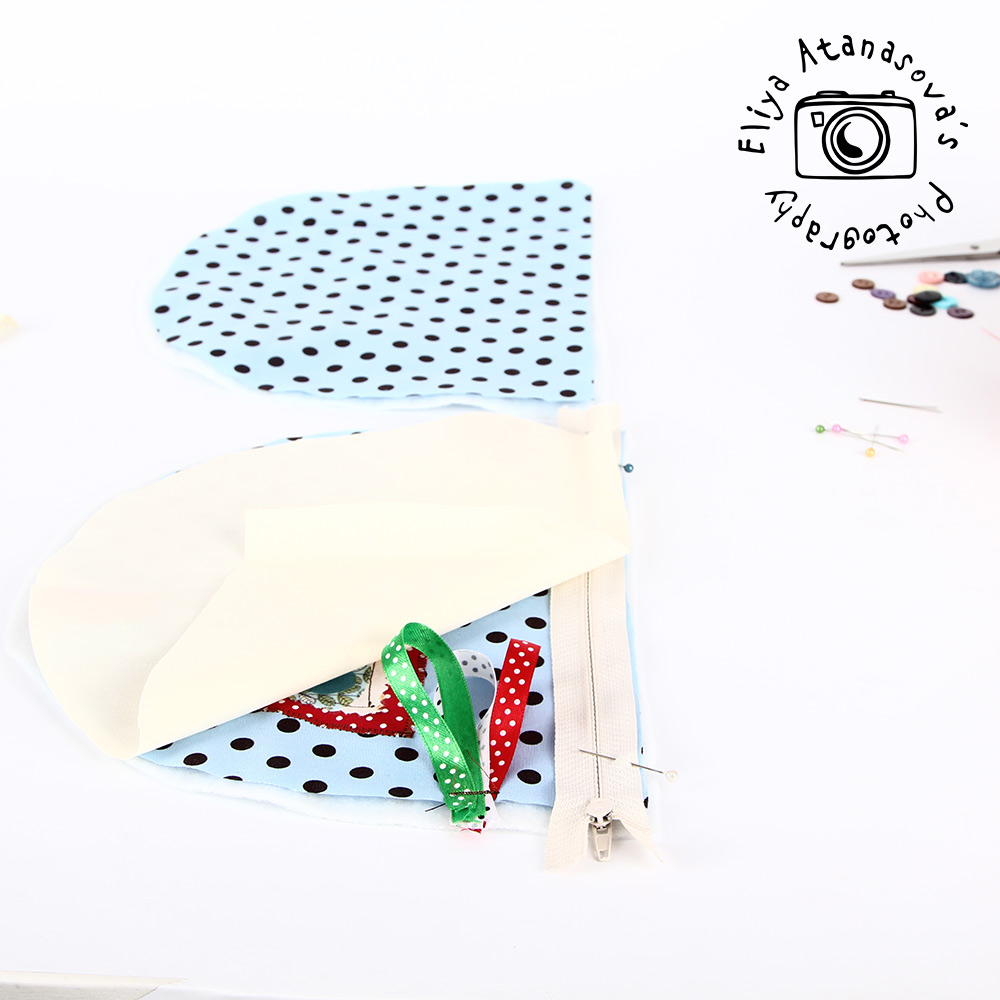
3. Start with the assemble of the case elements. First attach the zipper. The elements should be placed int he following order: batting,
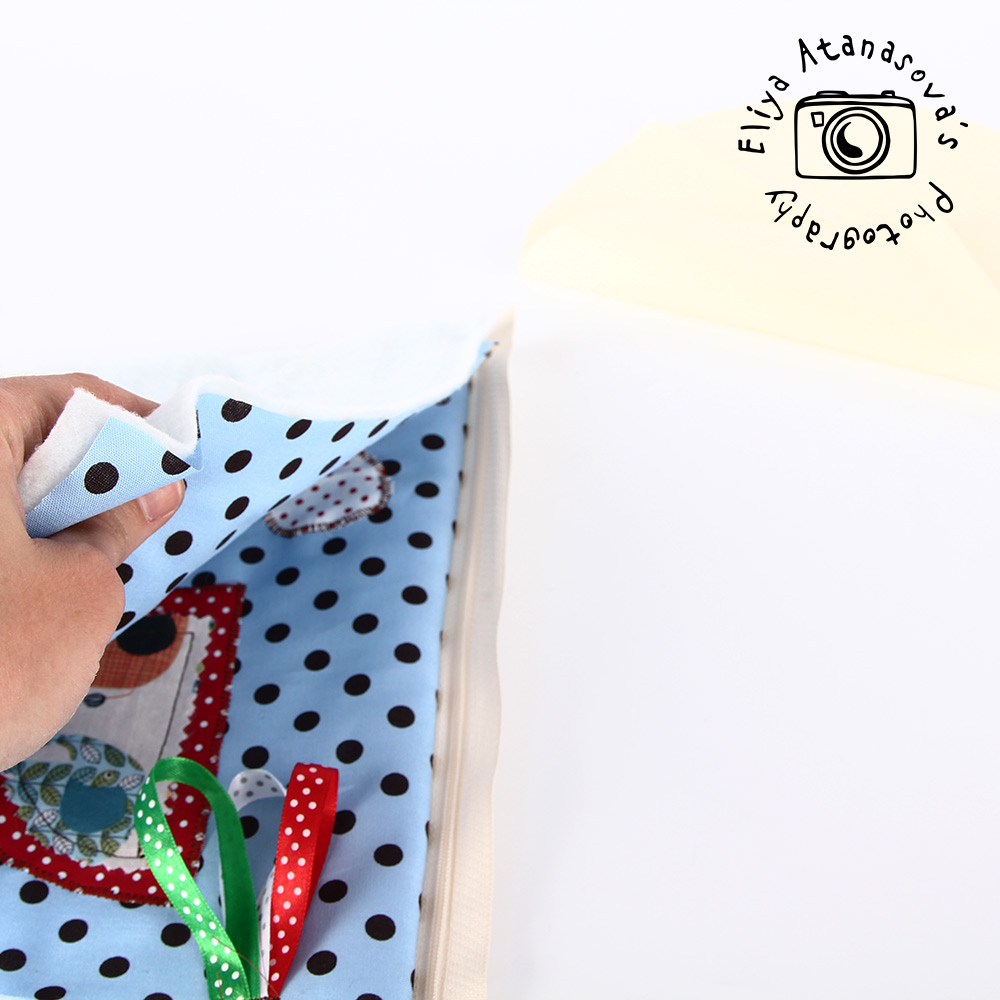
on top of it place the outer part with the right side facing up, on top of it one of the zipper parts, aligned with the top of the bird part and with the zipper right side facing the zipper outer side, on top of it place the inner bird part, with its right side facing the right side of the outer part. This is how I placed the elements:
4. Make a stitch attaching all layers. Here is how the case looks, with one of the zipper parts attached:
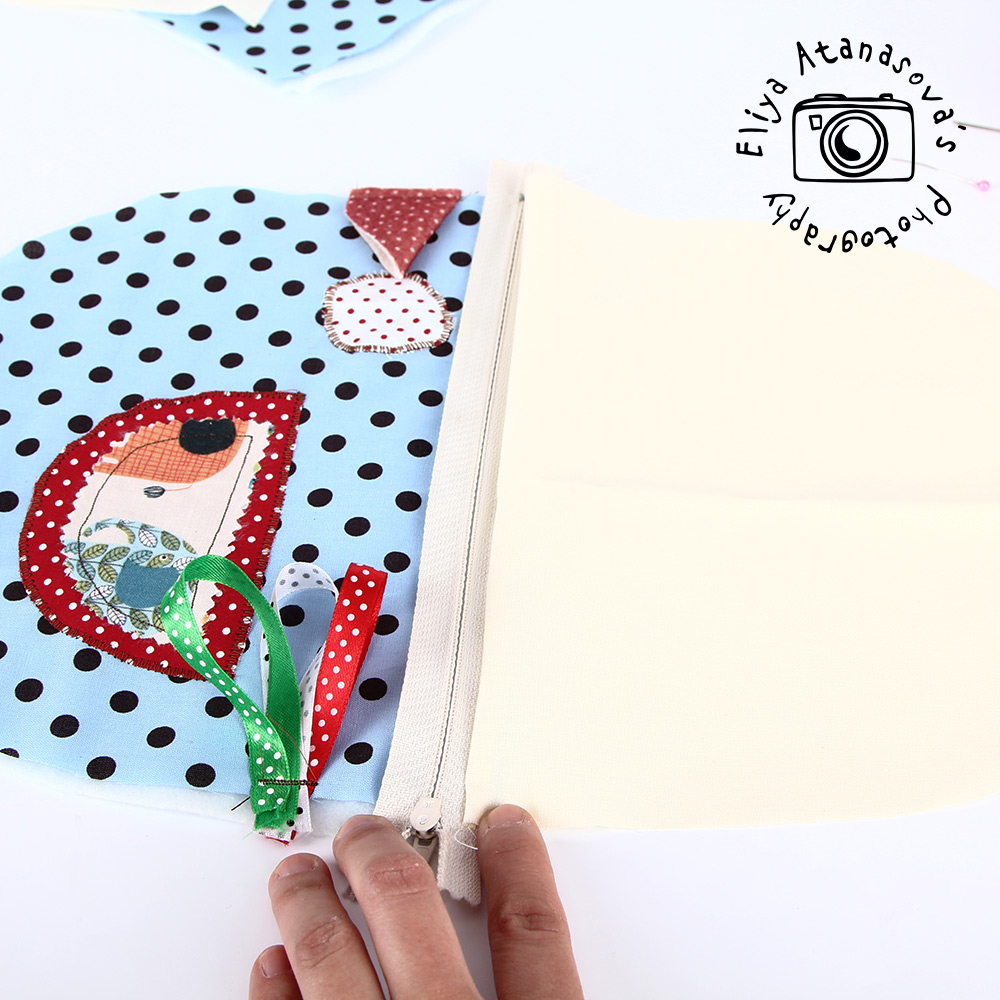
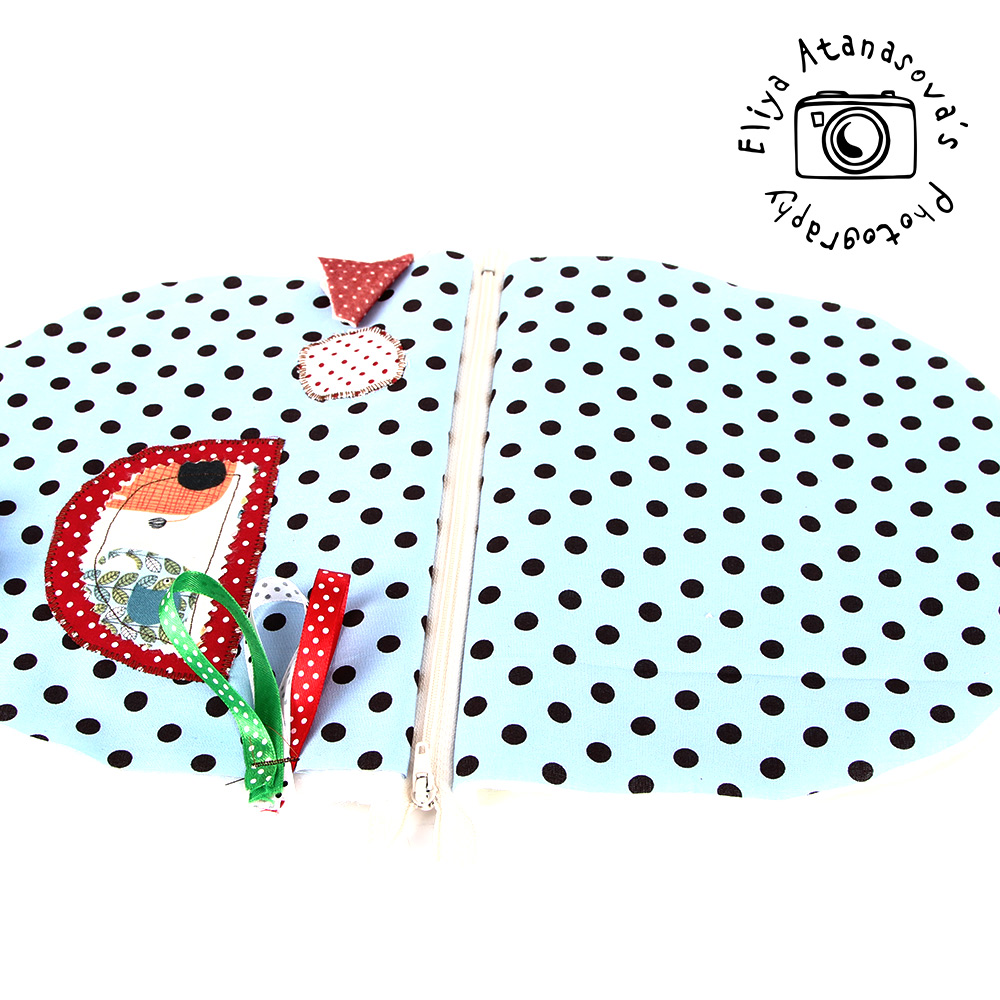
5. Now place the other part of the zipper the same way. Align the elements carefully and sew them together.
Here is how the attached zipper looks like:
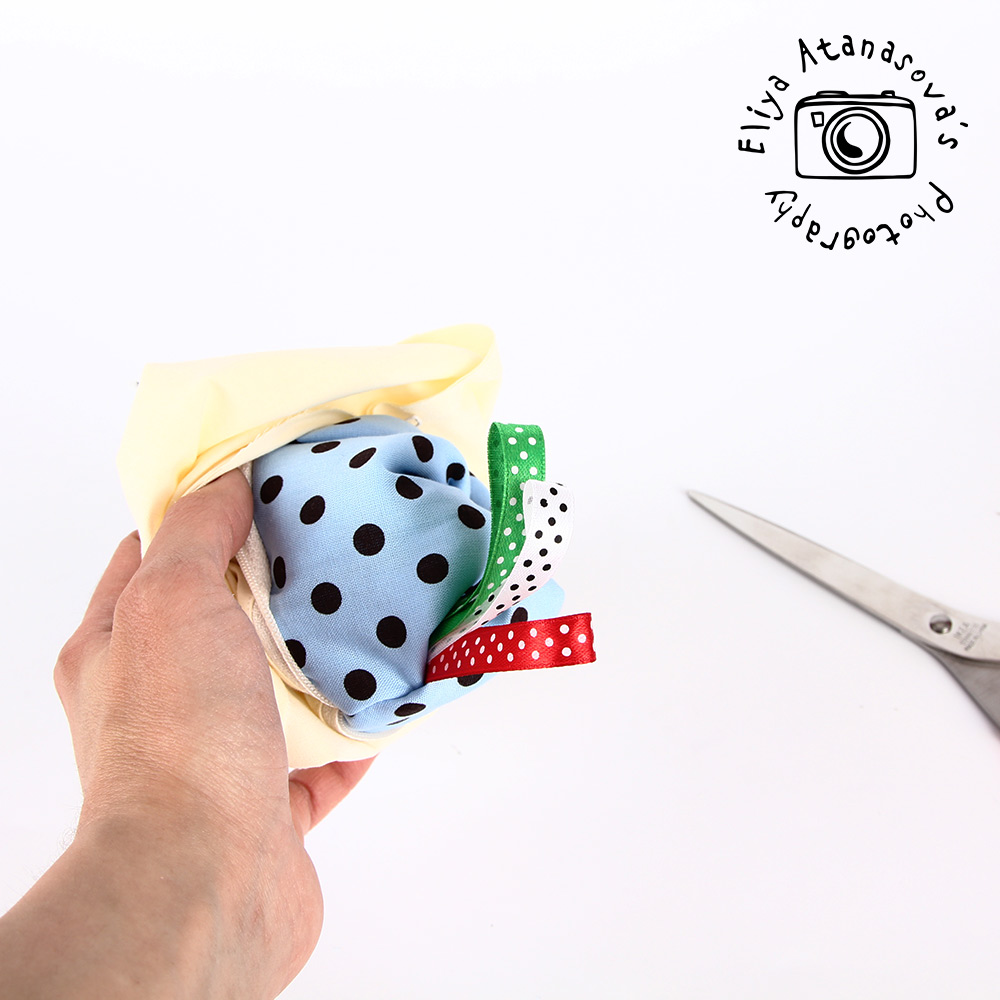
6. Open the zipper in half. Align the inner and the outer part of the zipper and make a stitch along, starting somewhere from the inner part and leave around 1.5″ or around 5 cm opening. You will use it to bring out the right side of the case through it. Cut some excess parts, if the zipper was longer, leaving the necessary sewing allowance, if needed.


7. Bring out the right side of the case through the opening. Close the opening and iron the case.

8. Decorate the case with buttons and whatever you like.

And the bird shaped case is ready :-). It could be easily transformed into girl’s bag 🙂

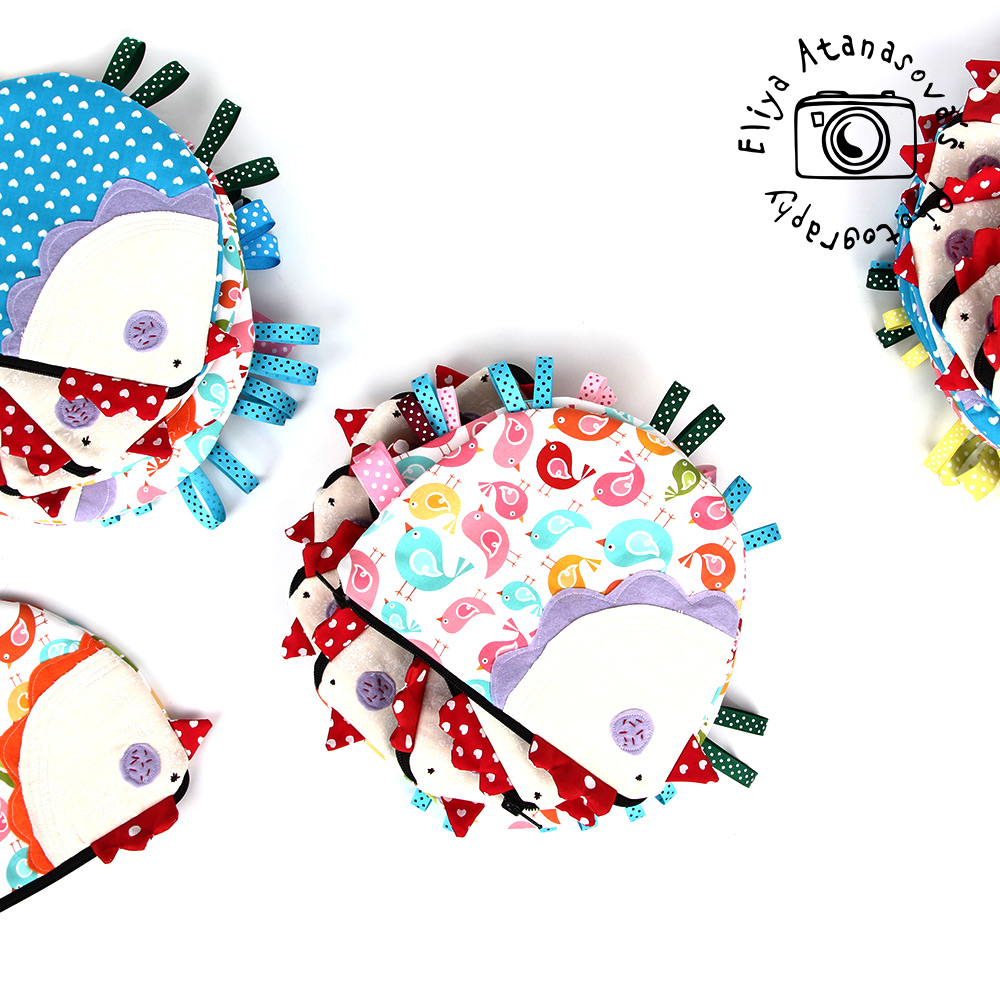
And here it is in some other variations:
I hope you like it 🙂