The textile tulips on the picture below were part of a charity initiative I ran for Mother’s Day.
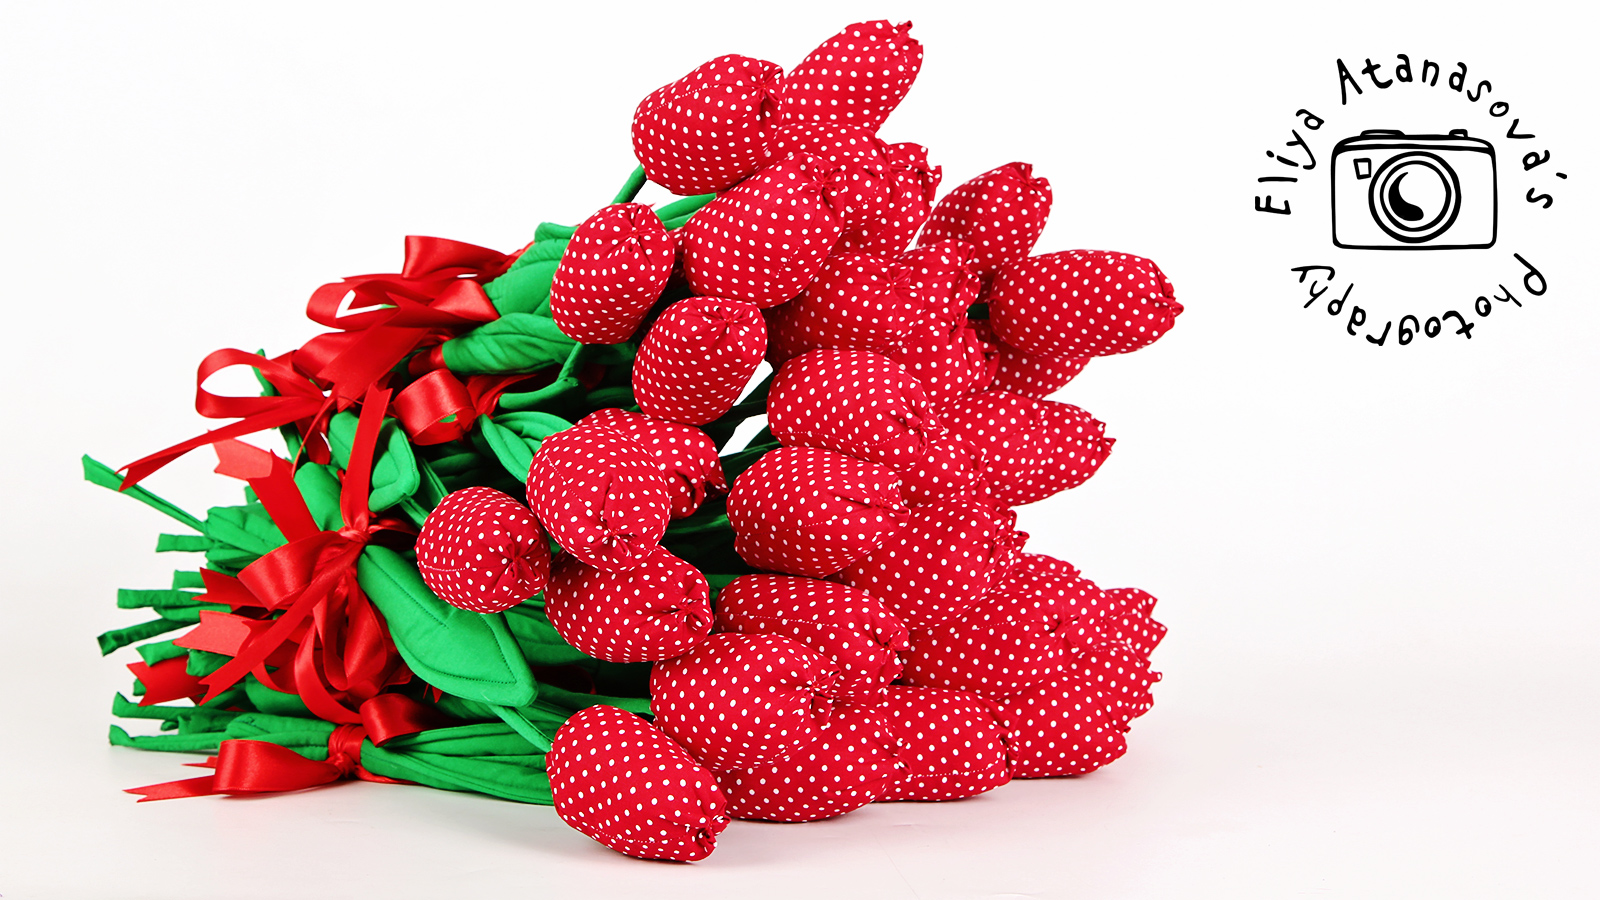
I made the tulips for Mother’s Day as part of a charity project. The proceeds where donated to “For Our Children Foundation” and the foundation’s main cause: family for every child.
And below are Step-By-Step instructions on how to make your own textile flower. I hope you enjoy this tutorial!
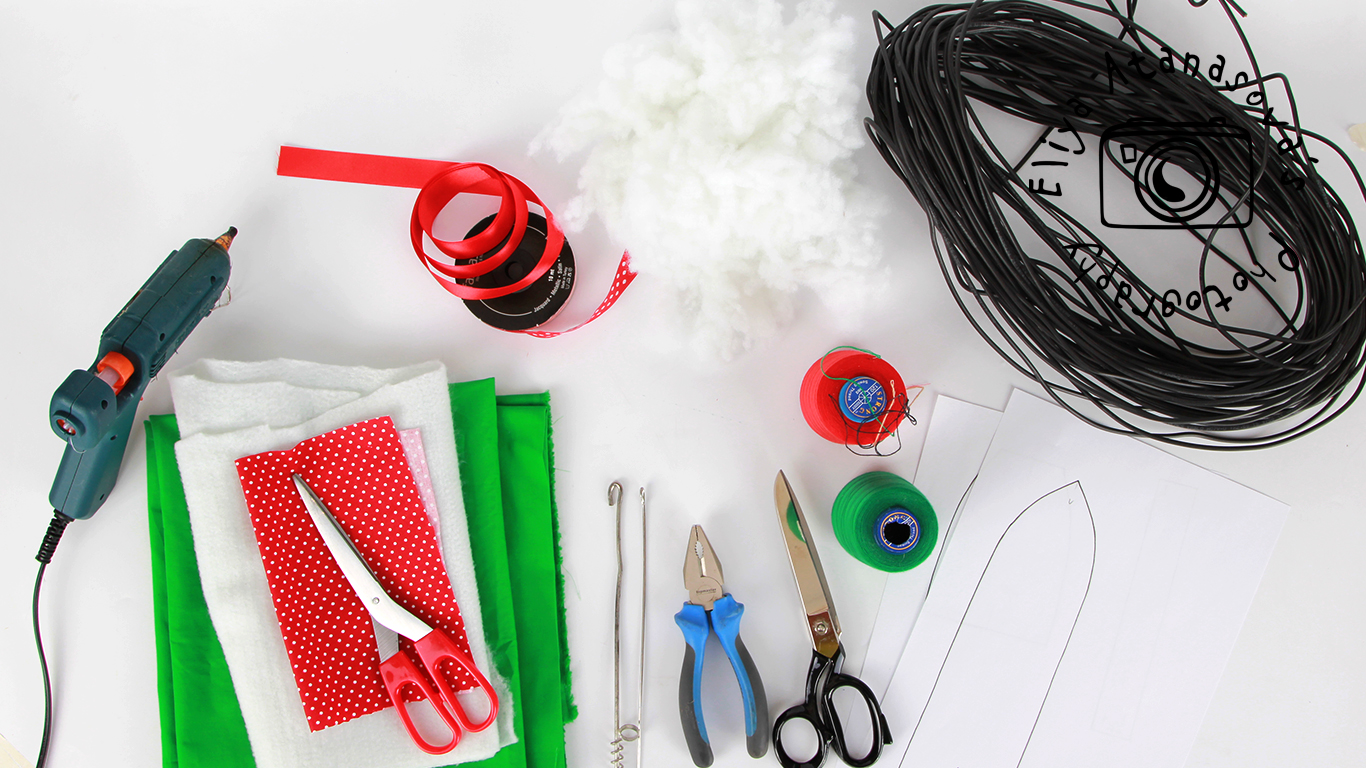
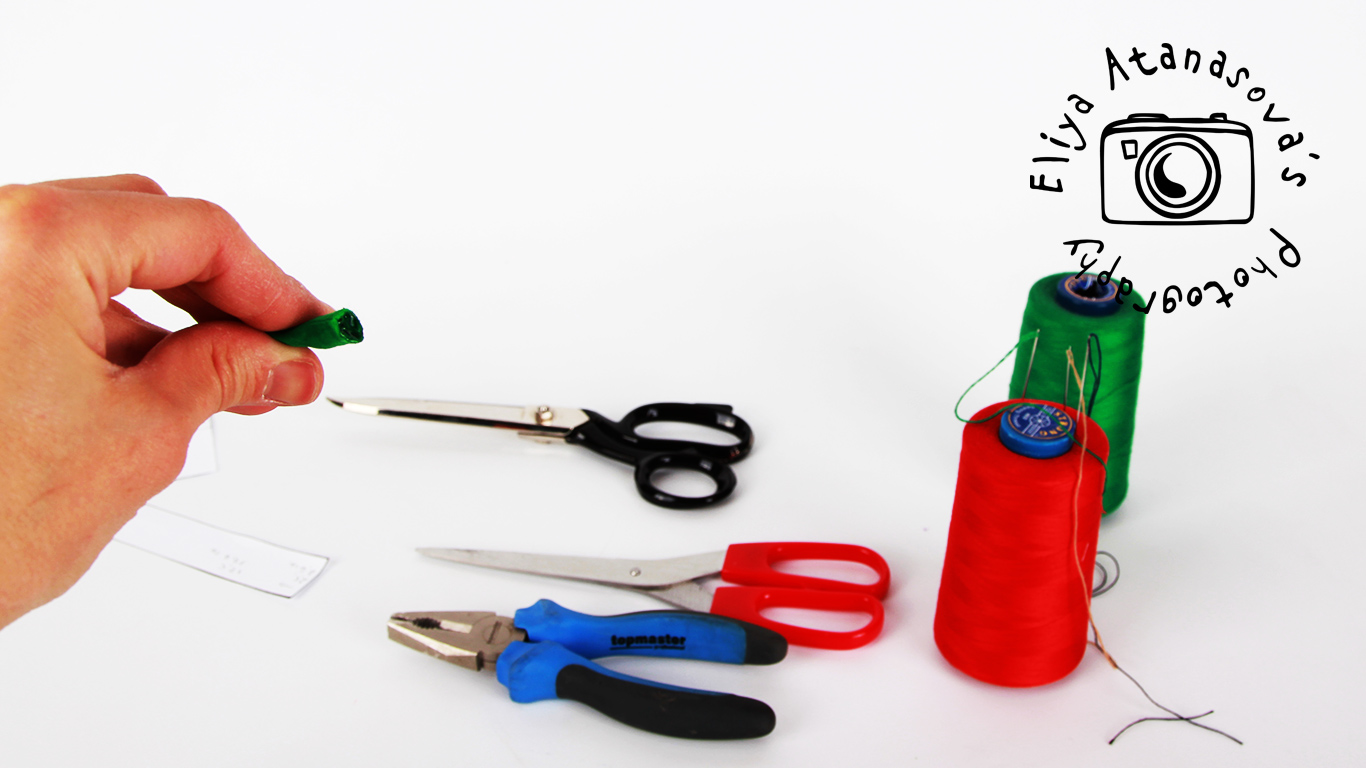
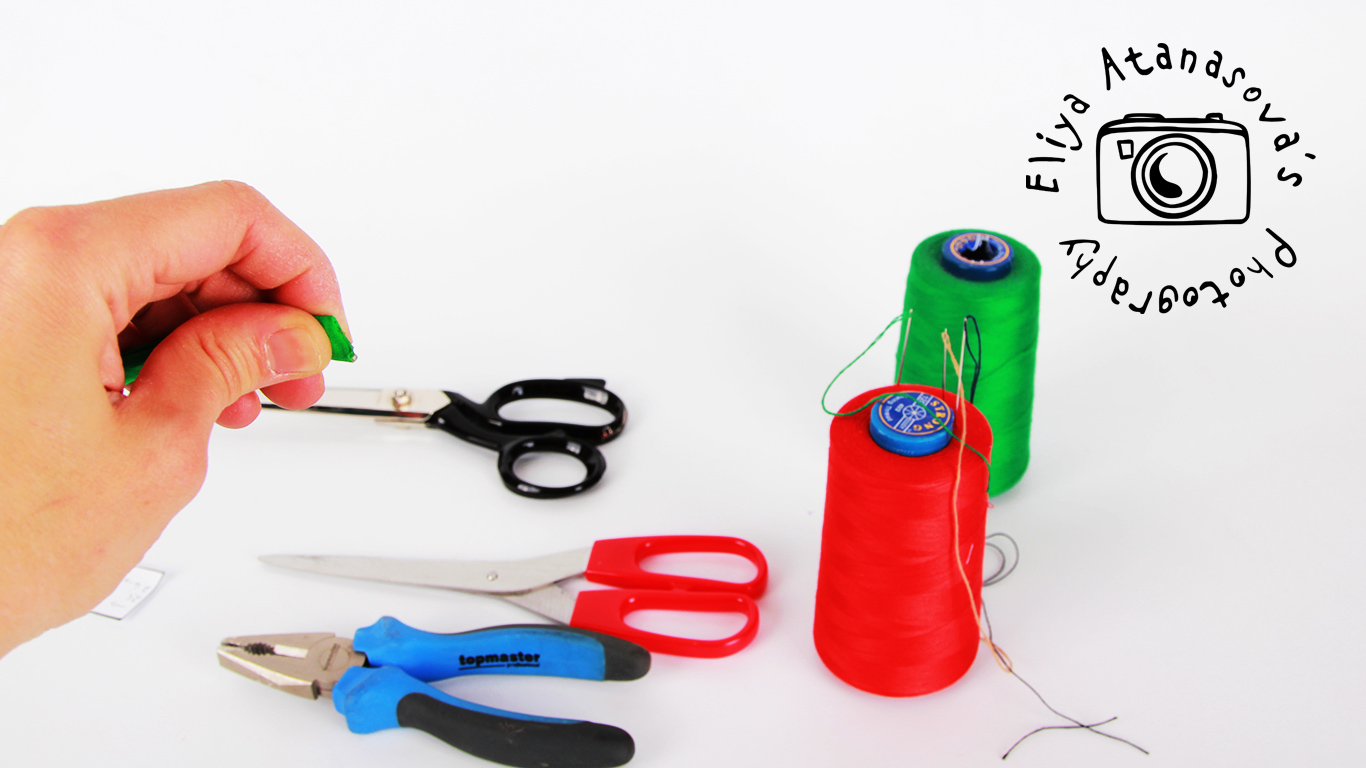
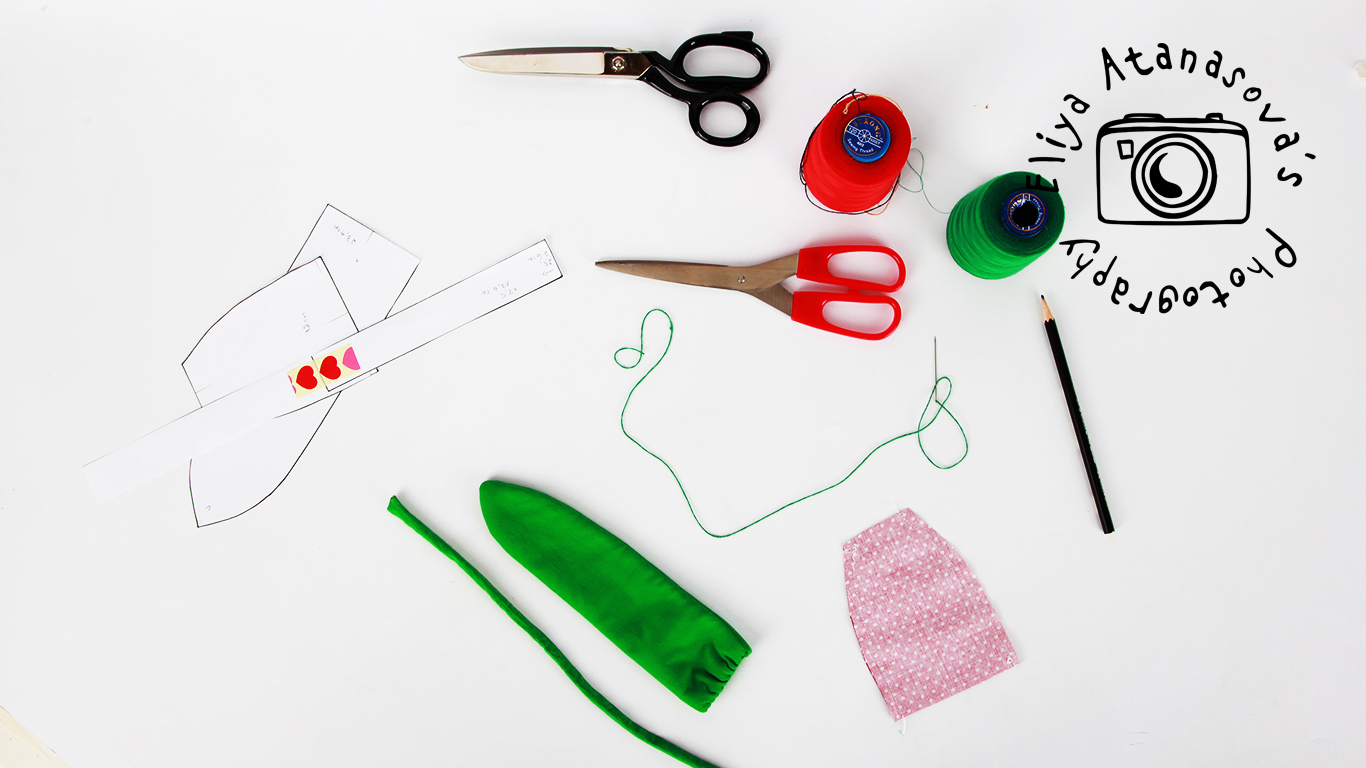
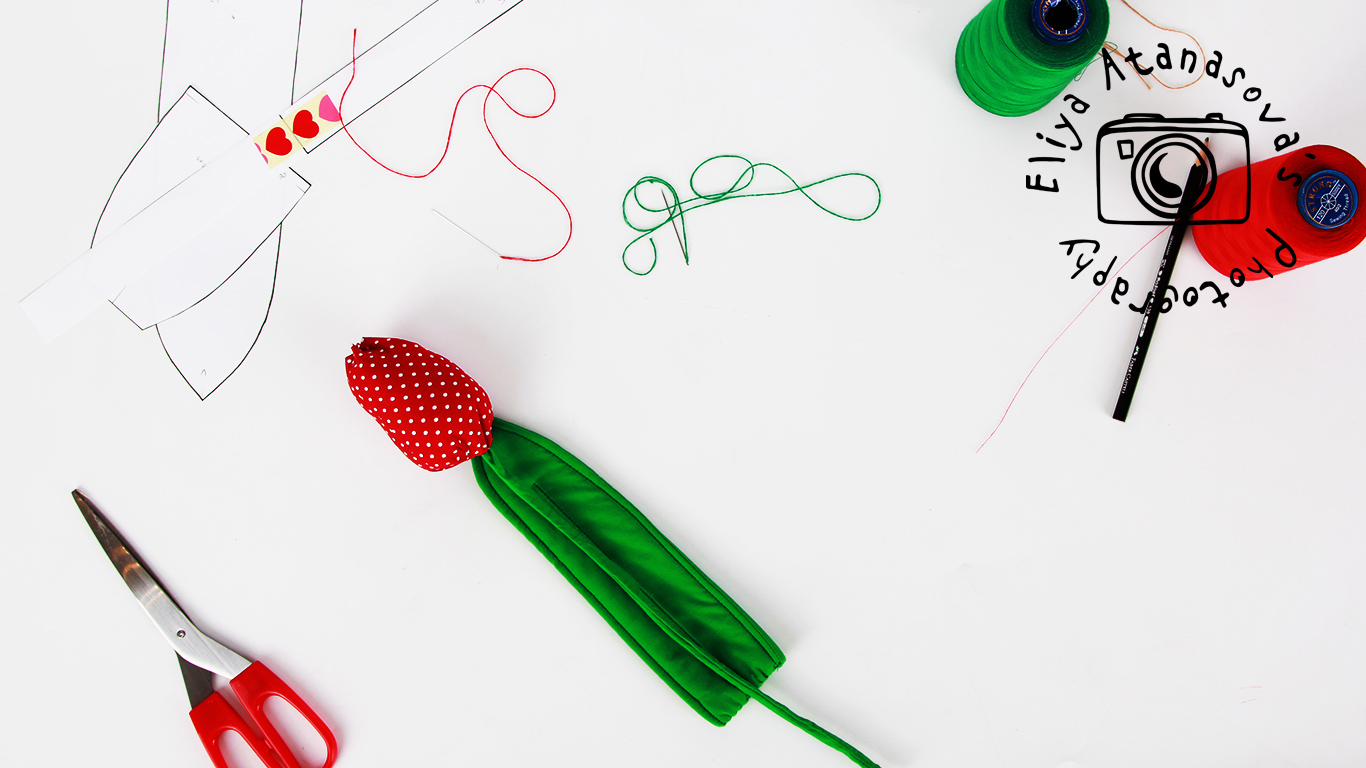
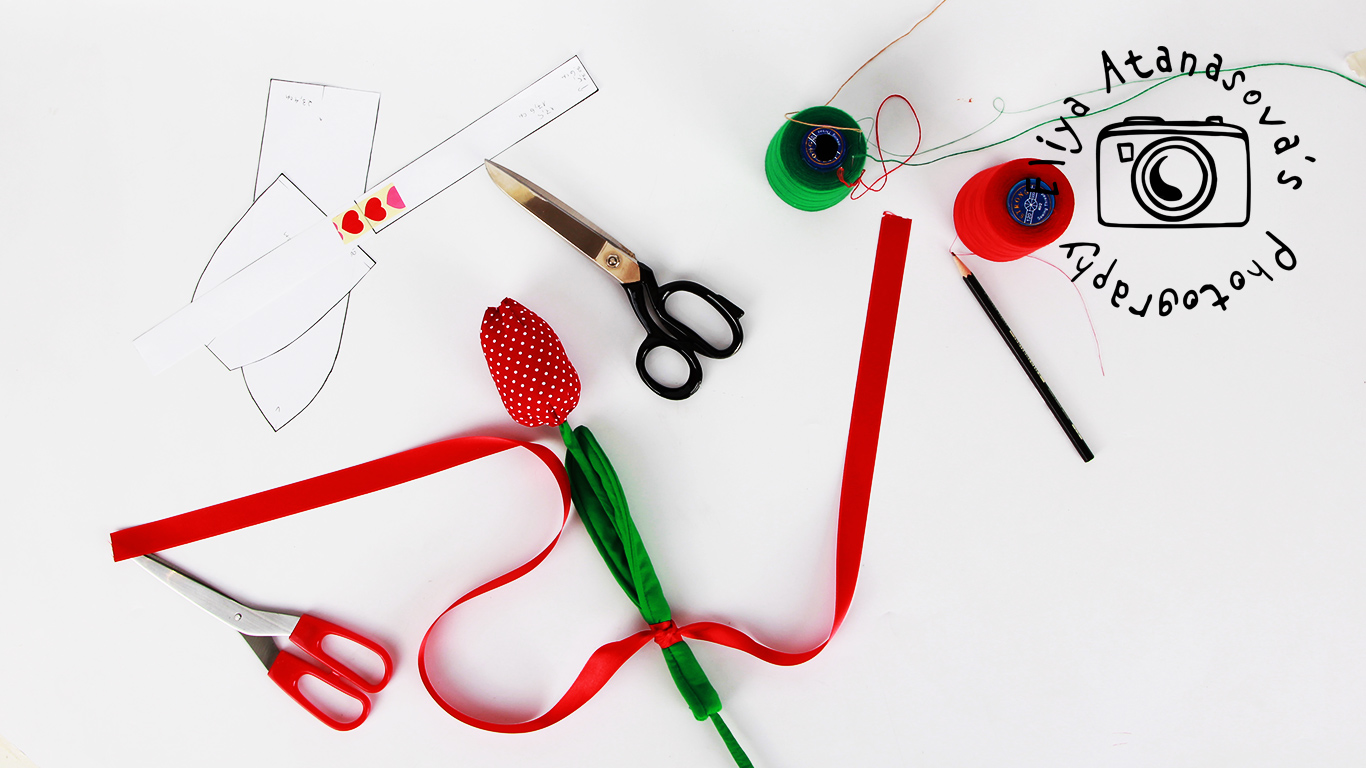
1. Necessary materials:
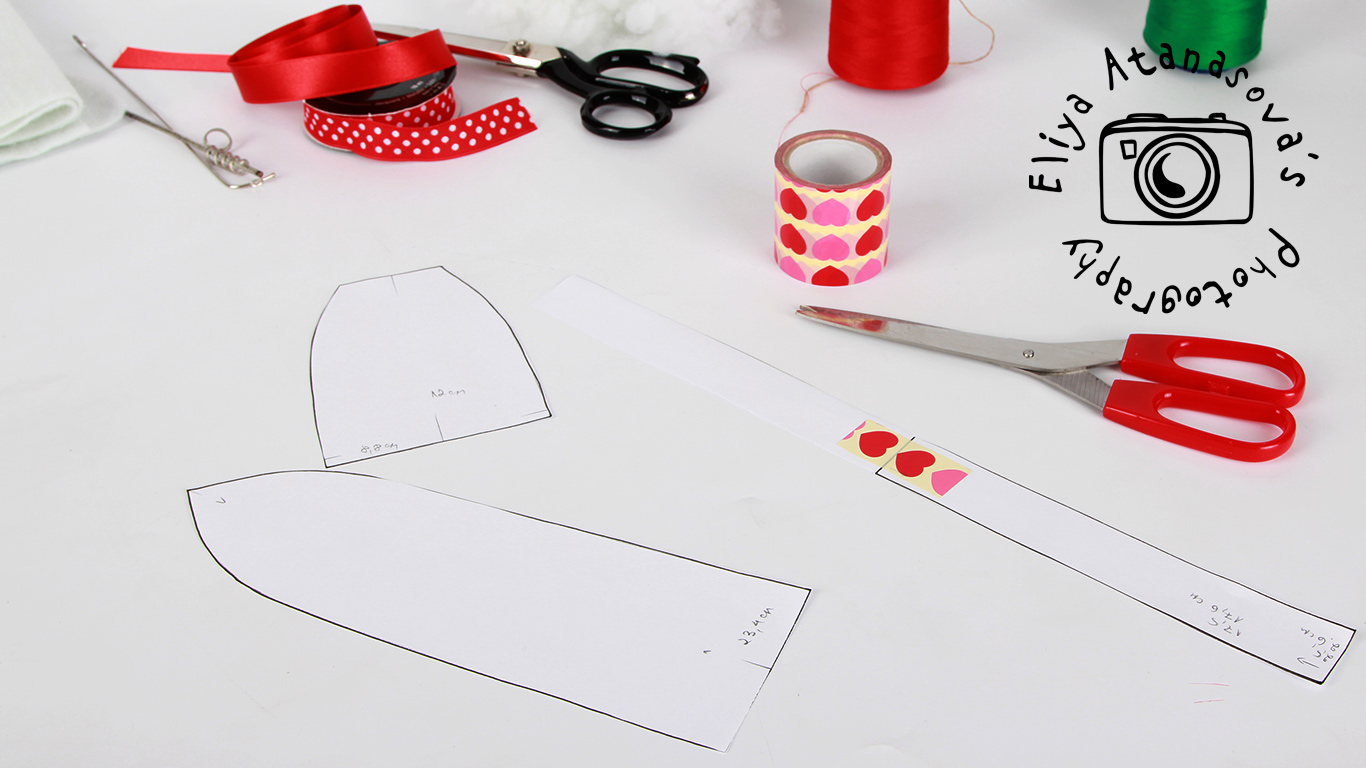
– Printed pattern: you can download the actual size pattern in .pdf from my Etsy Patterns Shop – link below. When you print the pattern, please choose “actual size” as printing preference in the printer dialog window and then make sure that the test squares are 1 cm and 1 inch respectively.
*** 1” is 2.54 cm
Important: The seam allowances are included in the pattern (approx. 0.5 – 0.7 cm (0.2” – 0.3”)).
– Green fabric for the leaf and the stem and some red, purple or other colorful fabric for the tulip blossom. I use 100% cotton fabrics. For the stem you will need approx. 35 cm x 5 cm (approx. 14” x
2“), for the leaf you will need 2 pieces of fabric approx. 24 cm x 8 cm (9.5” x 6.7”) and for the tulip
blossom you will need 2 pieces of fabric of approx. 13 cm x 10 cm (approx. 4” x 5”)
– Silicon granules (or other light and fluffy material for filling the tulip blossom), you will need just a little
– Batting (for the tulip leaf only)
– Ribbons for decorating the tulip (mine is 2 cm wide)
– Sewing machine
– Scissors and pins
– Pencil
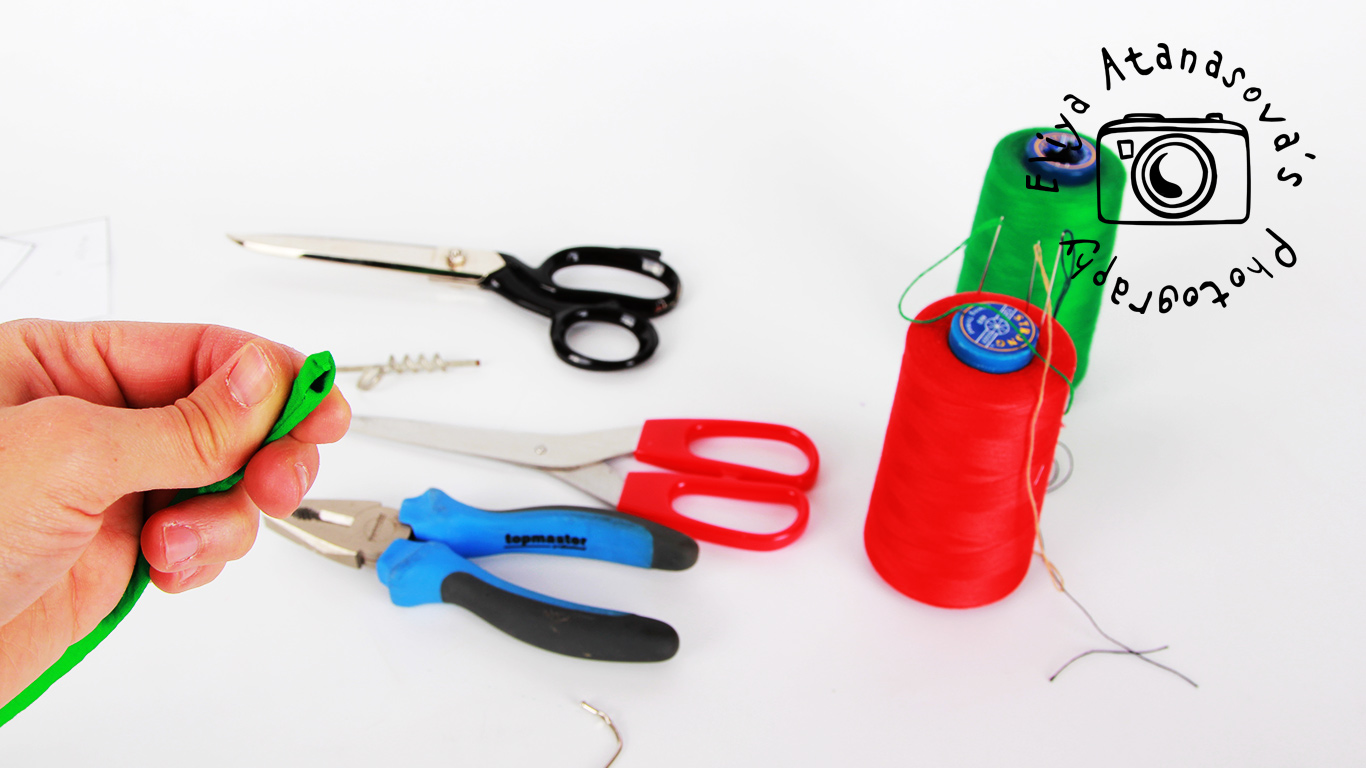
– Needle and thread (in the color of the stem/leaf and in the color of the blossom)
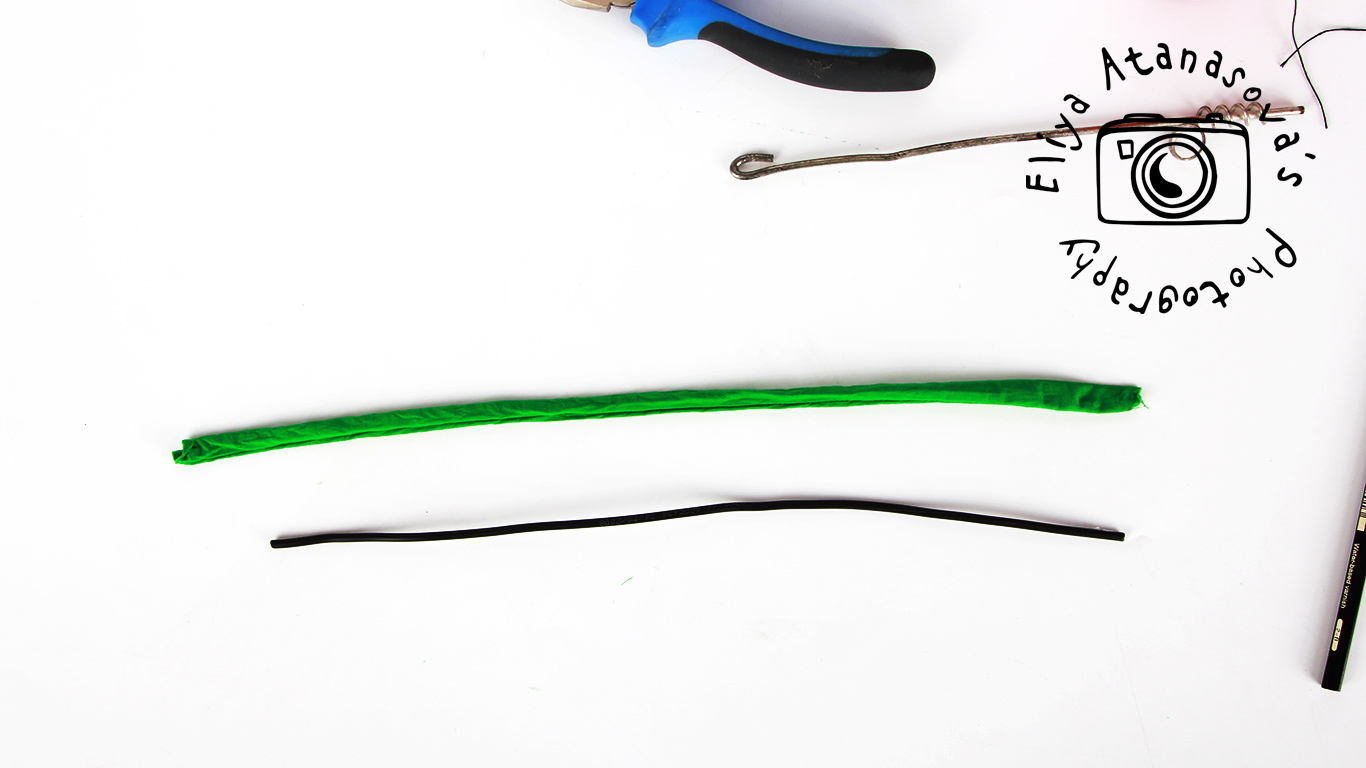
– 40 cm (approx. 16”) cable – some non flexible, solid cable that can stand straight without bending
– Pliers (cable cutter/diagonal pliers) to cut the cable for the stem
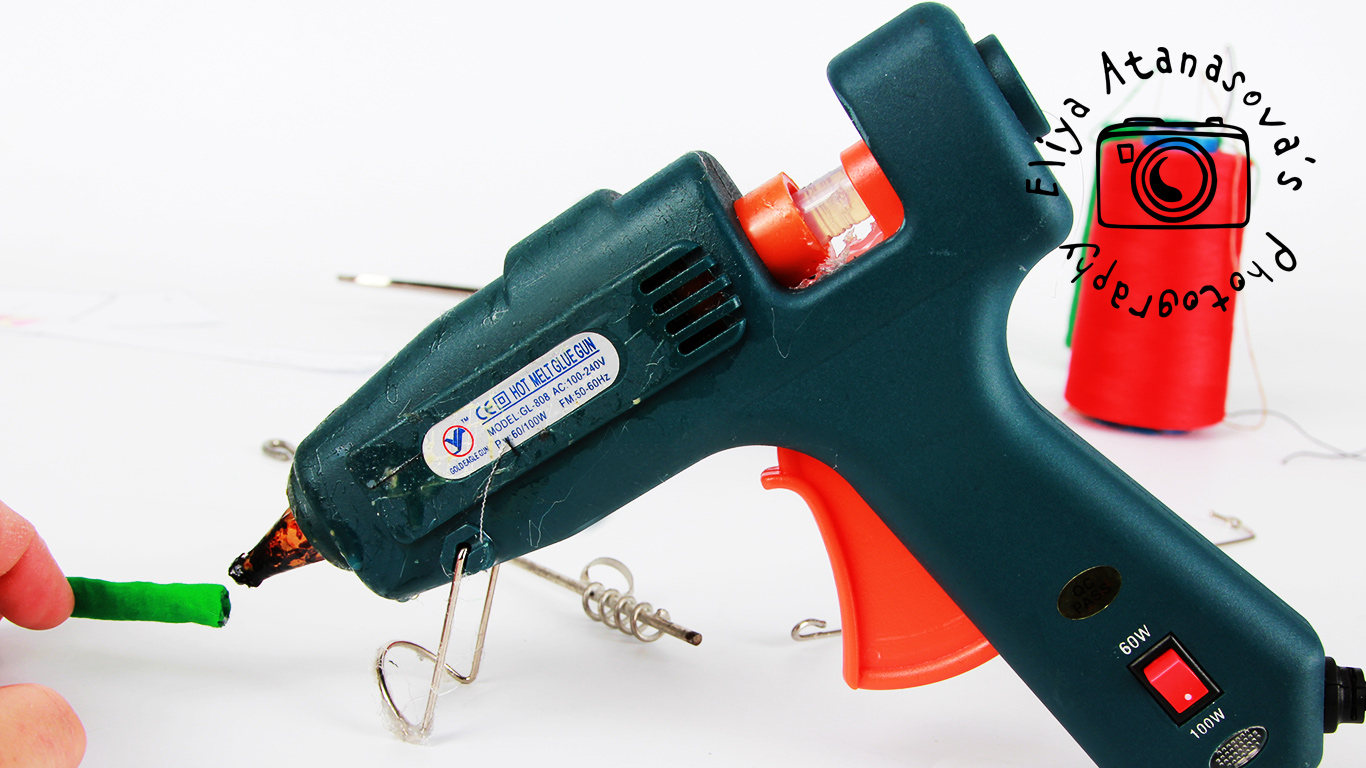
– Hot Glue Gun (for additionally fixing the stem to the leaf, you can use needle and thread instead)
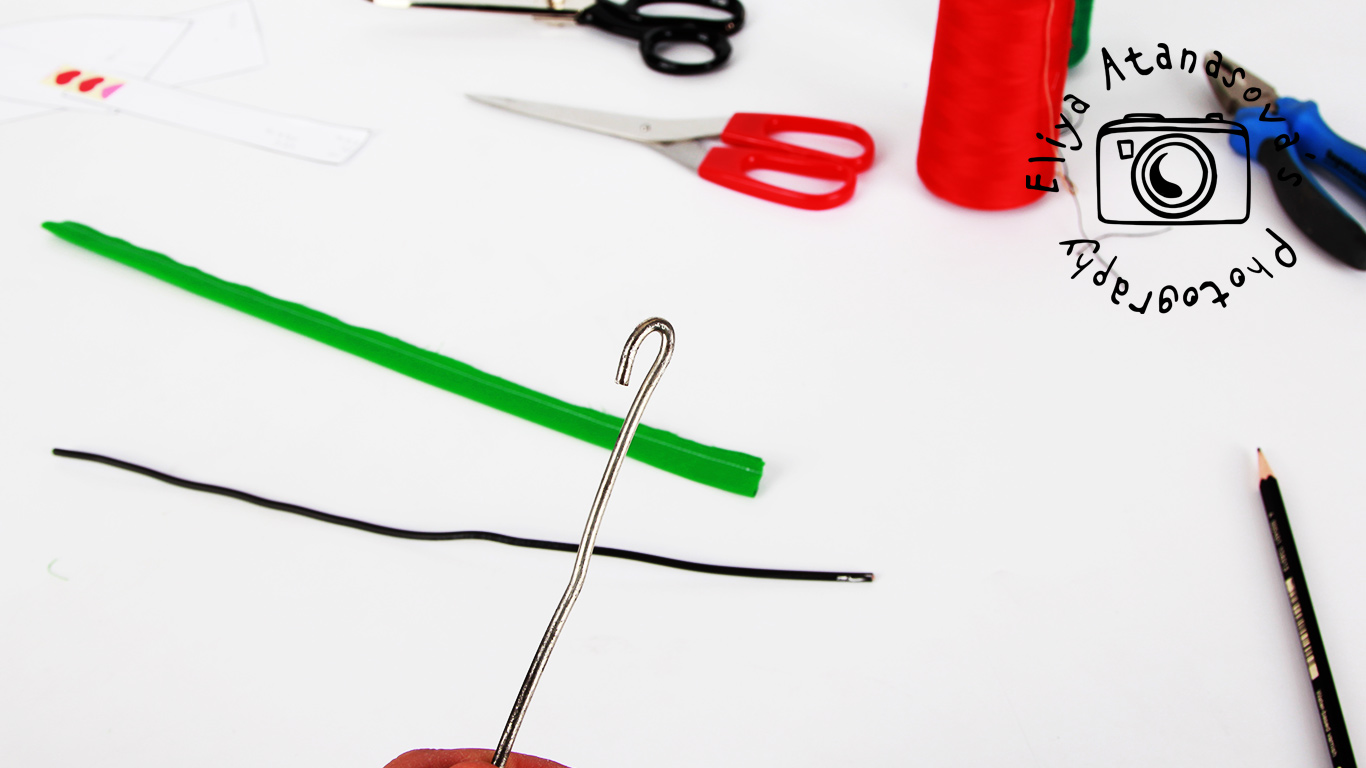
– You will also need a tool for bringing out the right side of the stem – I use an iron thin rod with a
self-made hook at one of the ends ☺. You can use some spare part of an old umbrella for example
and make a hook with pliers.
DOWNLOAD THE PATTERN FROM MY ETSY SHOP
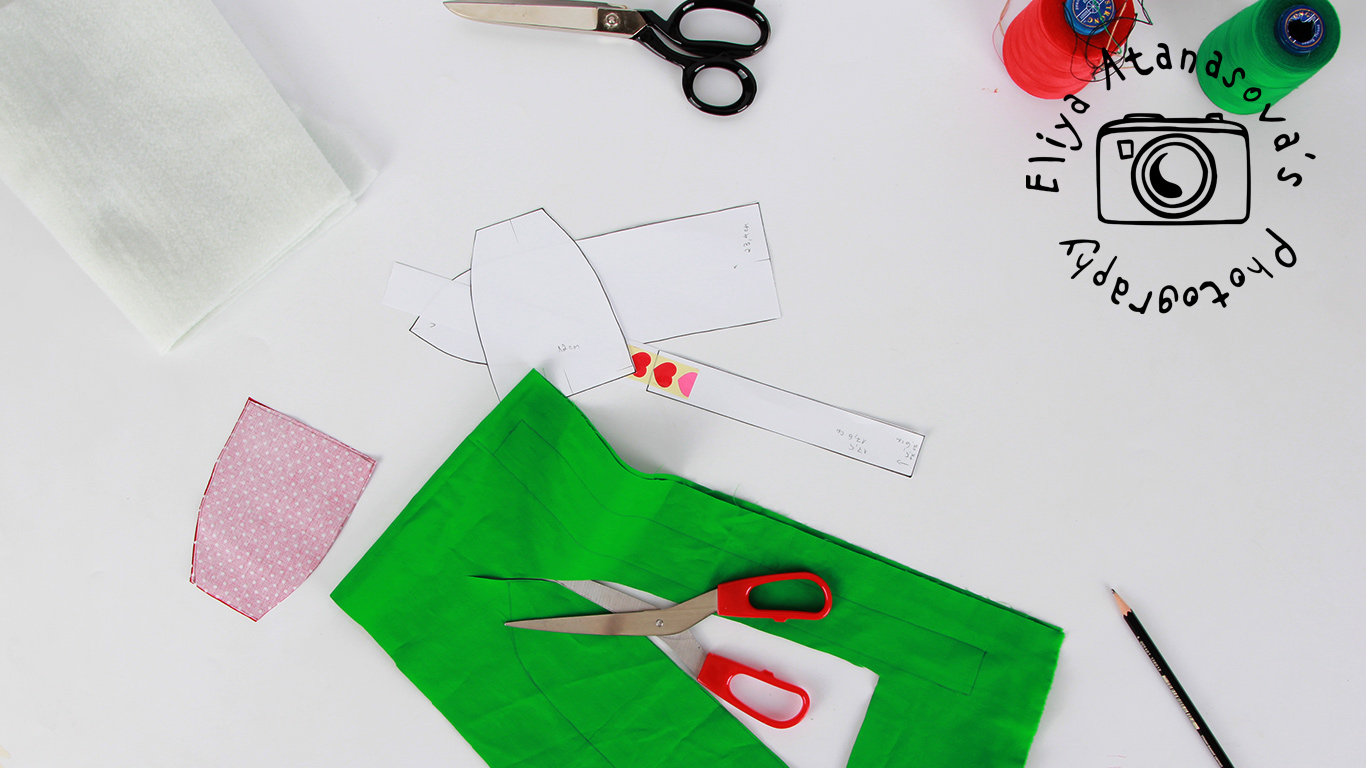
2. First, print and cut the pattern pieces, make the stem double length, as shown.
3. Then, draw the pattern pieces for the stem (x 1), leave (x 2) and tulip blossom (x 2) with pencil on
the wrong side of the fabric. Please, place the two fabric pieces for the leave and for the tulip
blossom with their right sides facing.
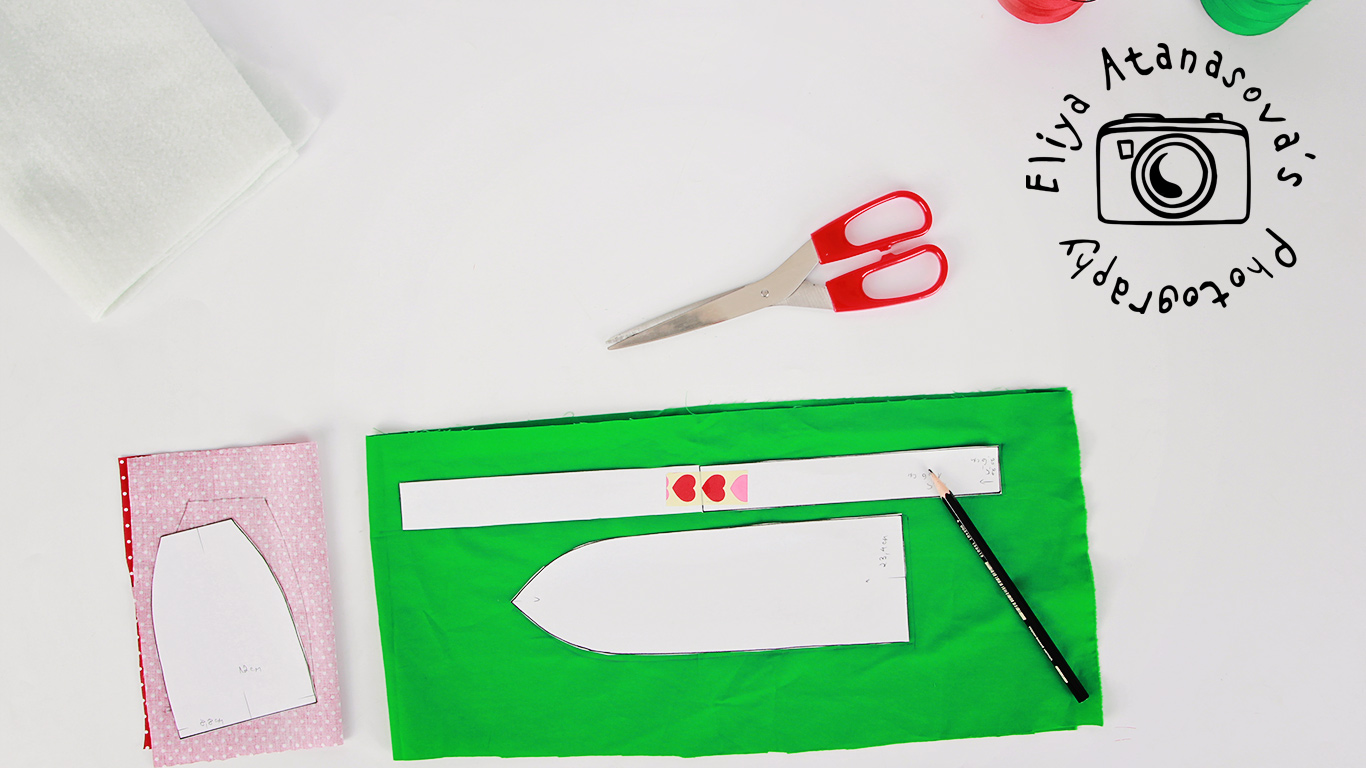
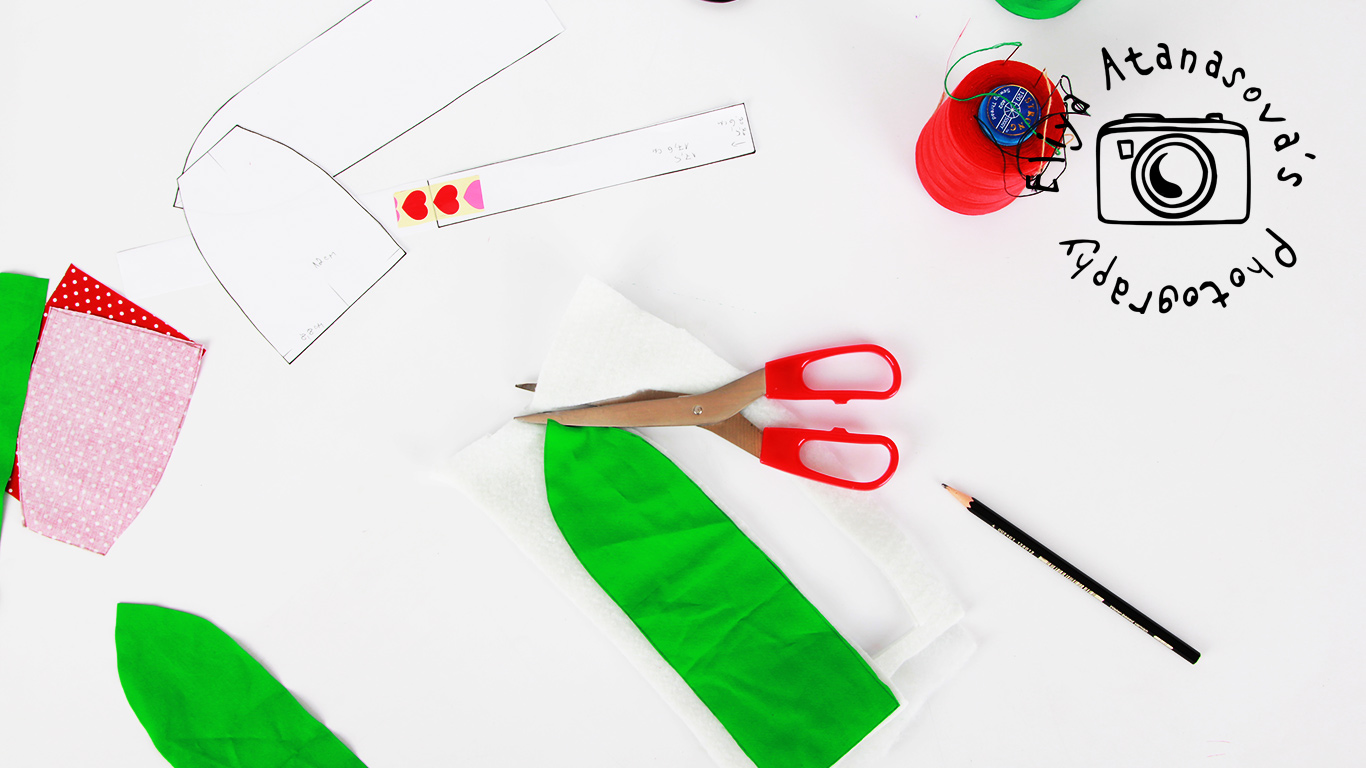
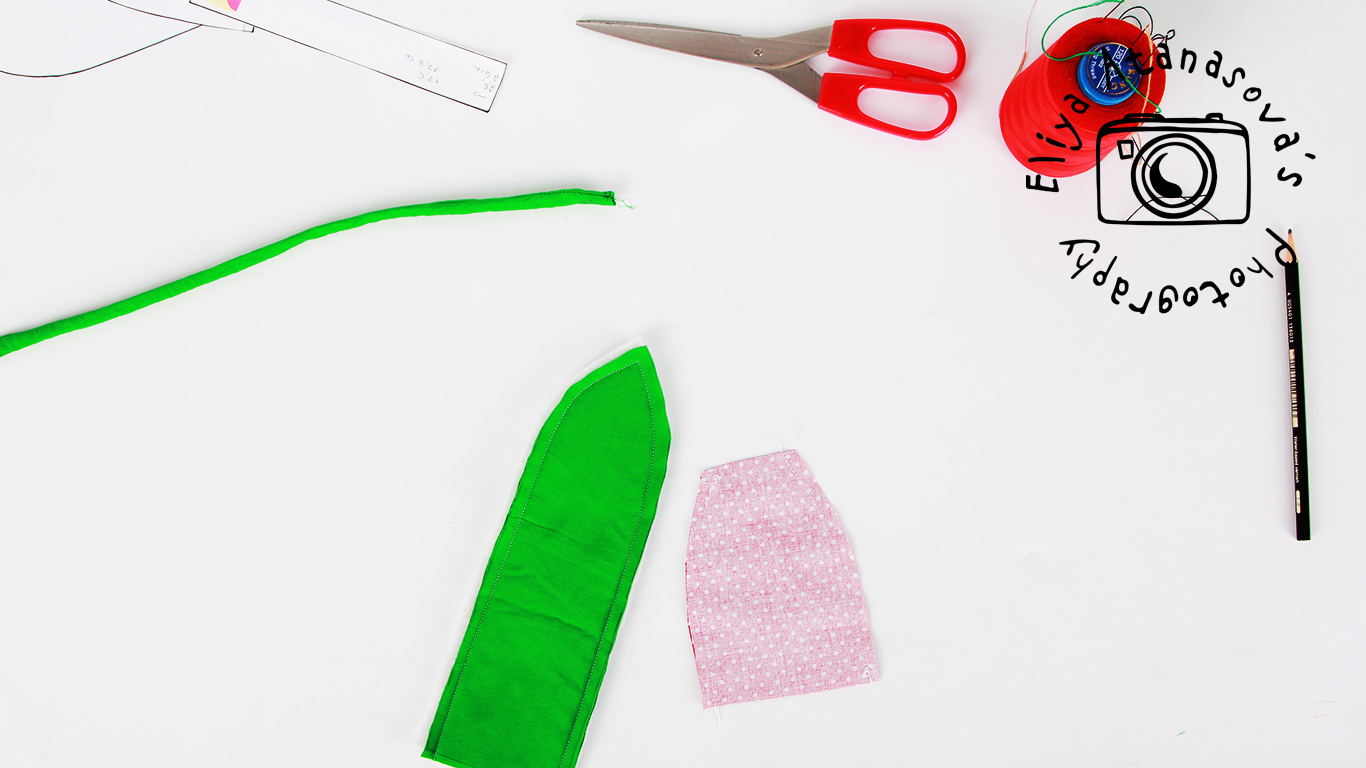
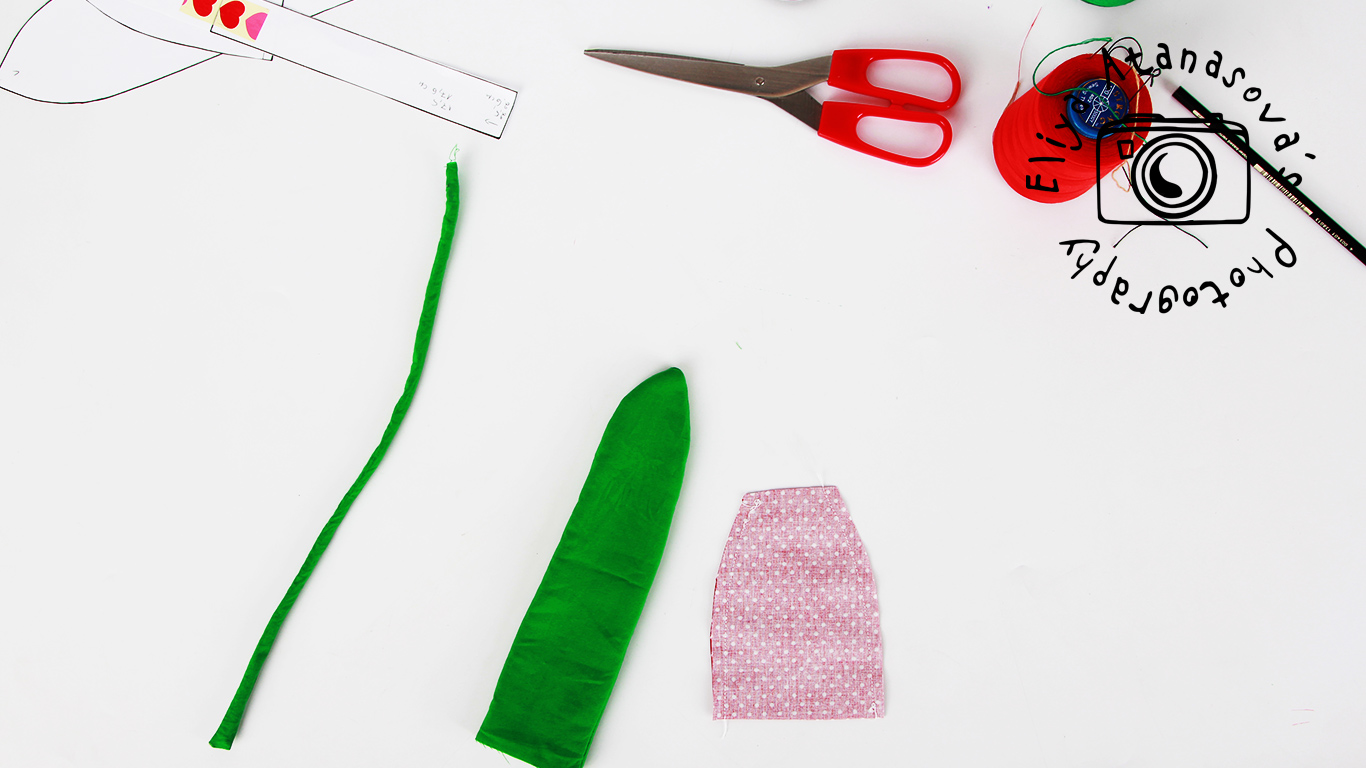
4. Then, cut all pattern parts, like so:

5. Then cut the batting for the leaf – just a tad wider than the leaf fabric piece itself, like so:
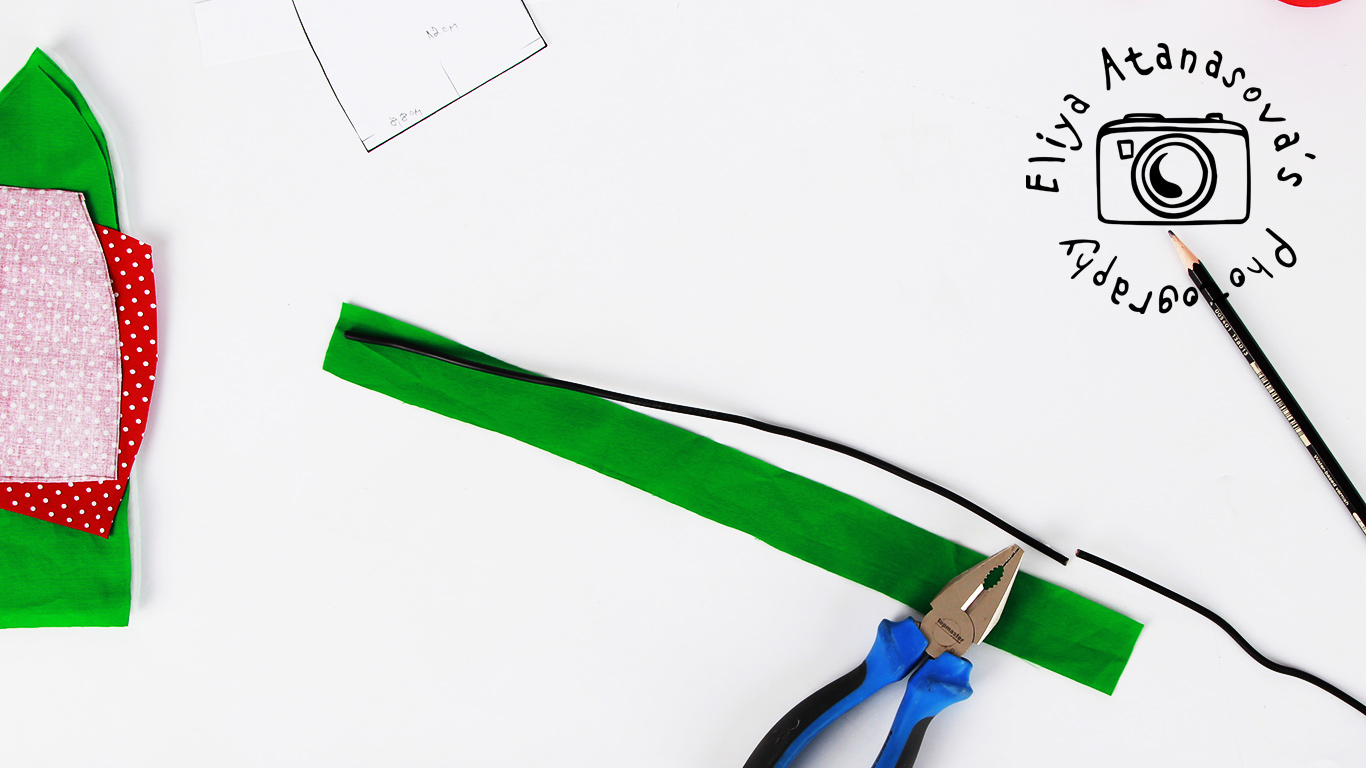
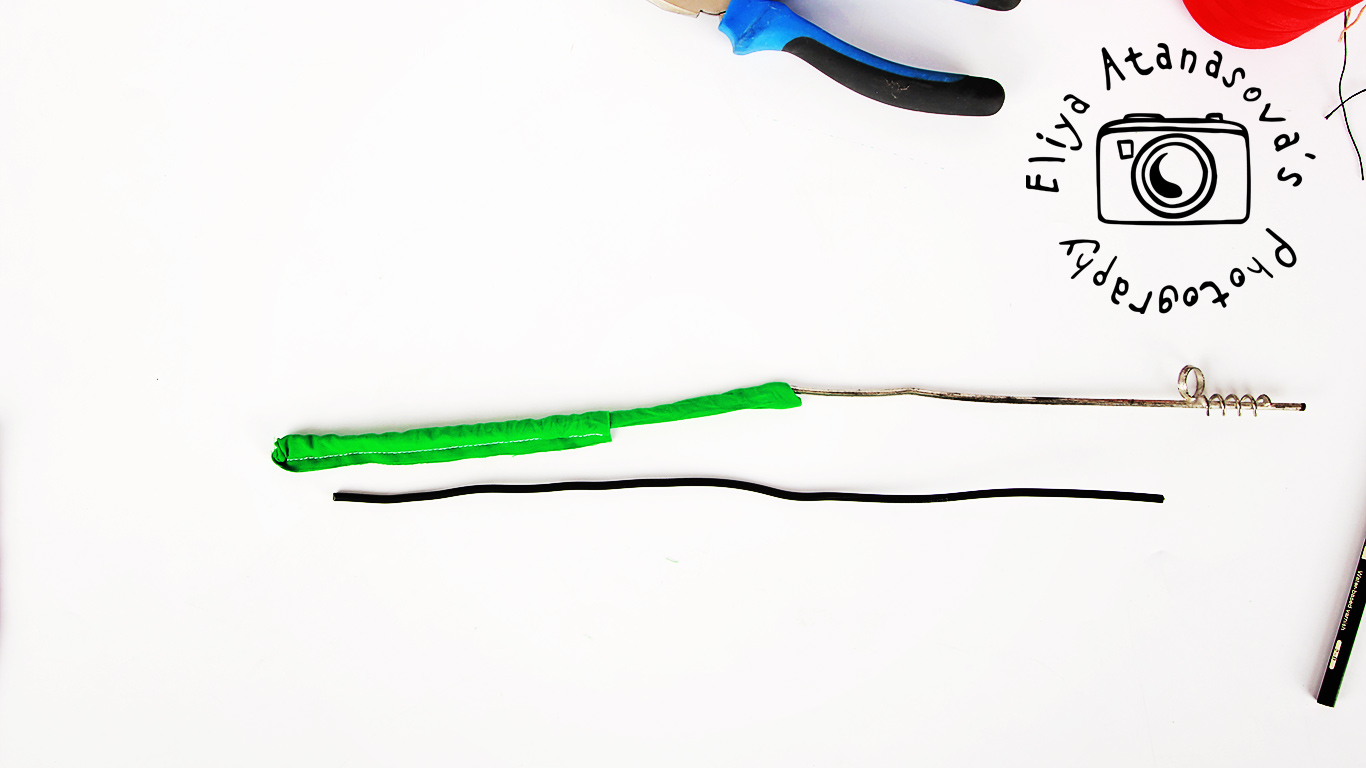
6. Cut the cable – the cable should be approx. 2.5 cm (1”) shorter than the stem fabric:

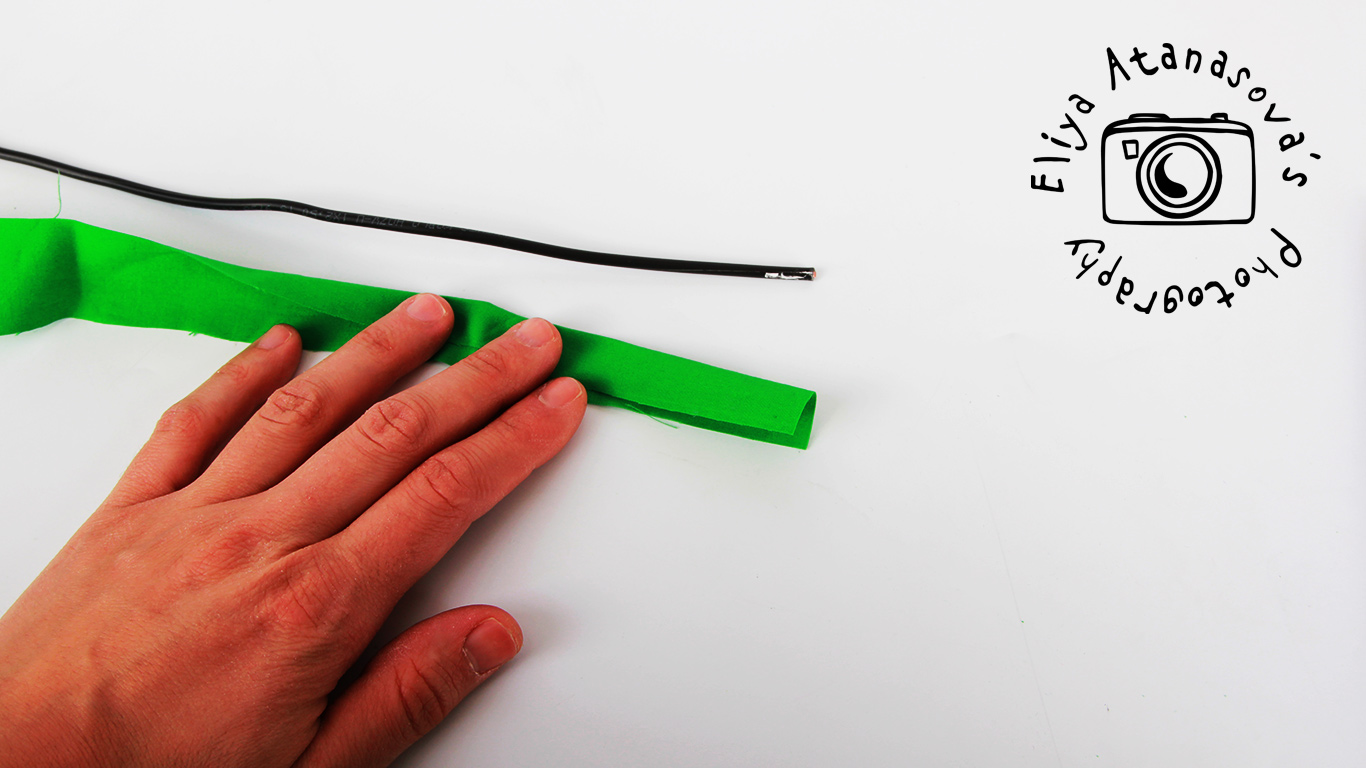
7. Fold the stem as shown on the picture below and sew along the longer side with approx. 0.5 cm
(0.2”) seam allowance:

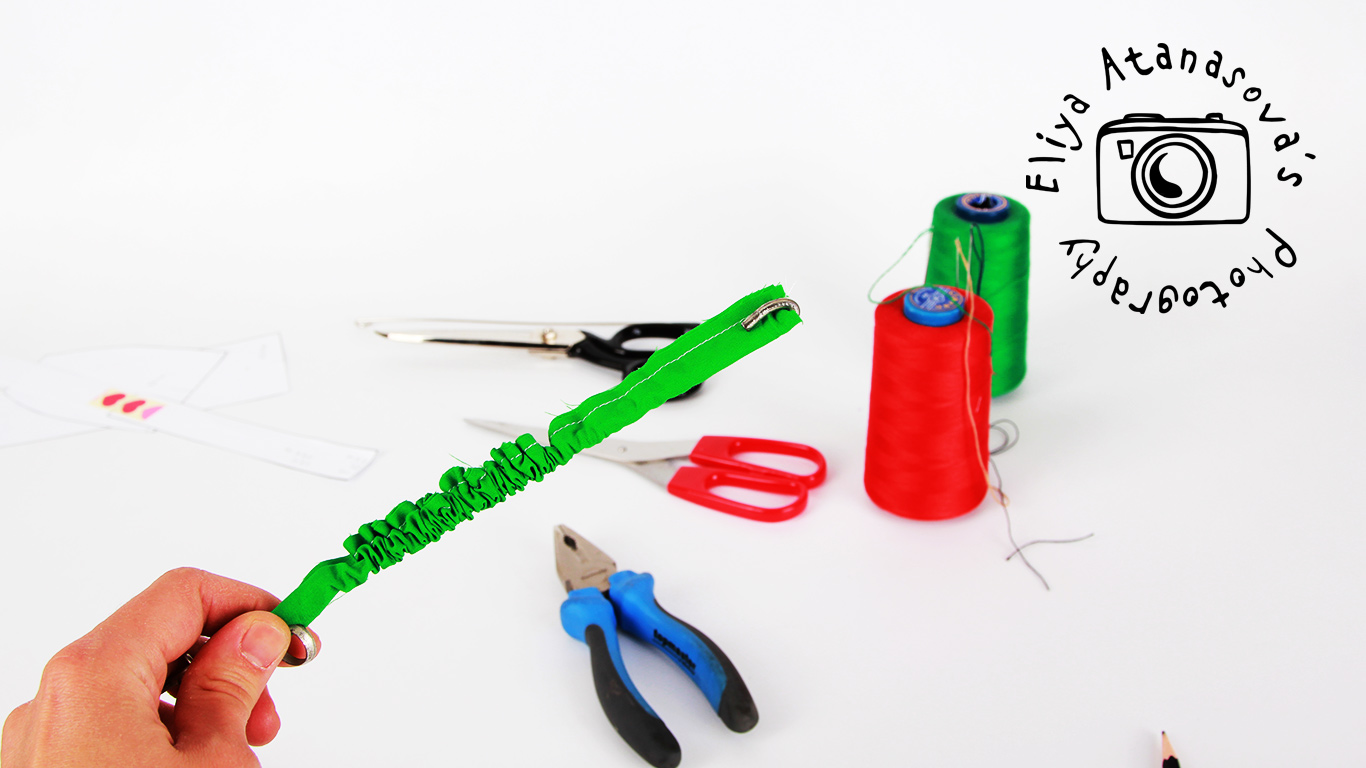
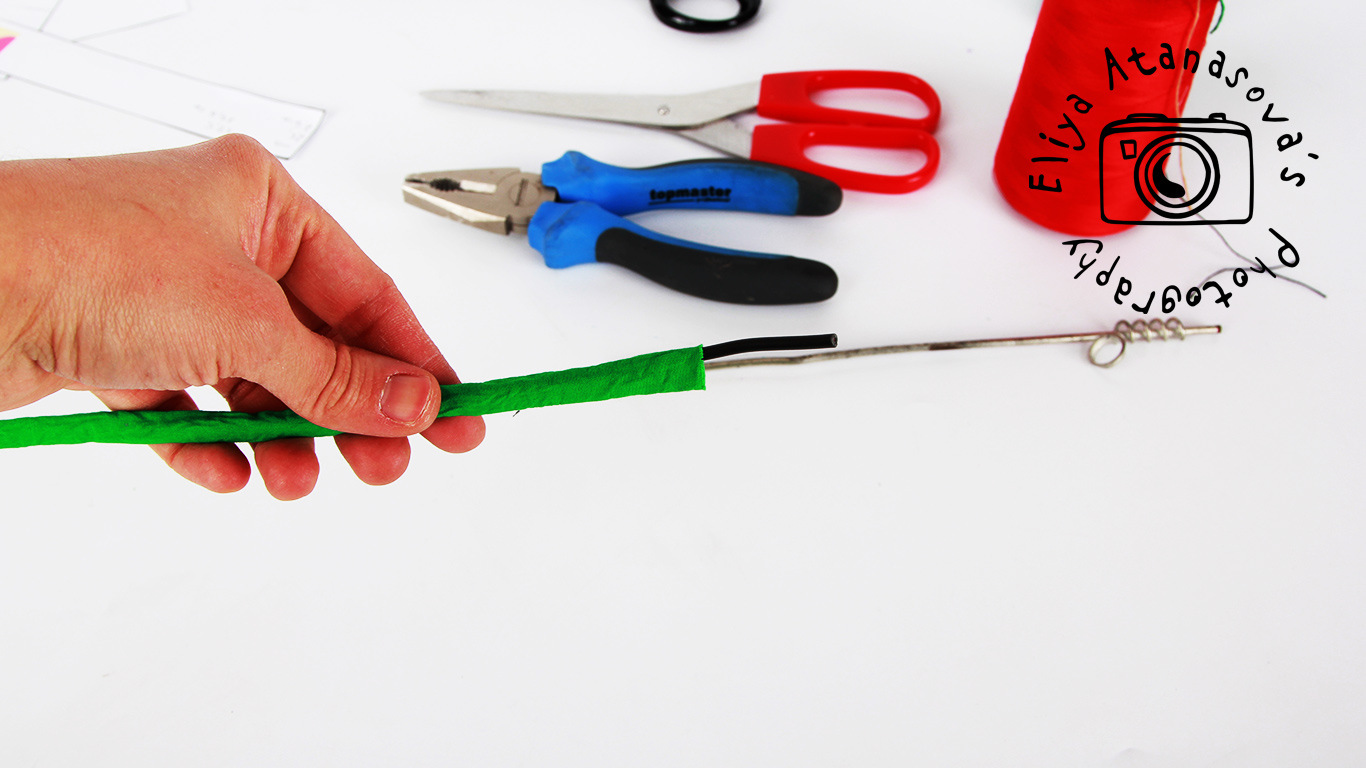
8. I usually bring the right side of the stem out, by using a hand-made rod with hook :-). This was part of an old umbrella once. If you prefer to, you can use green thread for sewing the stem and leave it as it is now, without bringing out the
right side of the stem. Here is how I do it:
9. Place the cable into the stem, like so:
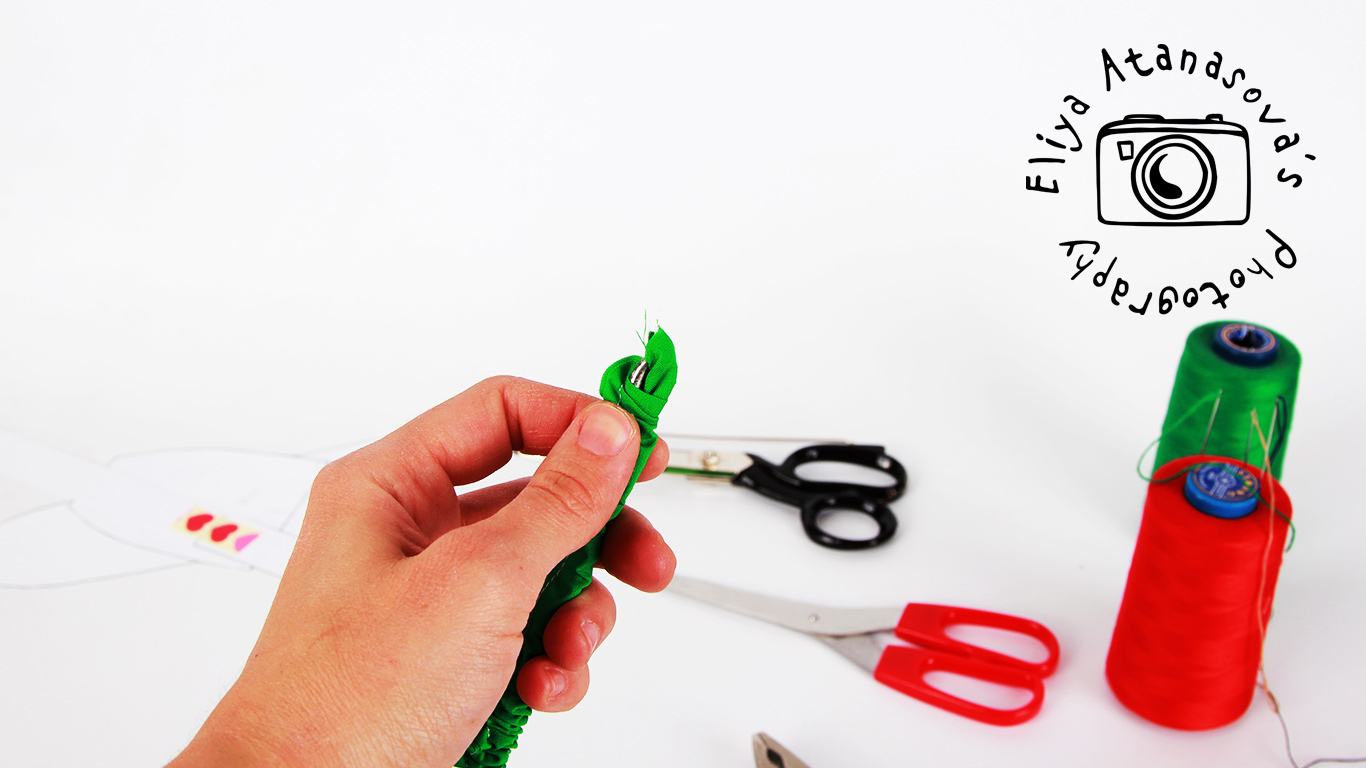
10. Tuck in the very end of the stem – the part that is going to be the bottom of the stem and sew it
with green thread or use the hot glue gun to close it.
11. Next thing to do is finish the leave. Place the two pieces for the leave over the batting with their right sides facing and sew along the whole edge (but leave the basis/bottom side of the leaf unsewn). Use approx. 0.5-0.7 cm (0.2 – 0.3”) sewing allowance, like so:
12. Then, cut the excess fabric and batting if any and bring out the right side of the leaf:
13. Iron the leaf at this step. Then tuck in the bottom approx. 1 cm (0.4”) of the leaf and close it by using needle and thread:
14. You can make a final outer stitch to make the leaf look more realistic ad beautiful – a stitch along the edges and one in the center of the leaf, like so:

15. Then, sew the tulip blossom. Make two stitches along the two side edges and leave the bottom and top parts without stitch:
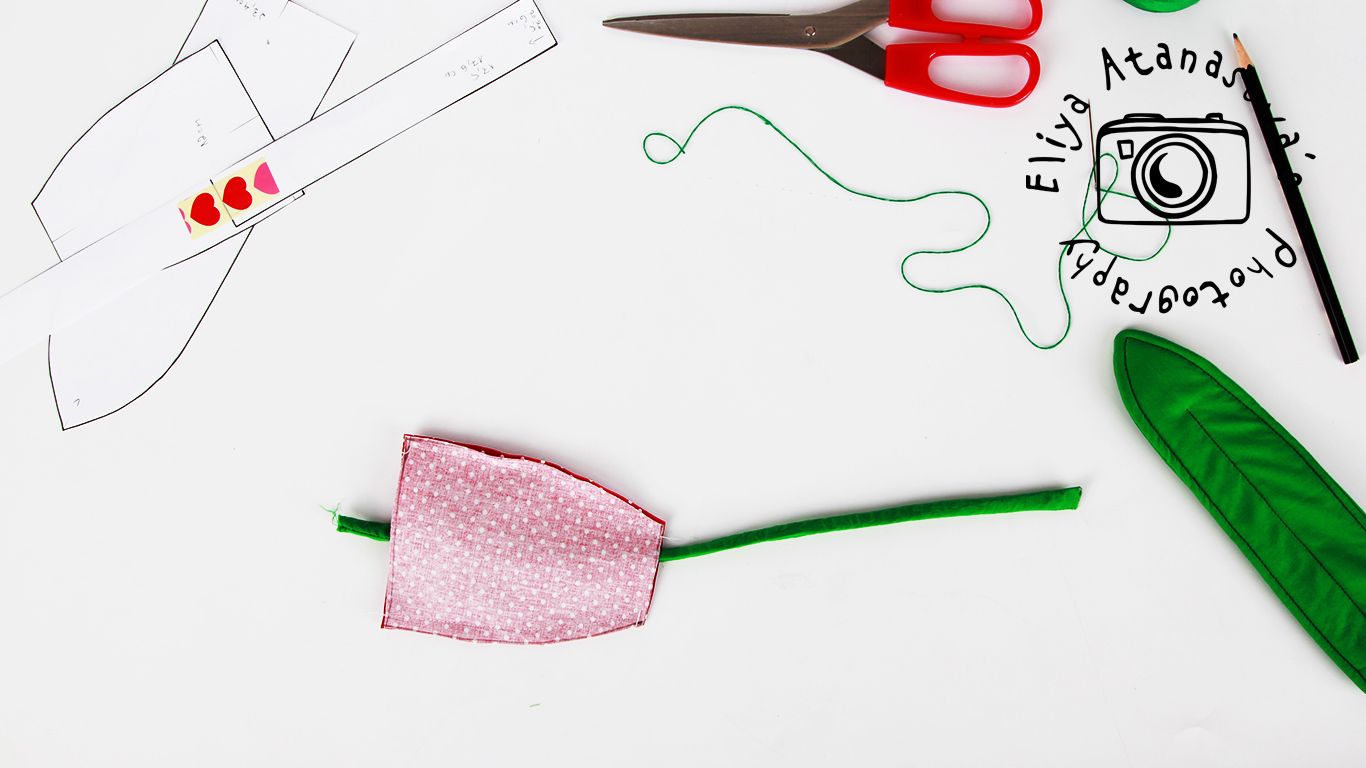
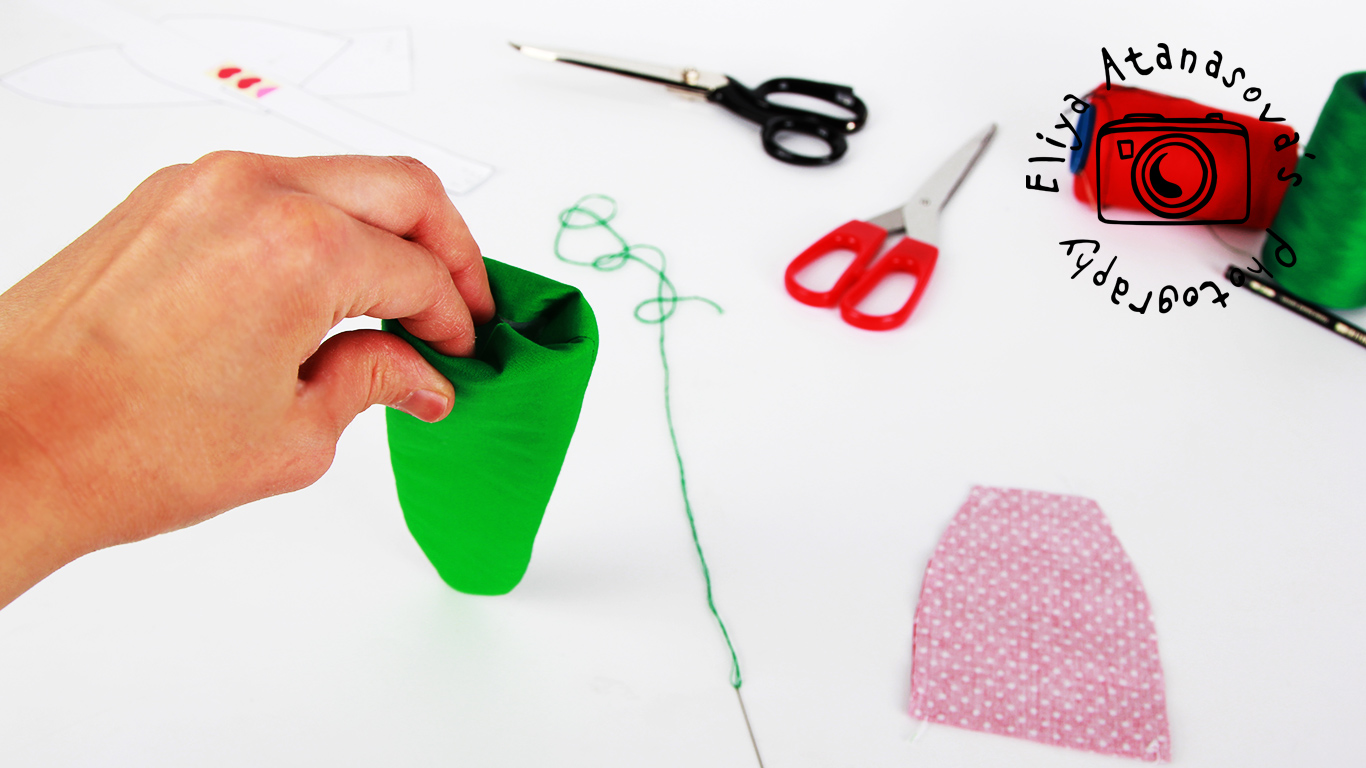
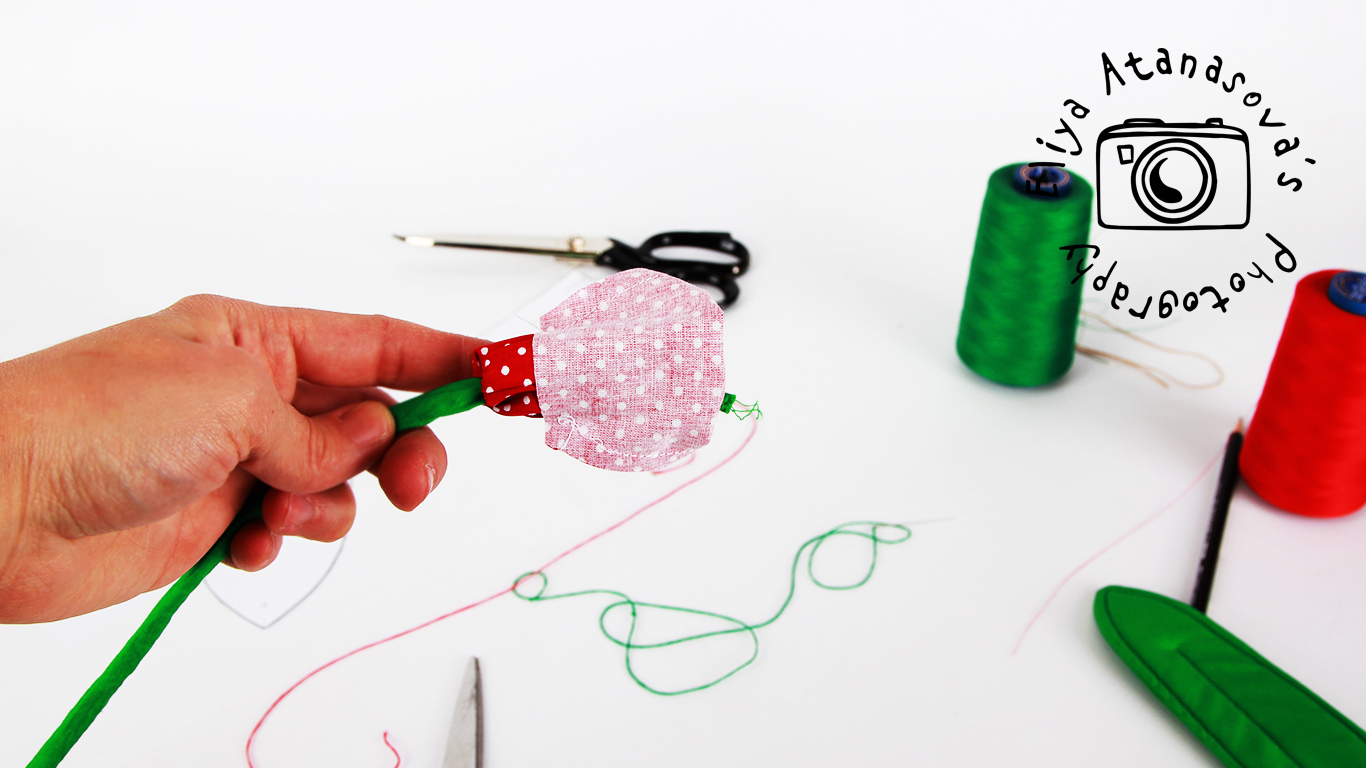
16. Then, place the ready stem, with its upper open part inside the tulip blossom, as it is. Make sure that the smaller opening of the tulip blossom is on the bottom and the wider opening – on the top, like so:


17. Then, sew firmly the wider part of the tulip blossom to the stem, like so:
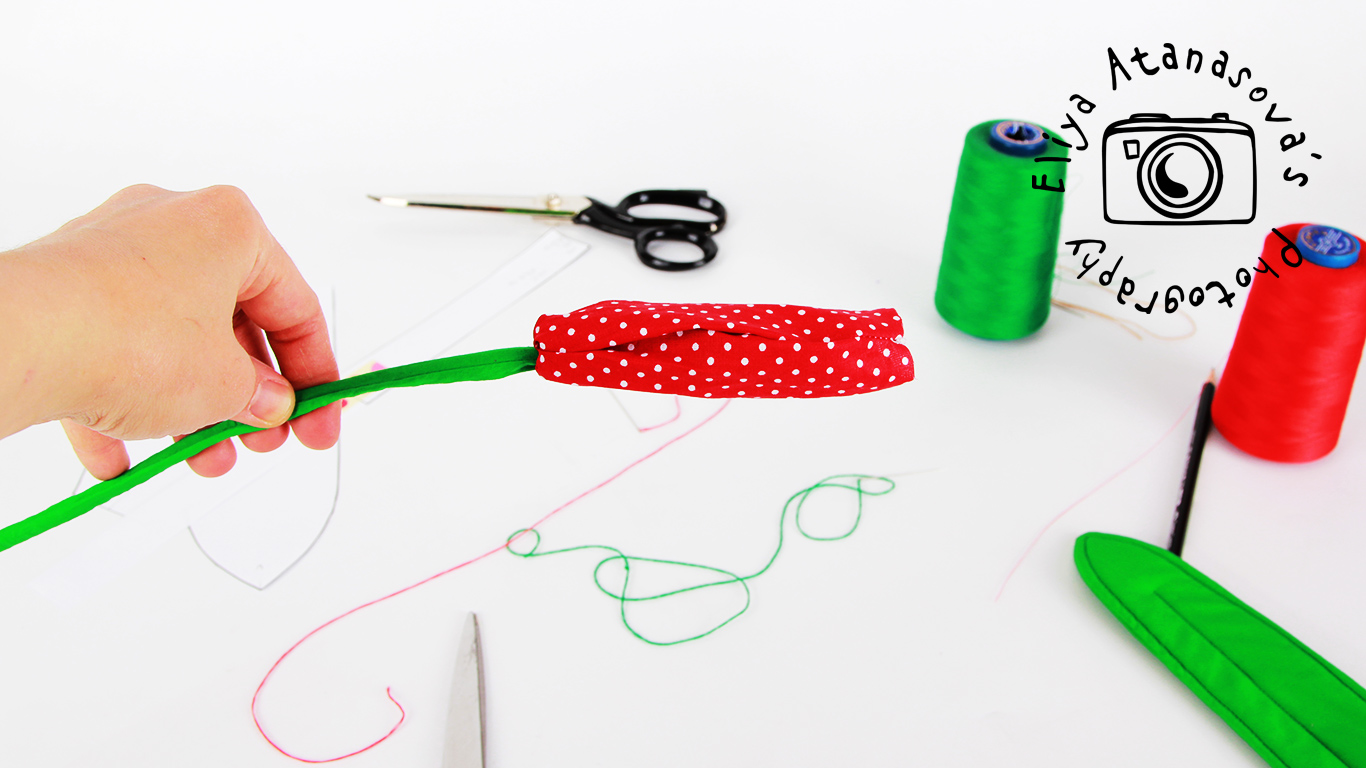
18. Then, bring out the right side of the blossom:
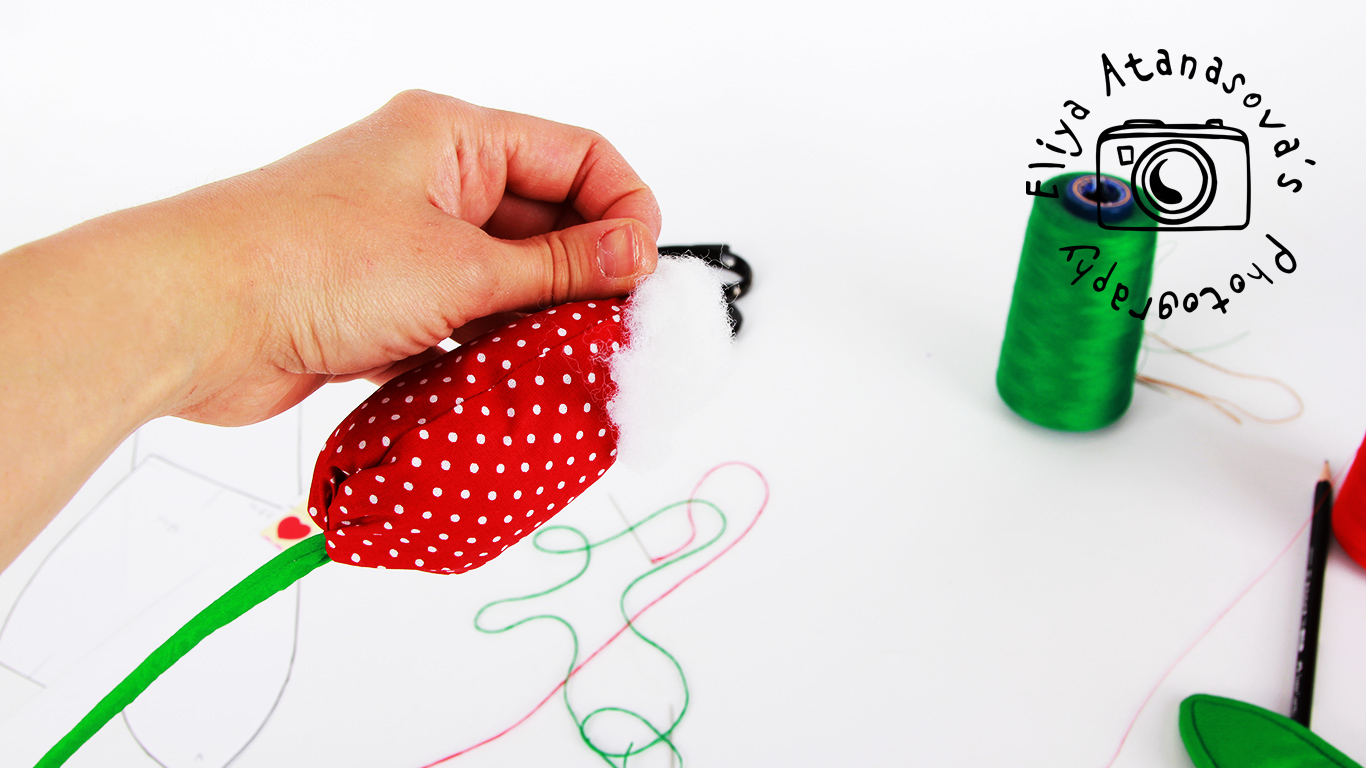
19. Fill it with silicon granules or whatever filling you use through the smaller opening:

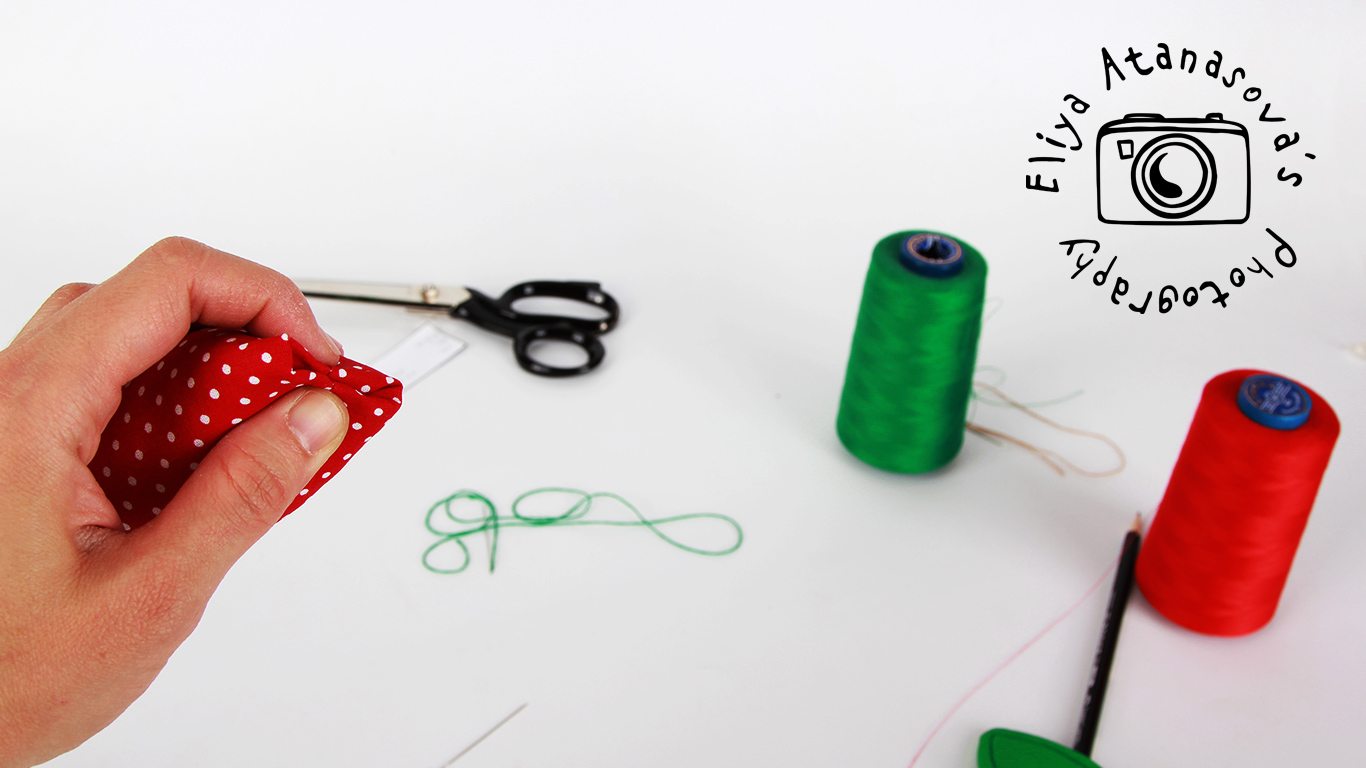
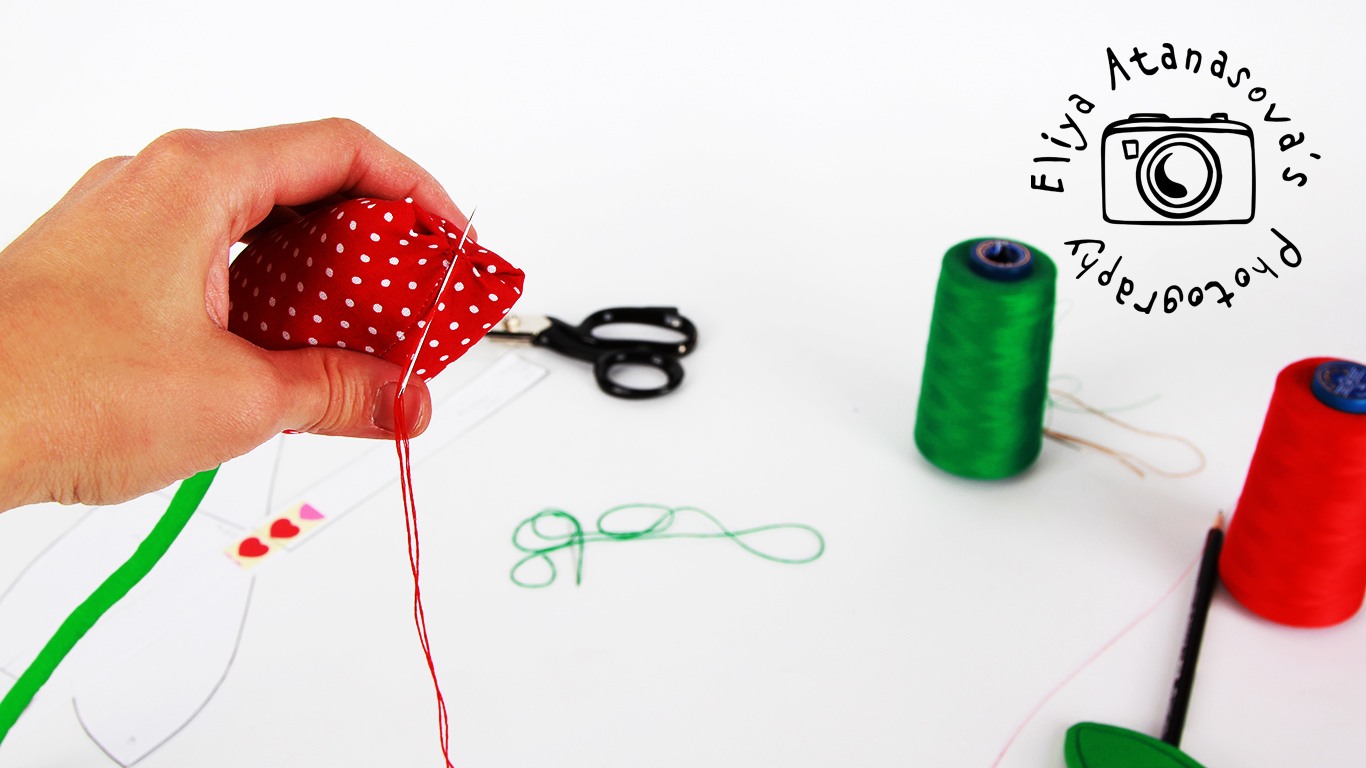
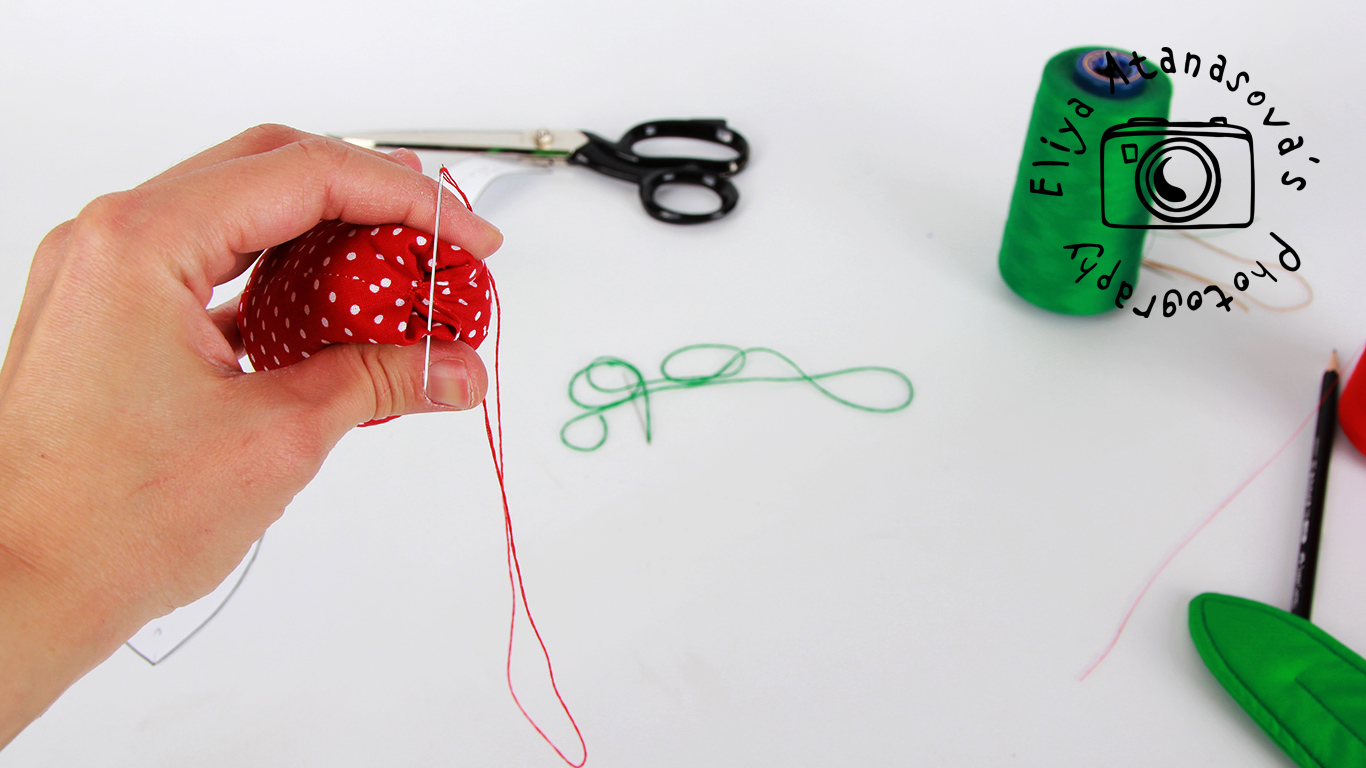
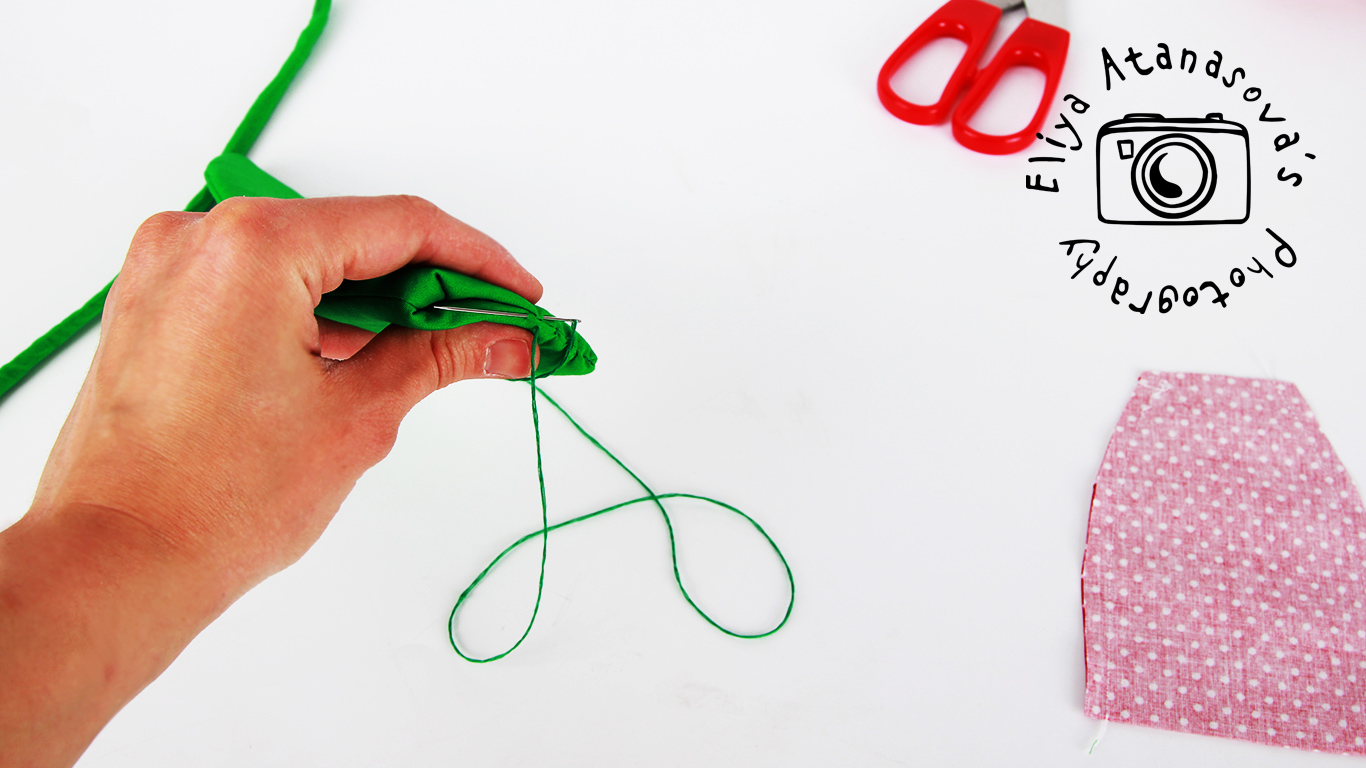
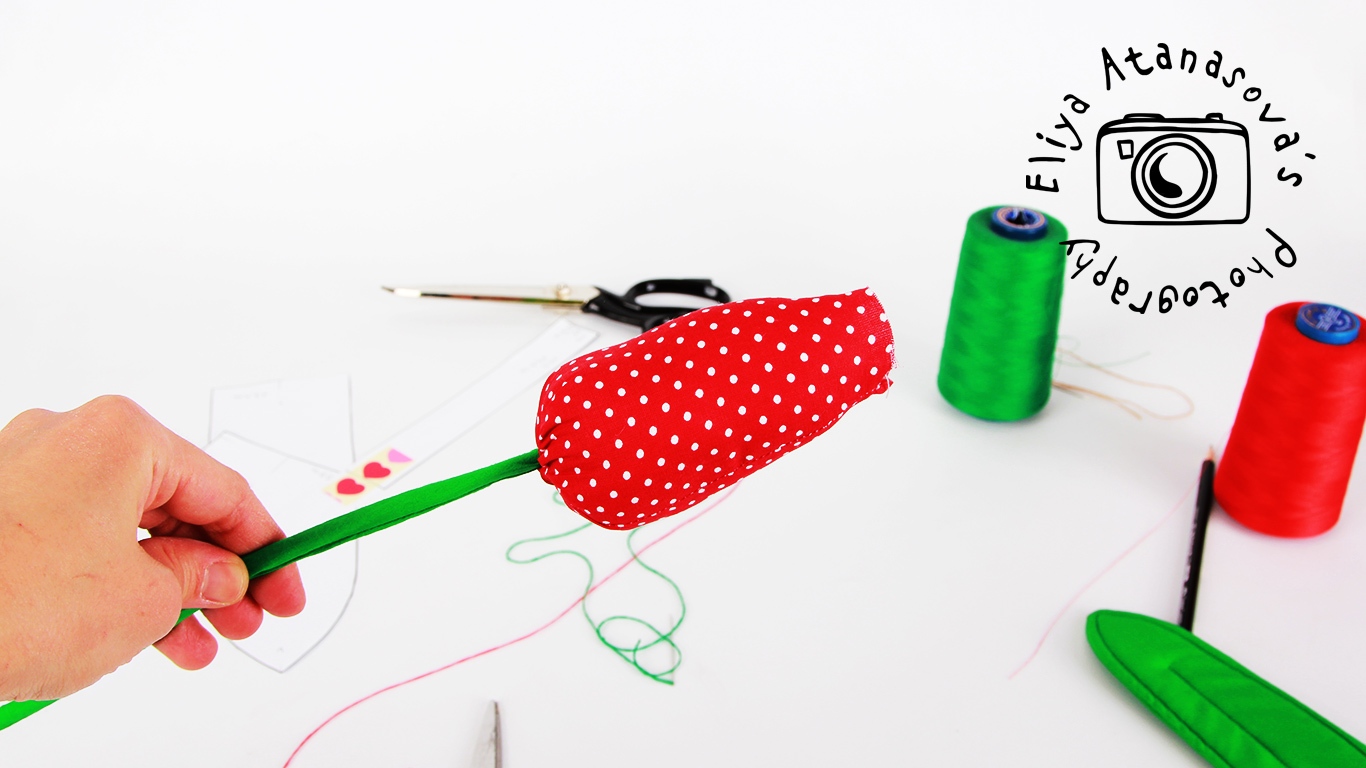
20. Then, we should close the blossom. Tuck in approx. 1 cm (0.4”) of the opening and sew it firmly with needle and thread (in matching color) in the center, like so:

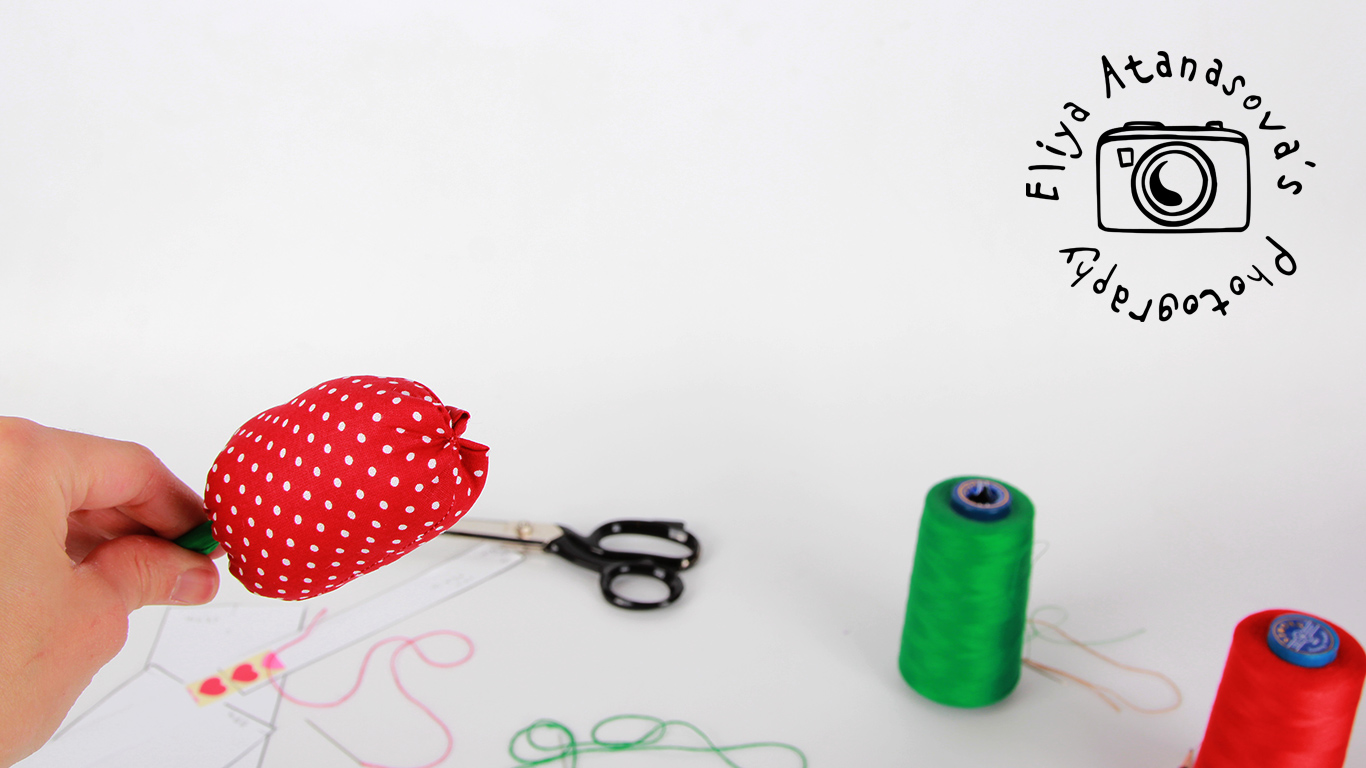
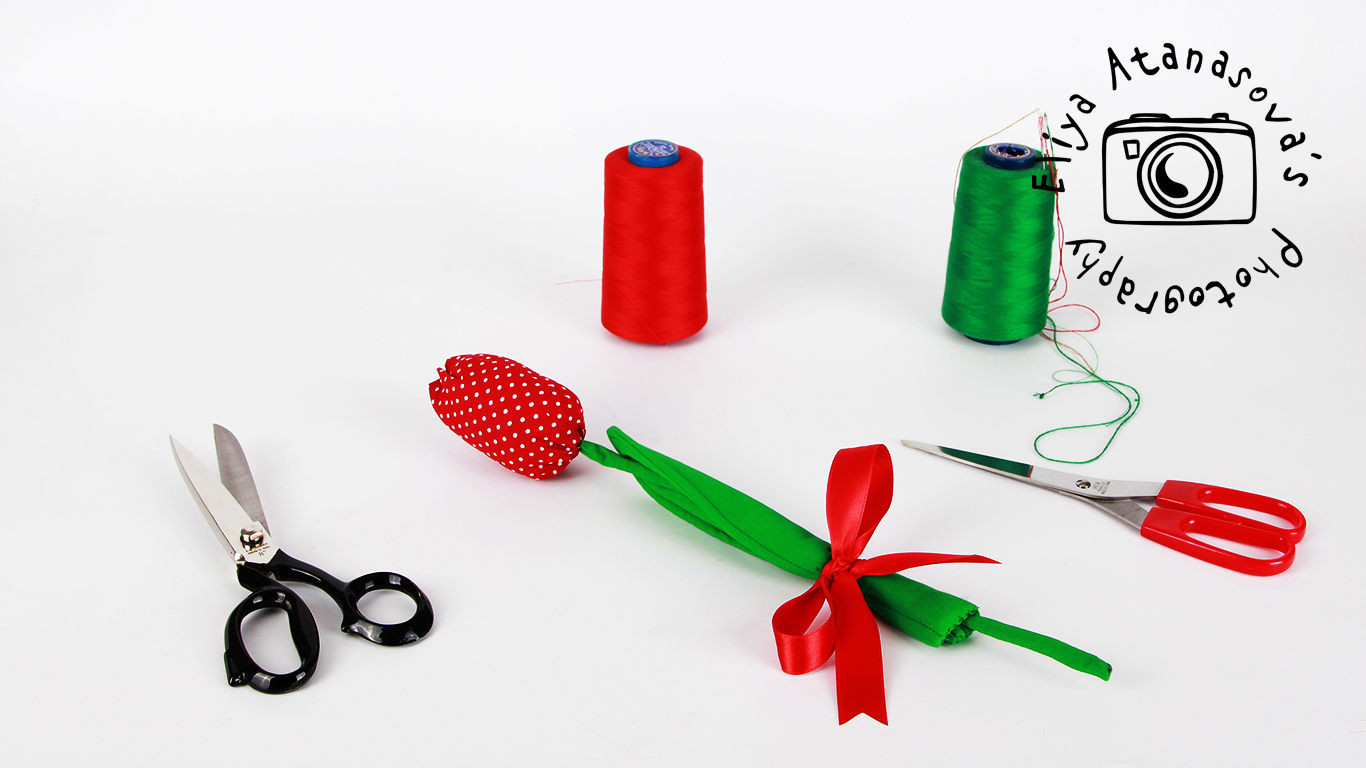
21. Last thing to do is attaching the leaf to the stem. I usually use hot glue gun but you can just place it around the stem and then tie the ribbon: 🙂
And the tulip is ready 🙂
I hope you like the tutorial and will make your own textile tulips 🙂