The case that I used for the desktop background for July blog post here is not difficult to make :-).
Here is what you will need:
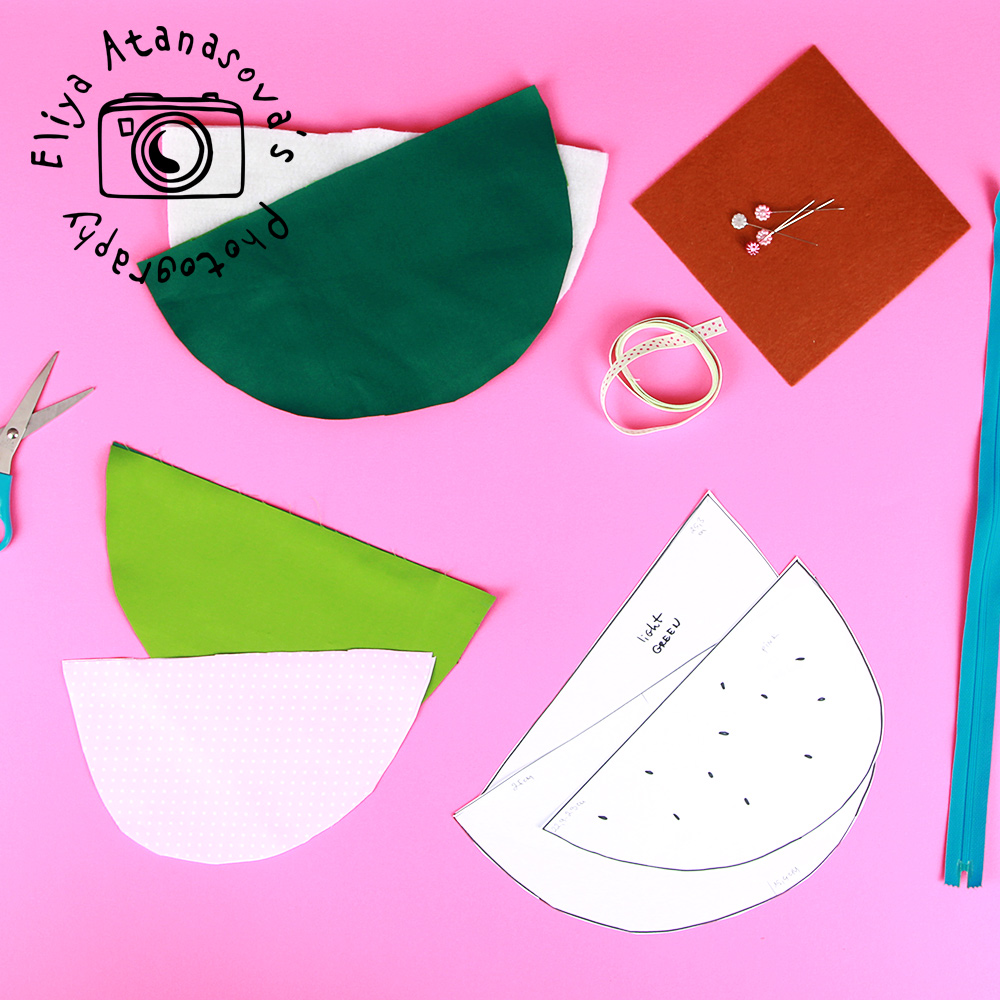
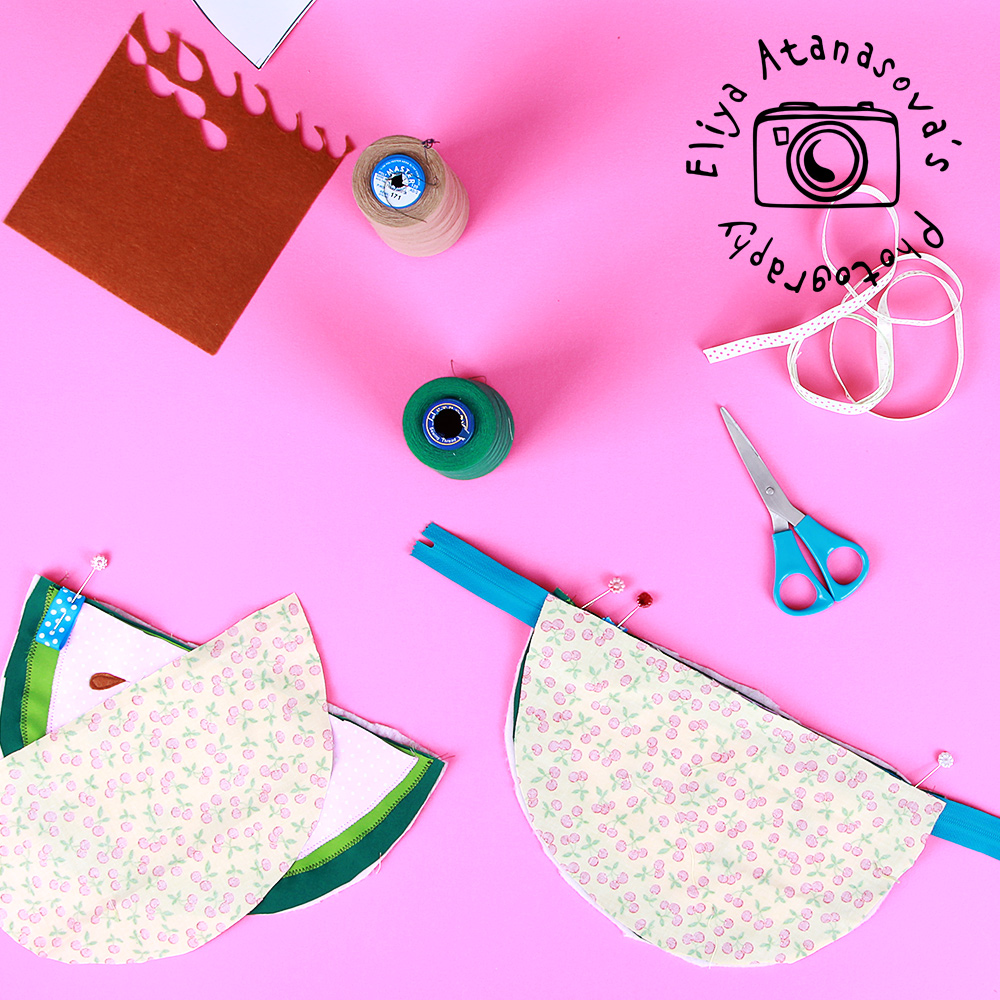
– fabric in dark and light green, pink, a bit of brown felt for the brown seeds
– zipper in suitable color
– threads
– batting
– scissors
– needle and thread
– sewing machine
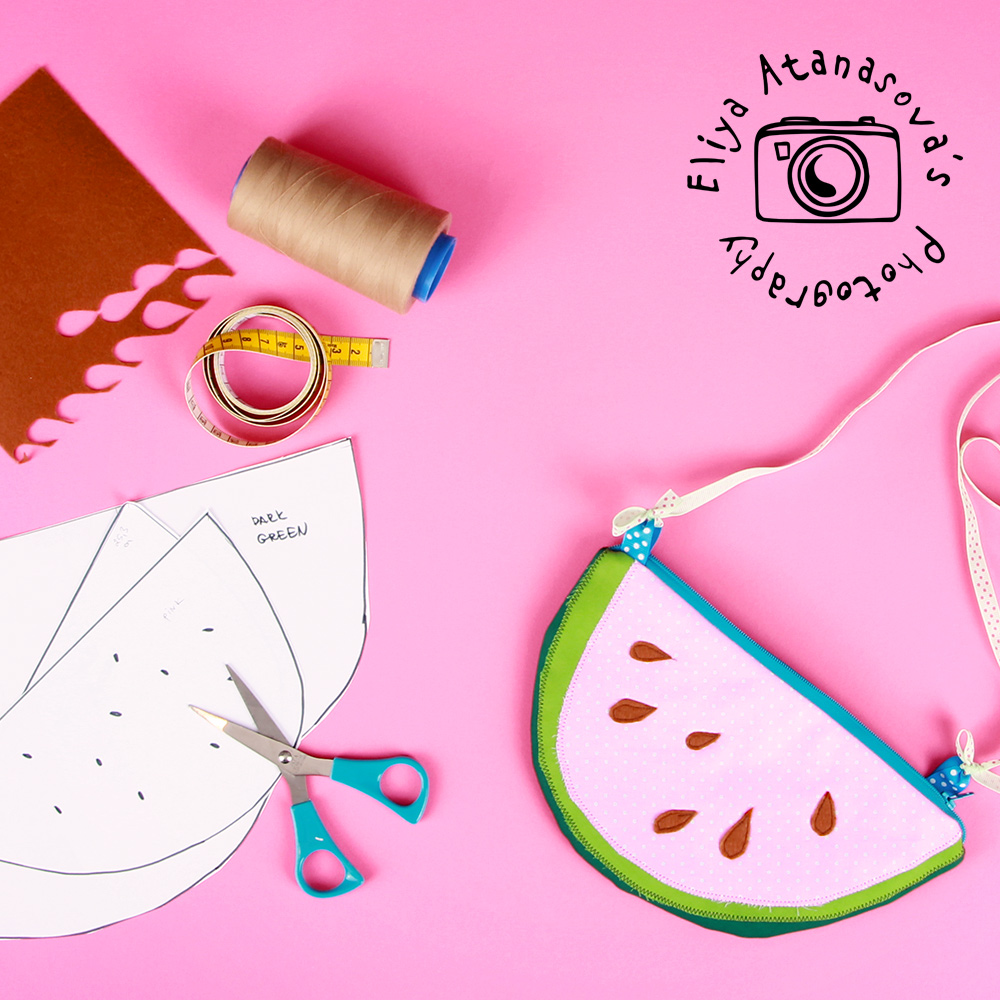
– the printed pattern (when you print the pattern, please choose “actual size” as printing preference in the printer dialog window and then make sure that the test squares are 1 cm and 1 inch respectively).
DOWNLOAD THE PATTERN
I made my pattern digital as always, so that you can use it.

First step is to cut the pieces: cut two dark green pieces, two light brown pieces, two batting pieces with the size of the biggest dark green pieces and two pink pieces. Place the dark green piece first, then place the light green piece on top of it, and place the pink piece on top of the light green one. I used a decorative stitch to assemble them on top of each other.
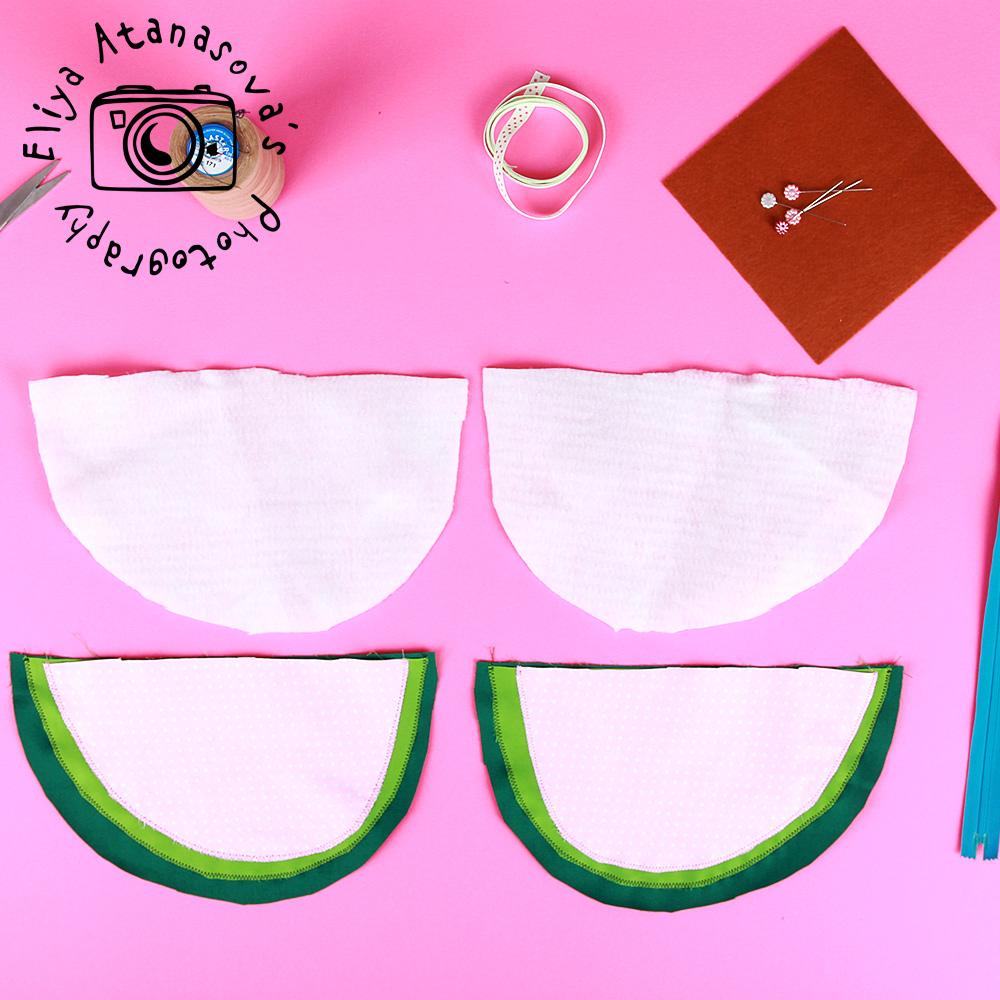
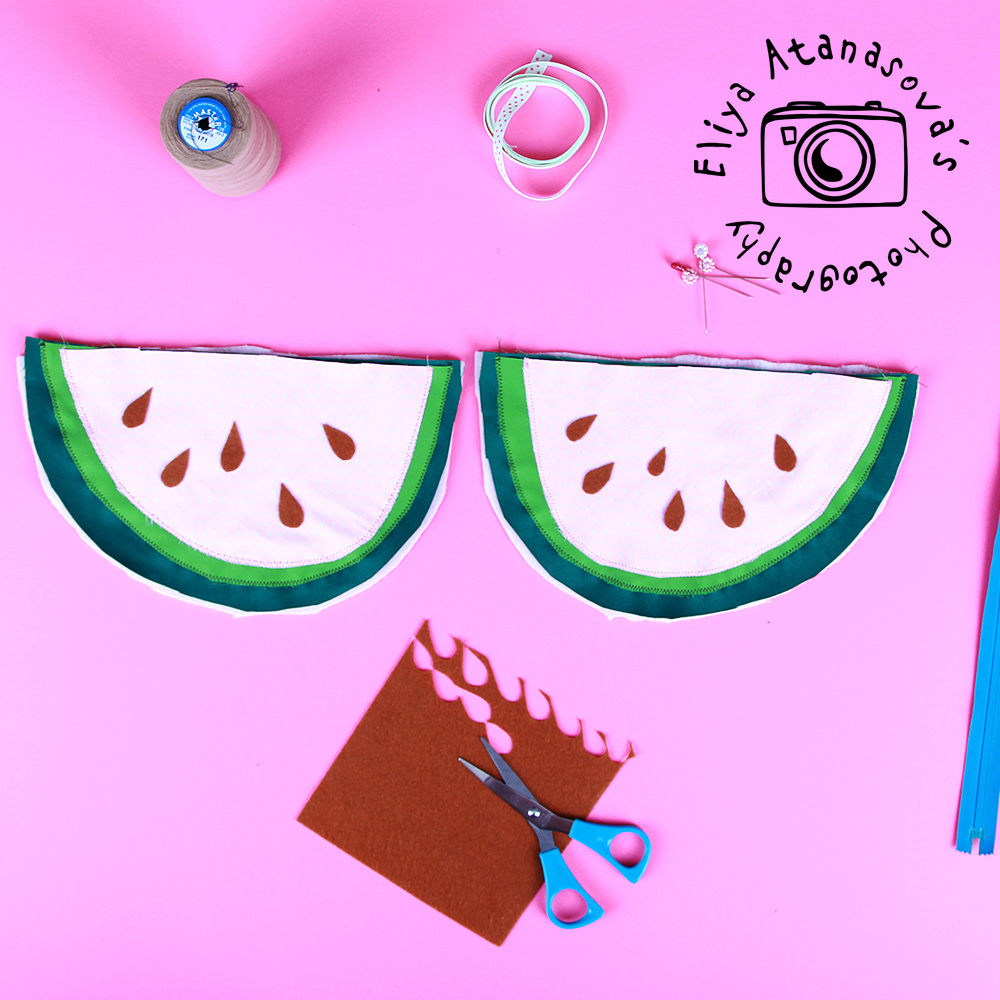
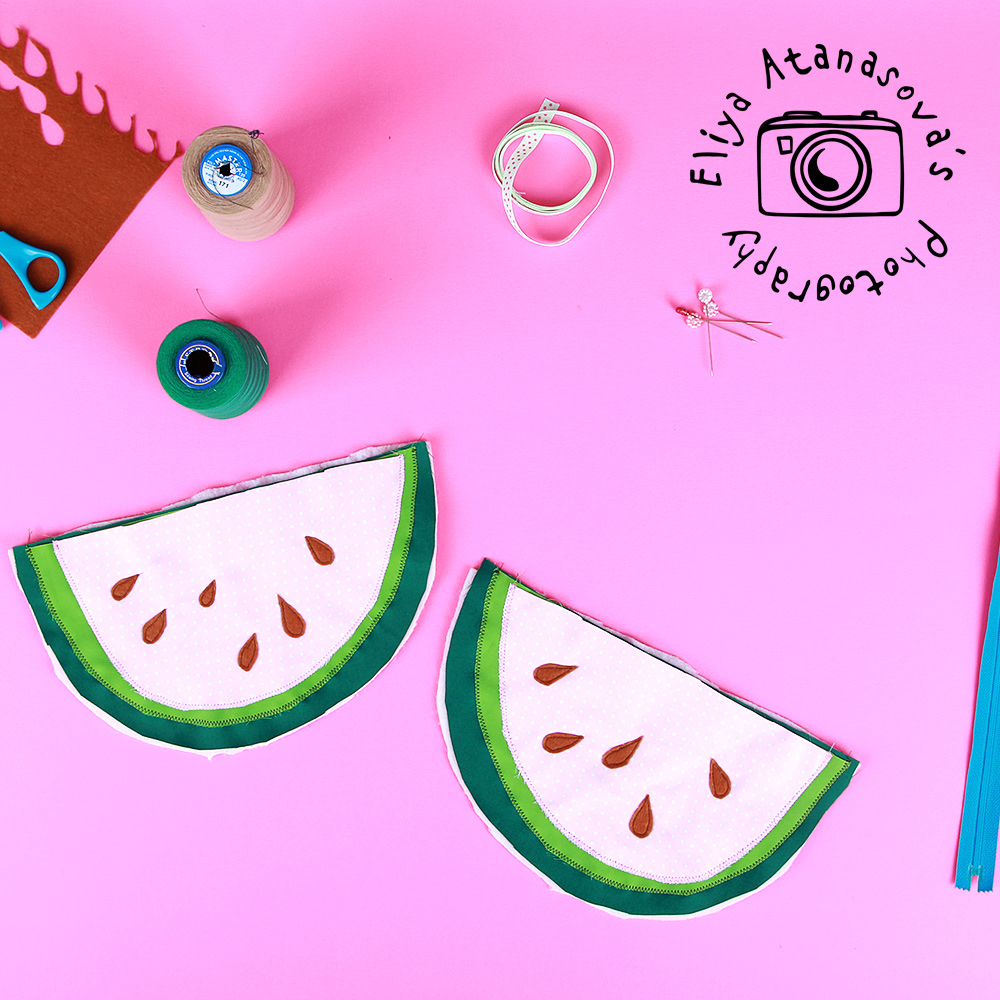
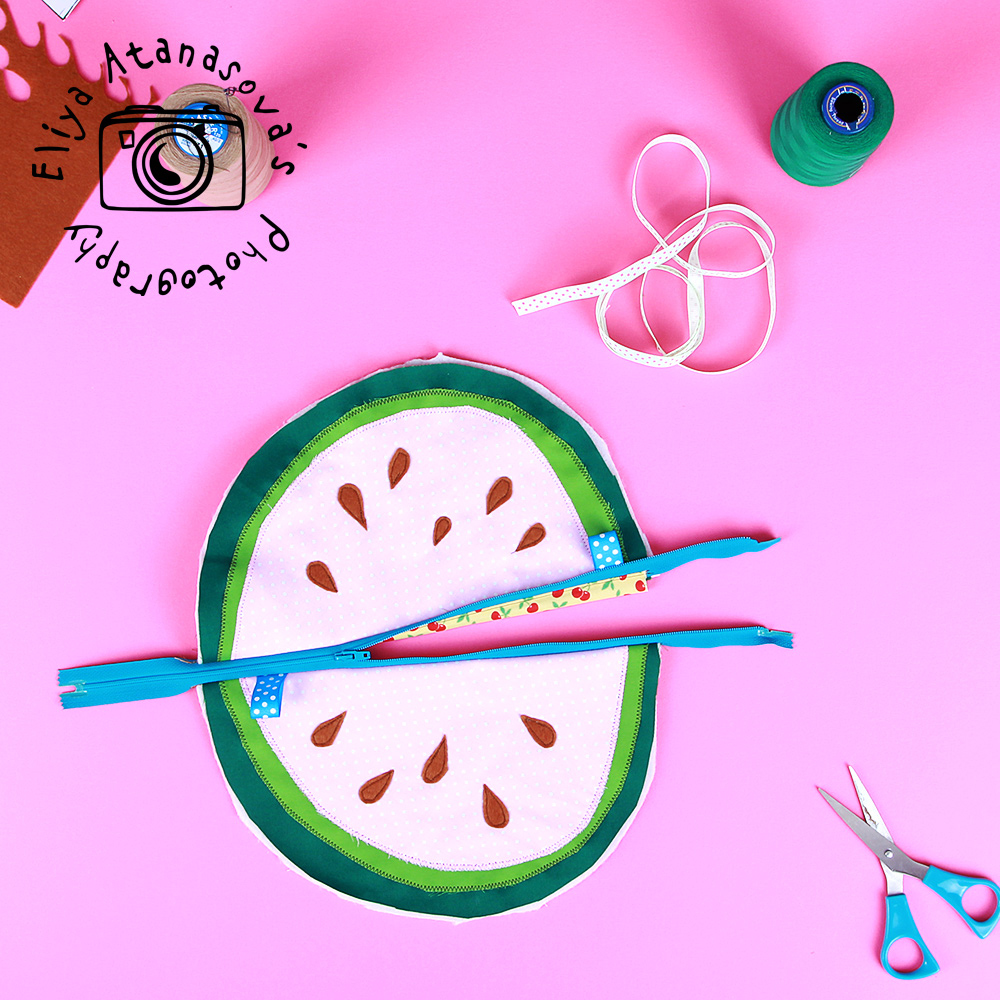
Cut the small brown felt “seeds” and assemple them on top of the pink piece.
I cut two more pieces with the size of the dark green ones, i.e the bigger piece. I assembled the zipper, as always (shown on the pictures: the zipper with its right side facing the outer piece, the batting below the outer piece and on top is the inner part with its right side facing down. At this step I added two small hooks that I will use for attaching the handle.
When the zipper is attached to both parts, the case is ready for the final assembly. Place the outer parts with their right side facing each other, as well as the inner parts, as shown on the pictures below. Sew along using around 0.4″seam allowance or 1 cm, and leave an opening of around 2″or less inside. You will use it to bring out the right side of the case after sewing.
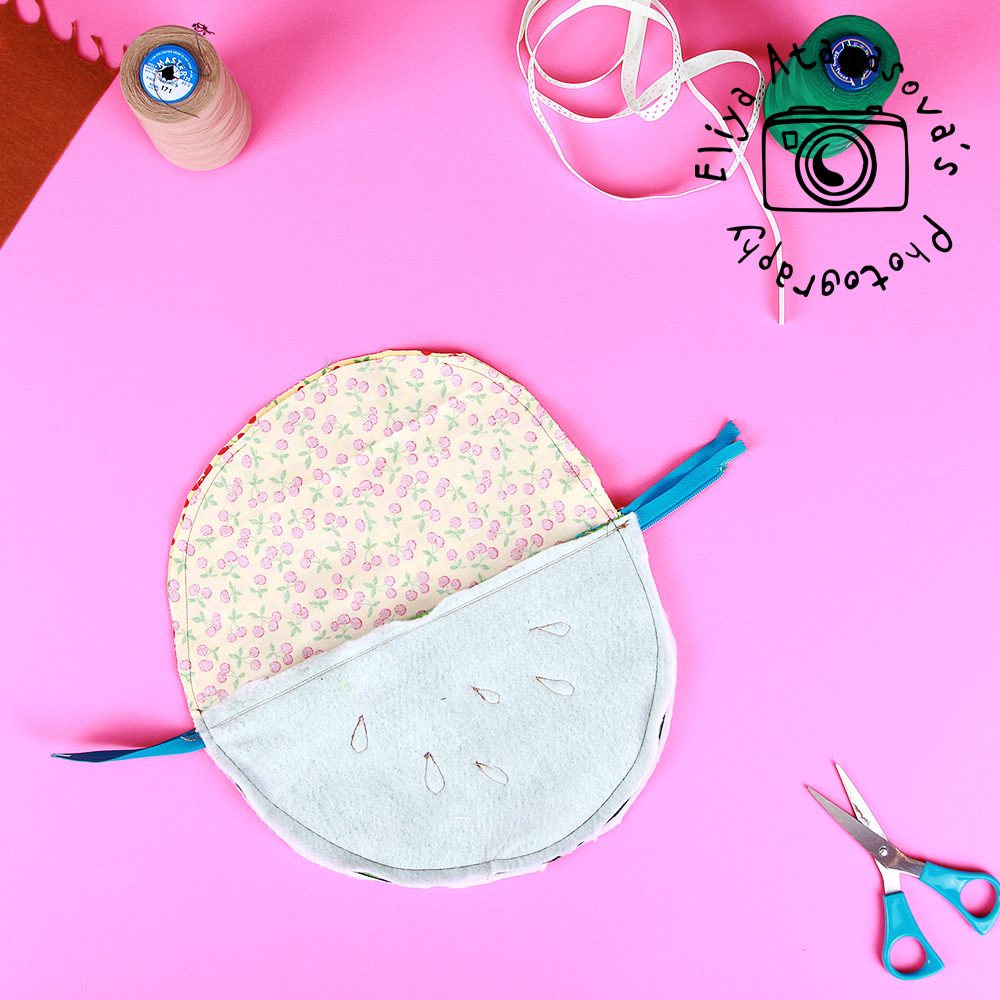

Bring out the right side of the case, close the opening using needle and thread, iron and add the handle 🙂
And the case will be ready 🙂